Guidance
HM Land Registry portal: update a user account
How Business e-services customers (business unit administrator role) can update an account through the portal.
Applies to England and Wales
Search user accounts
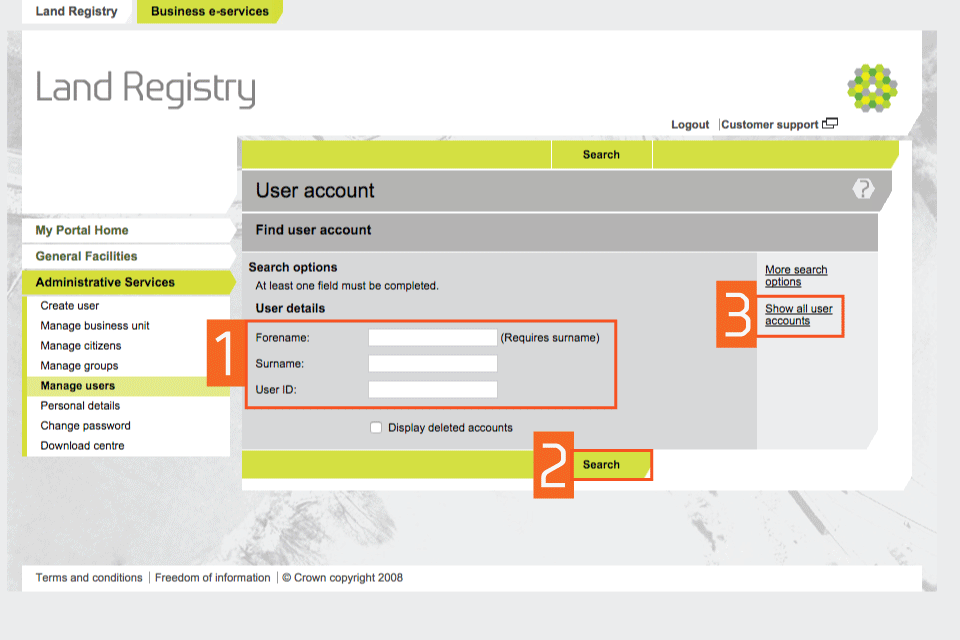
Select ‘Administrative Services’, then ‘Manage users’.
- Enter a ‘Surname’ or ‘User ID’ (Username). If your business unit has more than one person with the same surname, enter their ‘Forename’ to narrow the search results.
- Select ‘Search’.
- Alternatively, select ‘Show all user accounts’ to see all accounts associated with your business unit.
Find a user
View user account details
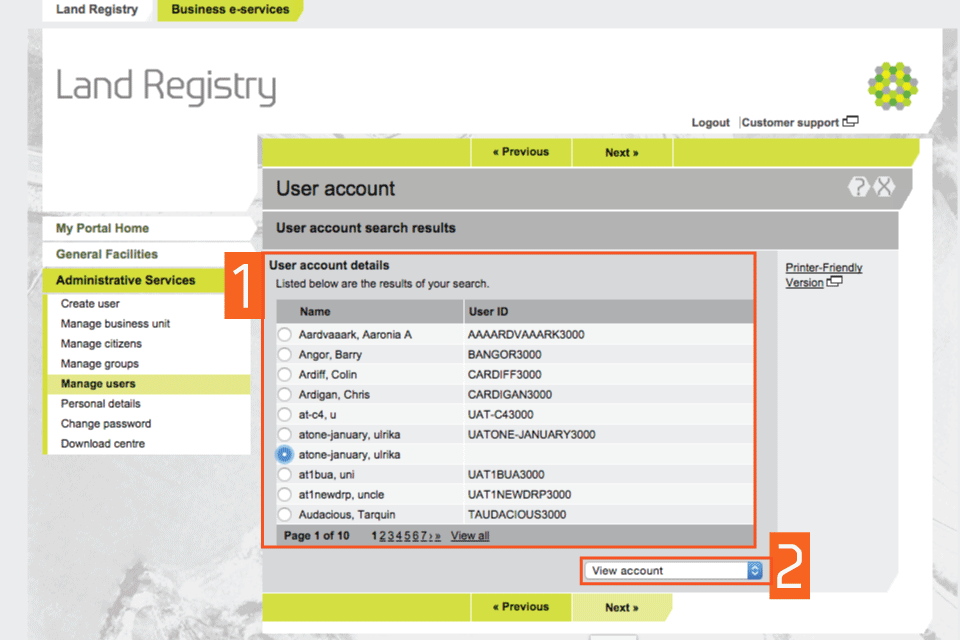
- If you selected ‘Show all user accounts’, identify the account you want to reset and select it.
- Select ‘Update account’ from the drop down menu. Then select ‘Next’.
Show all accounts
Update an account
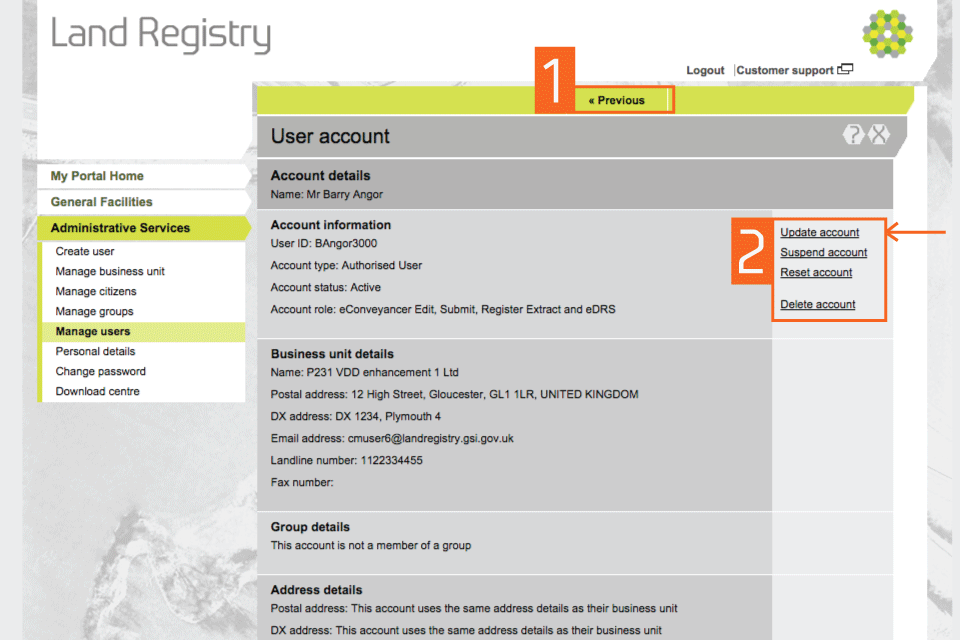
- Check the account details shown to make sure it’s the account you want. If it’s not, select ‘Previous’ and search again.
- Select ‘Update account’.
Update an account
Change a role
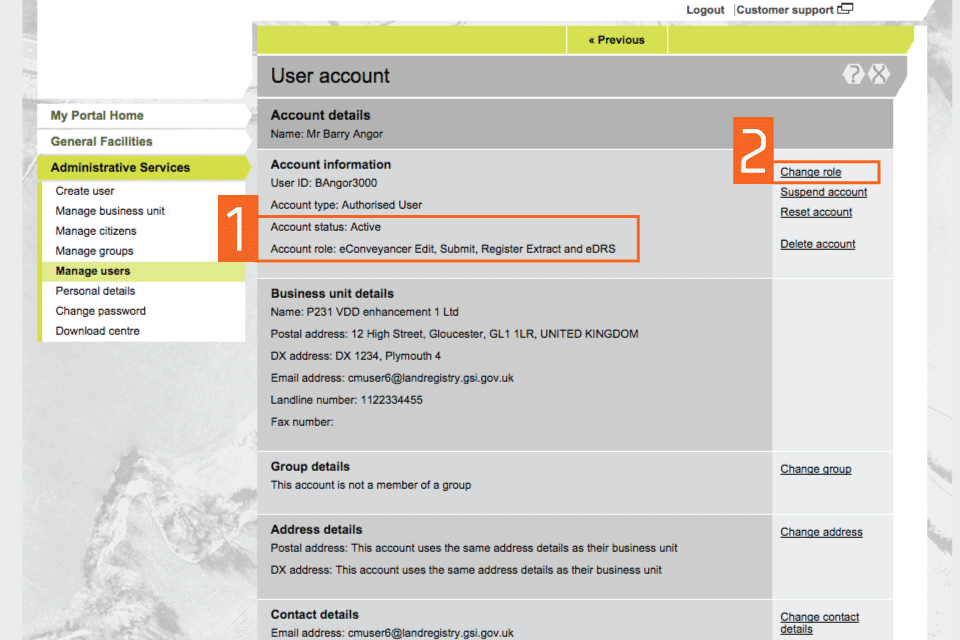
- The user’s ‘Account role’ is shown, eg ‘eConveyancer Edit, Submit, Register Extract and eDRS’.
- If you need to change the user role, select ‘Change role’.
Change a role
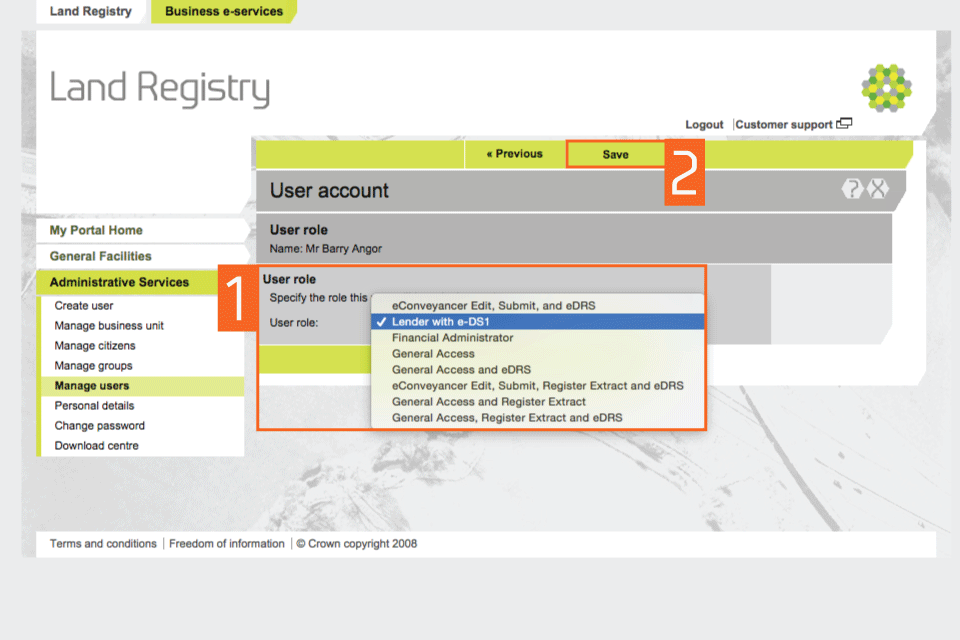
Select a different user role
- Select one of the ‘User roles’ from the drop down menu, eg ‘Lender with e-DS1’.
- Select ‘Save’.
Select a different user role
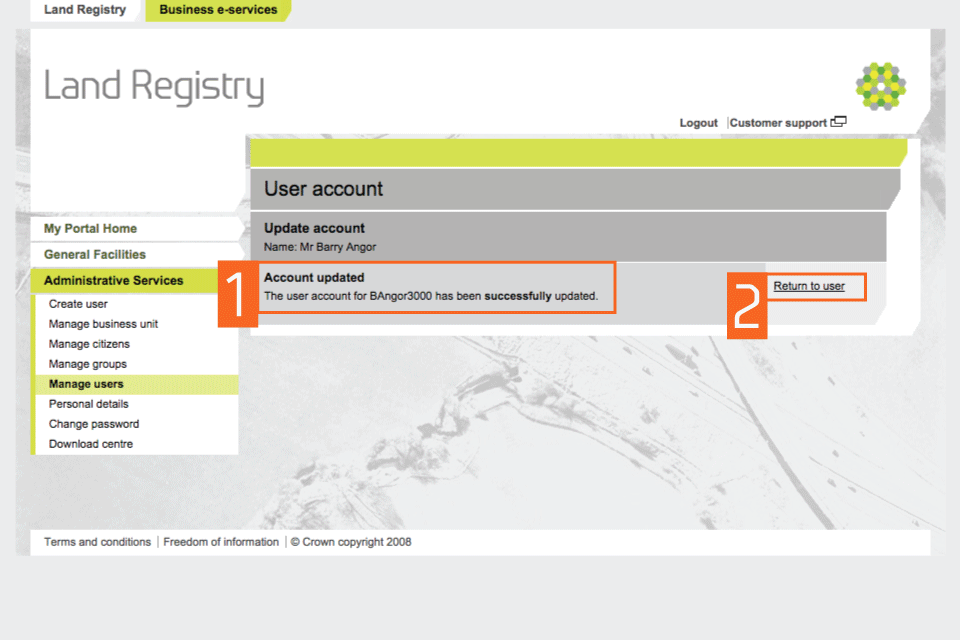
Change a role confirmation
- A message confirms that the account has been updated.
- Select ‘Return to user’ to return to the account details.
changing role confirmation
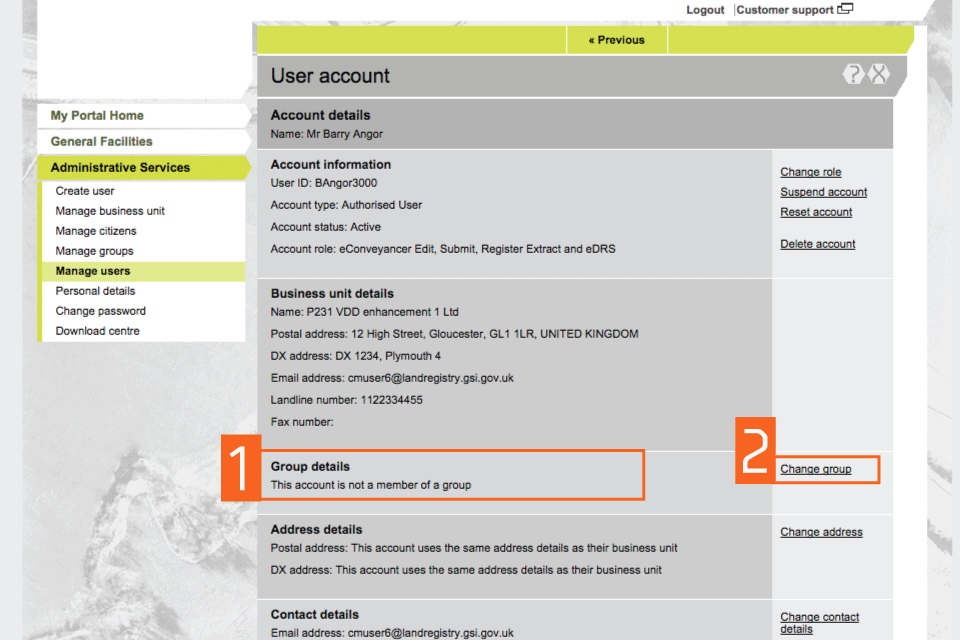
Change group
- This shows the updated group allocated to the user.
- Select ‘Change group’ to change the group that the user belongs to (if any).
changing group
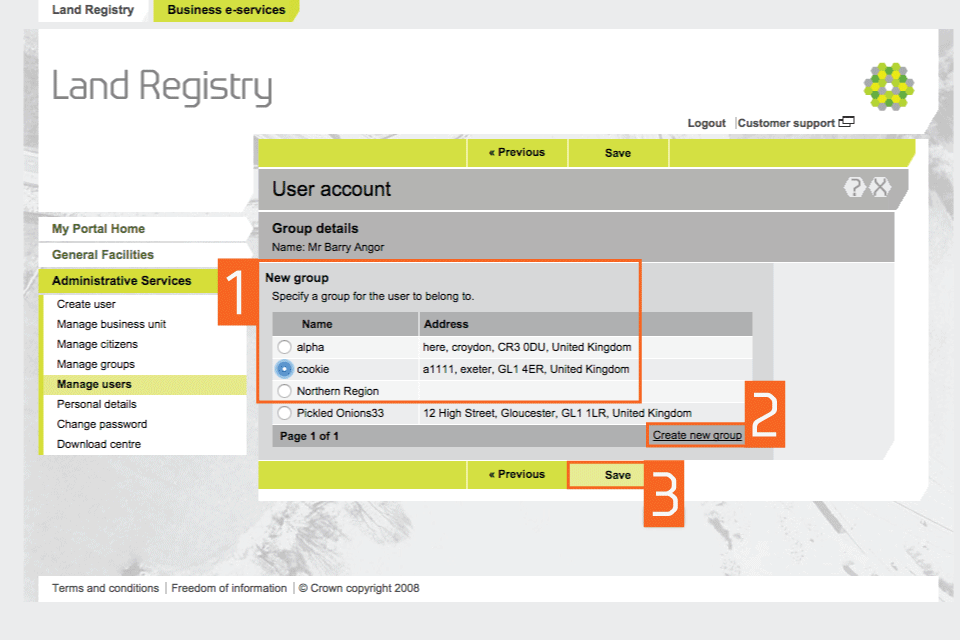
Change group details
- The ‘Group details’ show the name of the group that the user is associated with and also shows a list of all the groups connected to the business unit.
- If the group you need is not listed, select the guide ‘create a group of users’ to add the details.
- Select ‘Save’.
changing group continued
Change group confirmation
- This confirms that the changes have been made successfully.
- Select ‘Return to user’. This will show the user as a member of the new group you selected.

change group confirmation
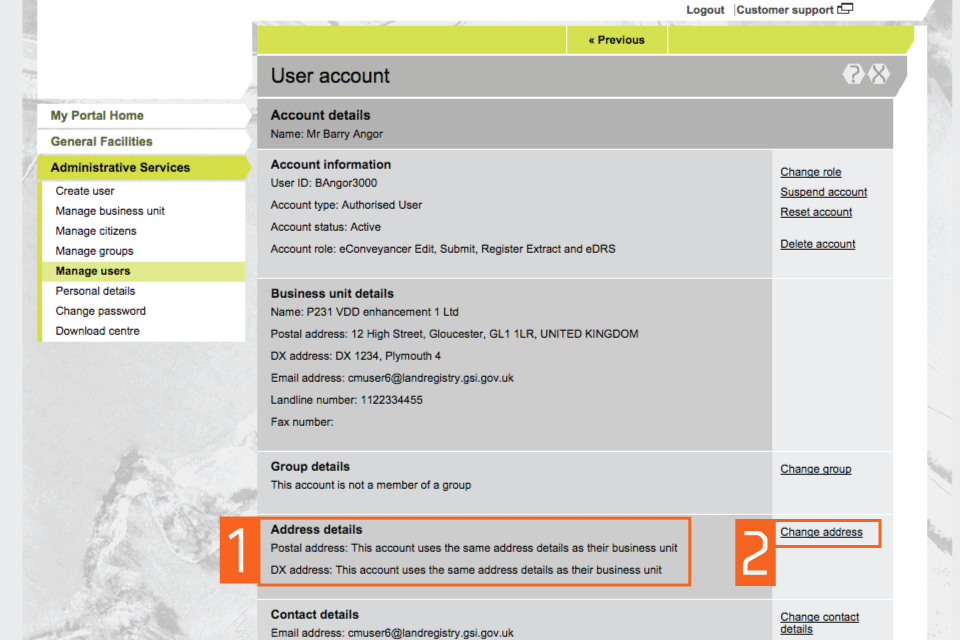
Change address
- The current address used is shown.
- Select ‘Change address’.
Change address select
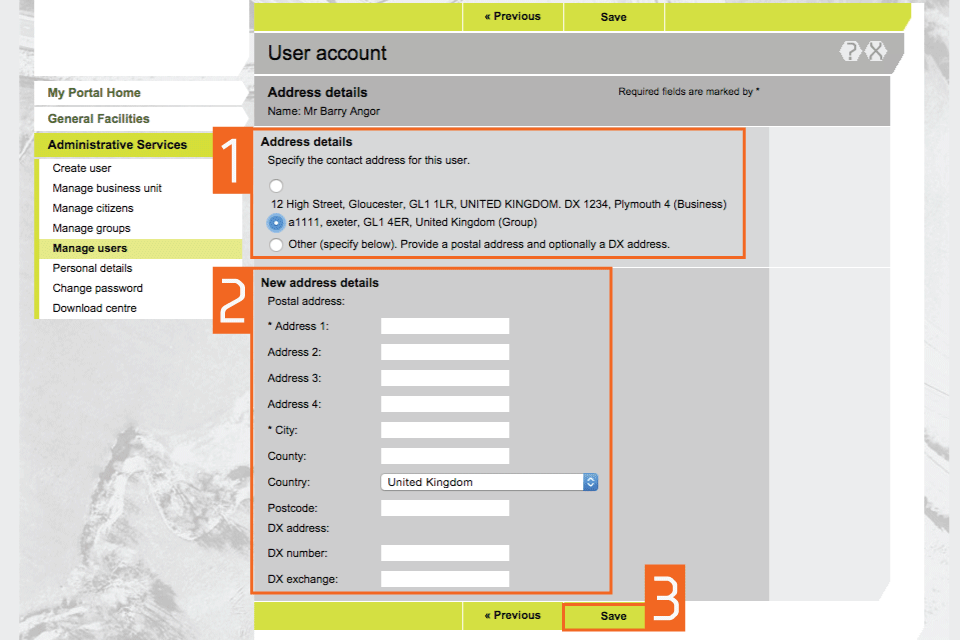
Change address details
- Select an address option: * select the address of the business unit * select the group address * select ‘Other’ to choose a new contact address
- If you choose ‘Other’, complete the ‘New address details’ section.
- Select ‘Save’. A message confirms that the account has been changed.
changing address continued
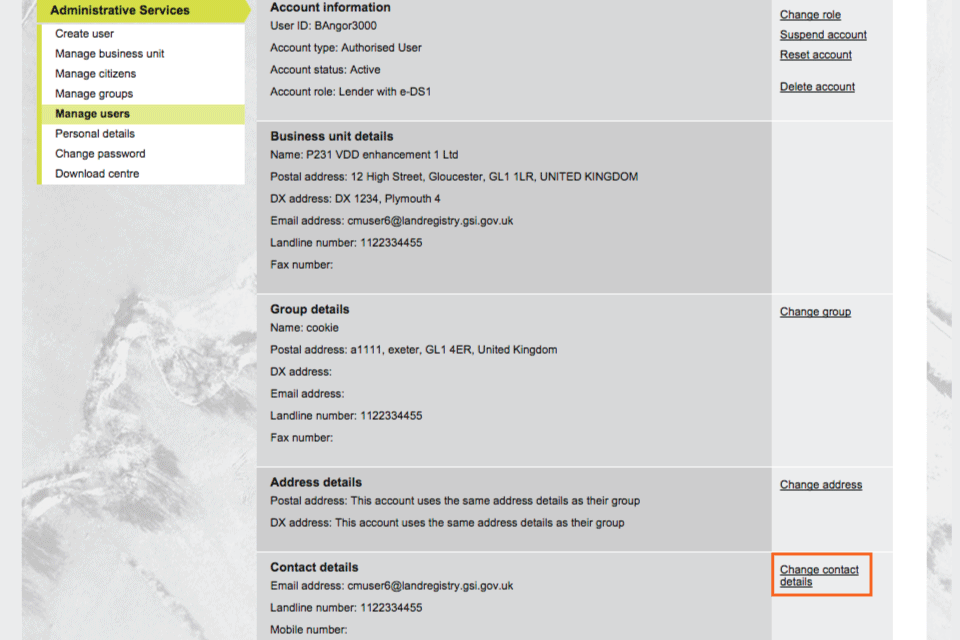
Change account details
From the ‘Account details’, select ‘Change contact details’.
change contact details
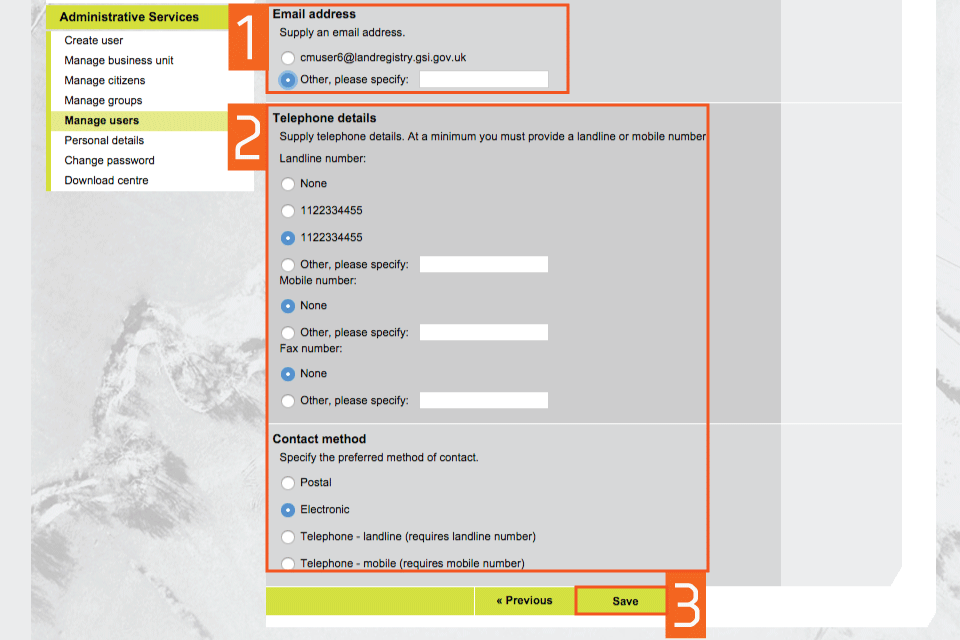
Update account details
- ‘Contact details can be updated by selecting one of the existing options displayed.
- If the contact number or email address you want is not shown, select ‘Other’.
- Select ‘Save’.
update address continued
Change the Variable Direct Debit (VDD) account
The ‘Account details’ show the updated account. Select ‘Change VDD’.
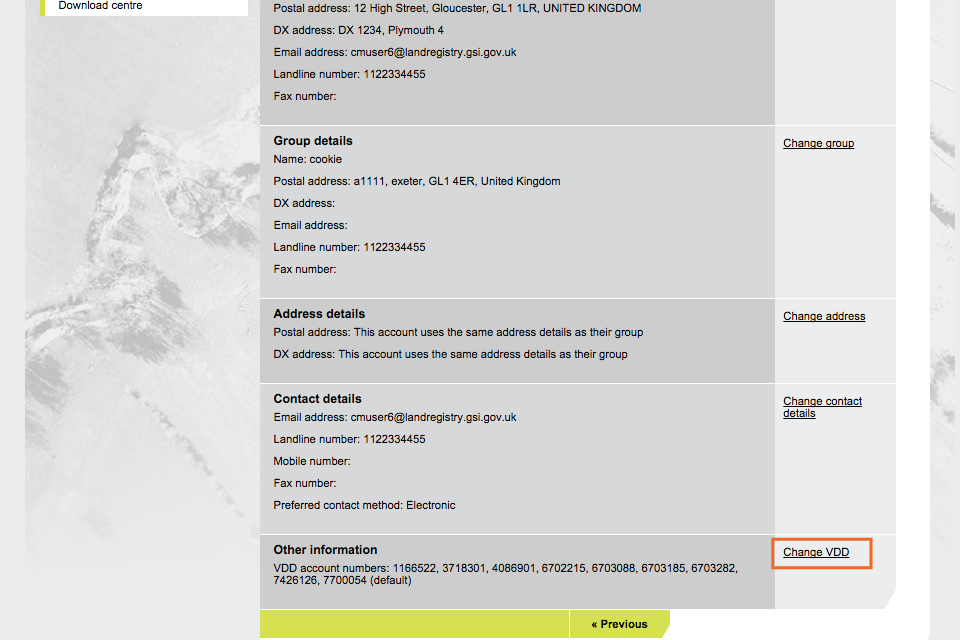
change VDD
Update the VDD account
- This shows a list of ‘VDD account numbers’ associated with your business unit and you need to link at least one Variable Direct Debit account to it.
- You can also choose all of them by selecting ‘Select all’ at the bottom of the list.
- When you change a user’s ‘VDD account number’, make sure that the ‘Default account number’ is one of the ones selected in step 1.
- Select ‘Save’.
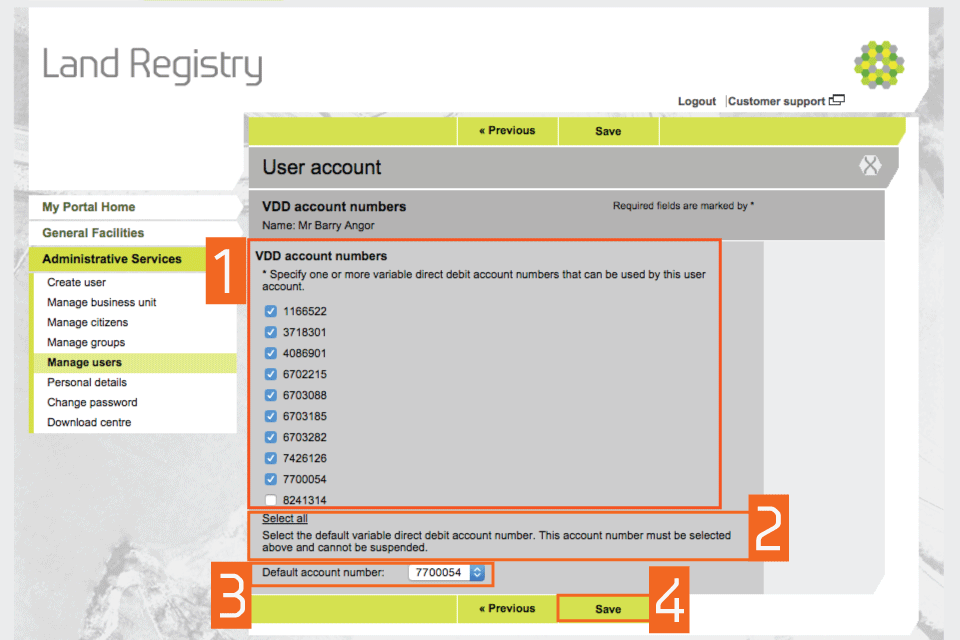
VDD continued
Logout
When you have completed your tasks, select ‘Logout’ at the top of the screen to exit the system securely.
Updates to this page
Published 19 October 2015