HM Land Registry portal: create a group of users
How Business e-services customers (business unit administrator role) can create groups of users through the portal.
Applies to England and Wales
Business e-services customers may find it useful to group users by location or by function, for example a group for the finance team.
Once a user is associated to a group, they can choose to use the group contact details as their personal contact details. This makes it quicker for you to update contact details, as you won’t have to update each individual’s account. Contact details are not associated to Variable Direct Debit accounts, which determine where completed postal applications are sent.
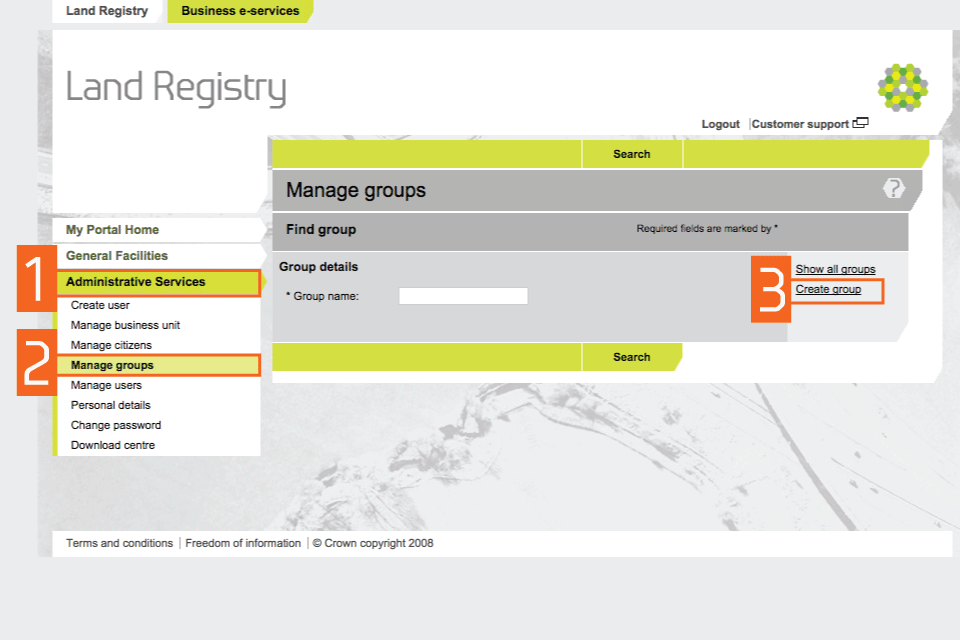
Create a group
- Select ‘Administrative Services’.
- Select ‘Manage Groups’.
- Select ‘Create group’.
Create a group
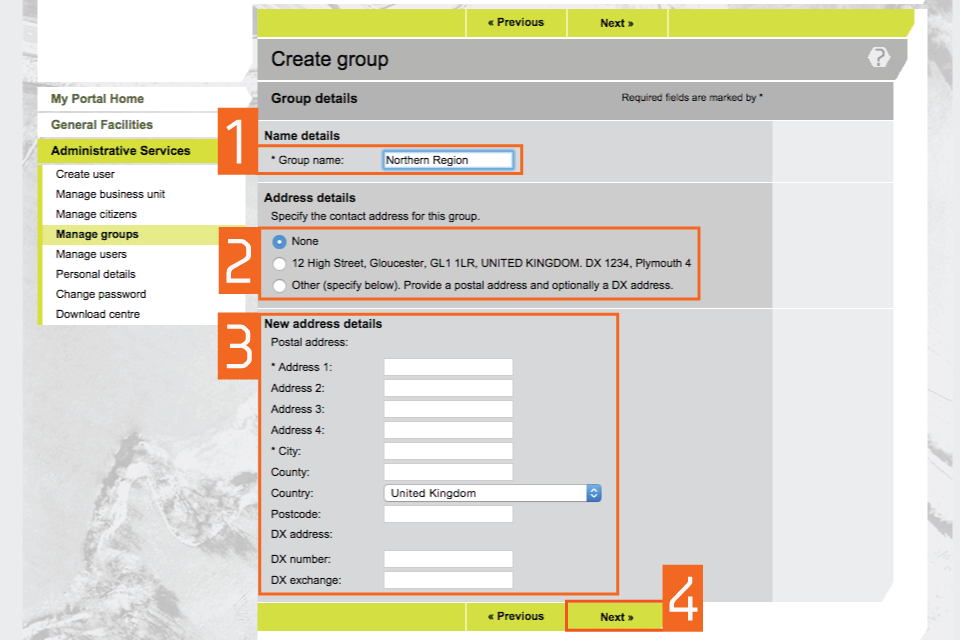
Enter group name and contact address
- Enter the name of the new group. (If a group of that name already exists, you will see an error message.)
- The ‘Address details’ section gives you 3 options for allocating a contact address to the group. This is a contact address only and not associated to where completed applications are sent: * if you select ‘None’, no contact address will be assigned to the group and group members cannot be contacted collectively. Also, if you select this option you will not be able to add any other contact details in later screens * select the second address option, to assign the business unit address to the group * select ‘Other’ to specify another contact address for the group
- If you select ‘Other’, enter a postal or DX address. UK postal addresses must include a postcode. You can also enter telephone details.
- Select ‘Next’.
New address
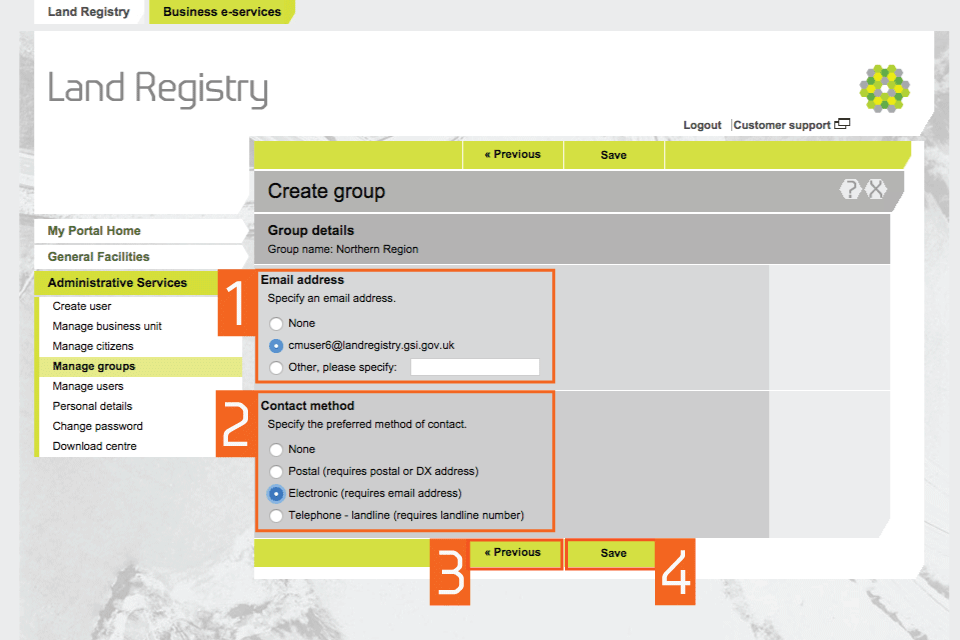
Email address and preferred contact
- Select no email address, the business unit email address, or add a new email address.
- Choose a preferred ‘Contact method’.
- Select ‘Previous’ to change one of the options you selected earlier or to add additional details. You can’t do this after you’ve saved.
- Select ‘Save’ to create the group.
Email address
A message confirms that the group has been created.
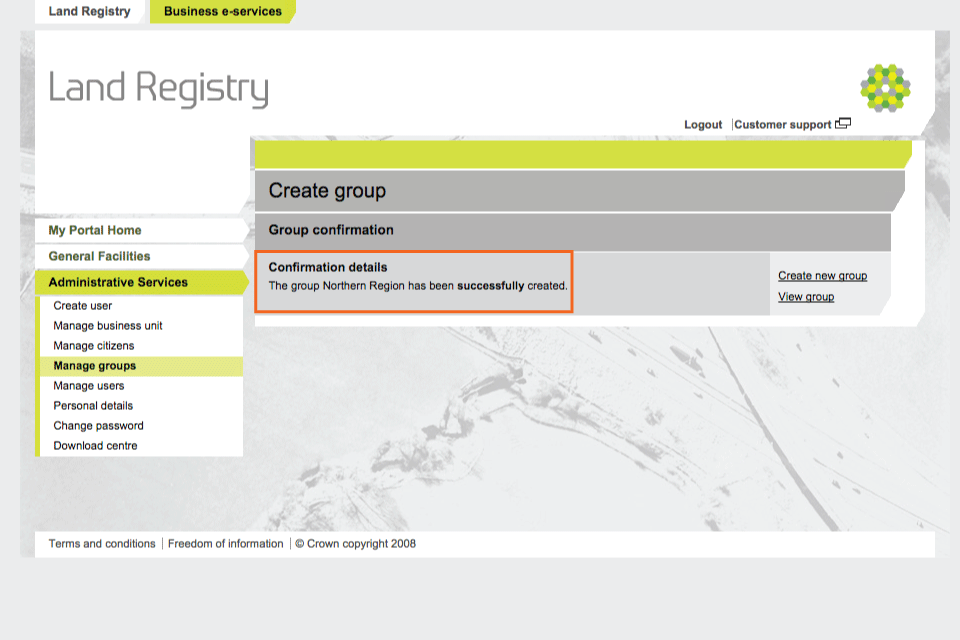
Confirmation
Logout
When you have completed your tasks, select ‘Logout’ at the top of the screen to exit the system securely.