Guidance
HM Land Registry portal: allocate an additional role
How Business e-services customers (Business Unit Administrator role) can allocate additional roles to portal users.
Applies to England and Wales
A user can only have one role for each account. If you want an existing user to have a different role you need to decide if you want to:
- replace their existing role
- allocate an additional role
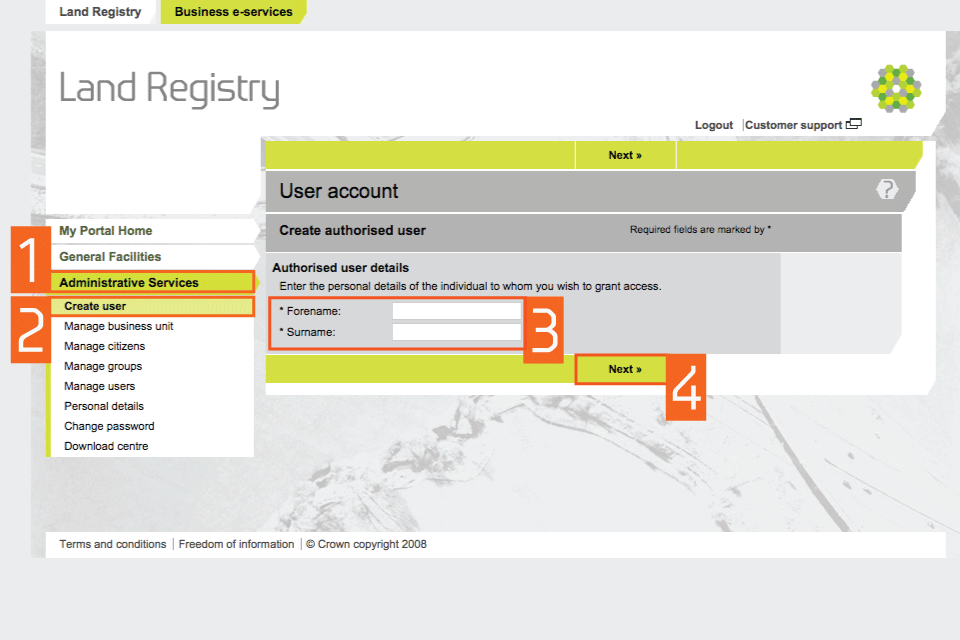
Find user details
- Select ‘Administrative services’.
- Select ‘Create user’.
- Enter the user’s forename and surname.
- Select ‘Next’.
1
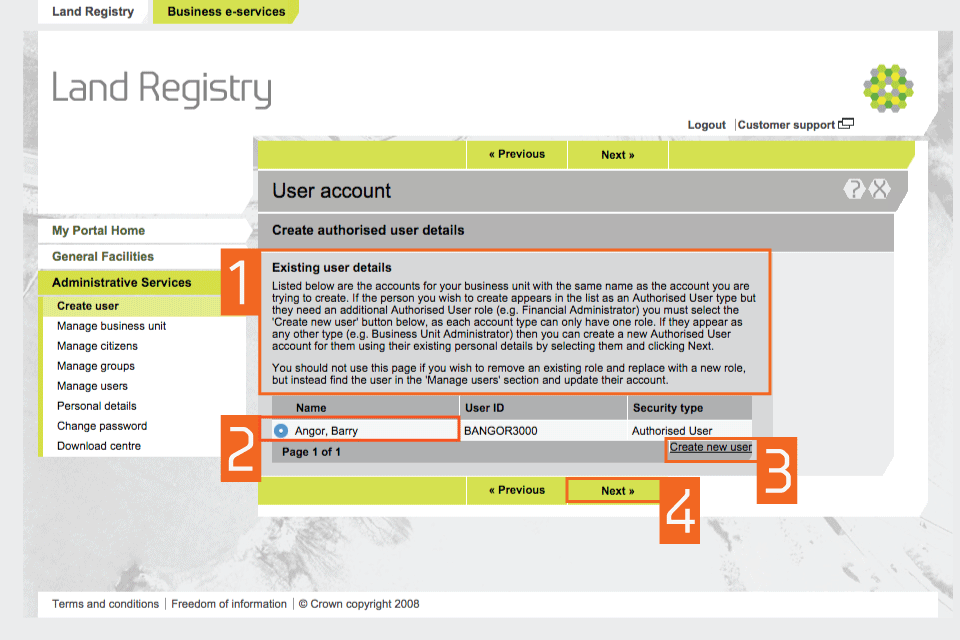
Existing user details
- If an account with the same name exists, you’ll see a message stating that users can only have one role for each account and that if you want to replace an existing role you need to ‘Manage users’.
- All users in your firm who have the same name as the person being given the additional role are shown. If the person who needs the additional role is listed as having a ‘Business Unit Administrator’ or ‘Responsible Person’ role, select the circle next to their name.
- If the person has an ‘Authorised User’ role (as shown), select ‘Create new user’.
- Select ‘Next’.
existing user details
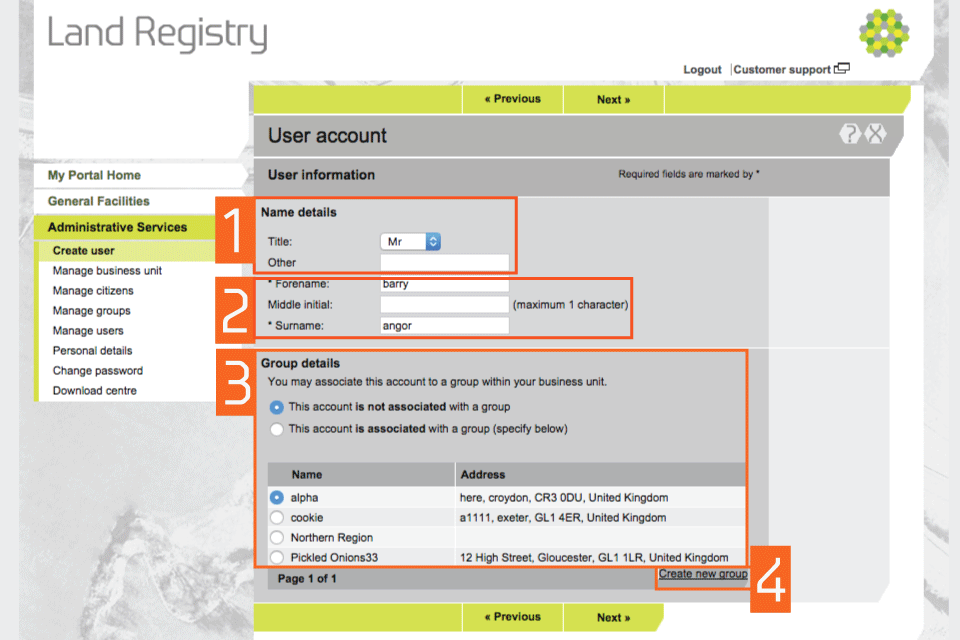
User information and group details
- Select the ‘Title’ of the user from the dropdown menu. If the title isn’t available in the dropdown menu, use the ‘Other’ field.
- If you have multiple users with the same forename and surname, the system will automatically issue different User IDs. You can add a middle initial to be incorporated into their User ID. If the user doesn’t have a middle name, you can add any letter to create a difference between the users.
- To associate the user with a group within your business unit, choose from the groups displayed, then select ‘Next’.
- If the group you want to associate the person with isn’t listed, select ‘Create new group’. Otherwise, select ‘Next’.
group details
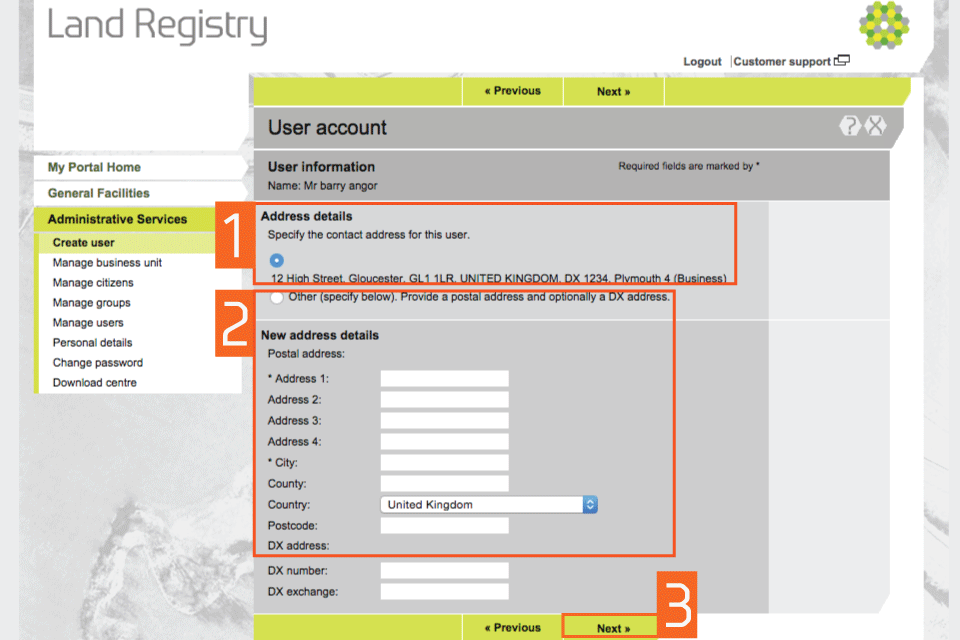
Contact address
Specify an address for us to contact the user about their portal account. This address is not linked to the despatch address for applications sent by post.
- To use the address of your business unit, select the first option.
- To use a different address, select ‘Other’ and enter ‘New address details’. If you previously associated the new user with a group, the group address will apply unless you change it here.
- Select ‘Next’.
ADDRESS DETAILS
Contact phone
- If the business unit address was previously selected, telephone details are inserted automatically. Mobile numbers can also be added. Numbers can be changed by selecting ‘Other’.
- Select ‘Next’.
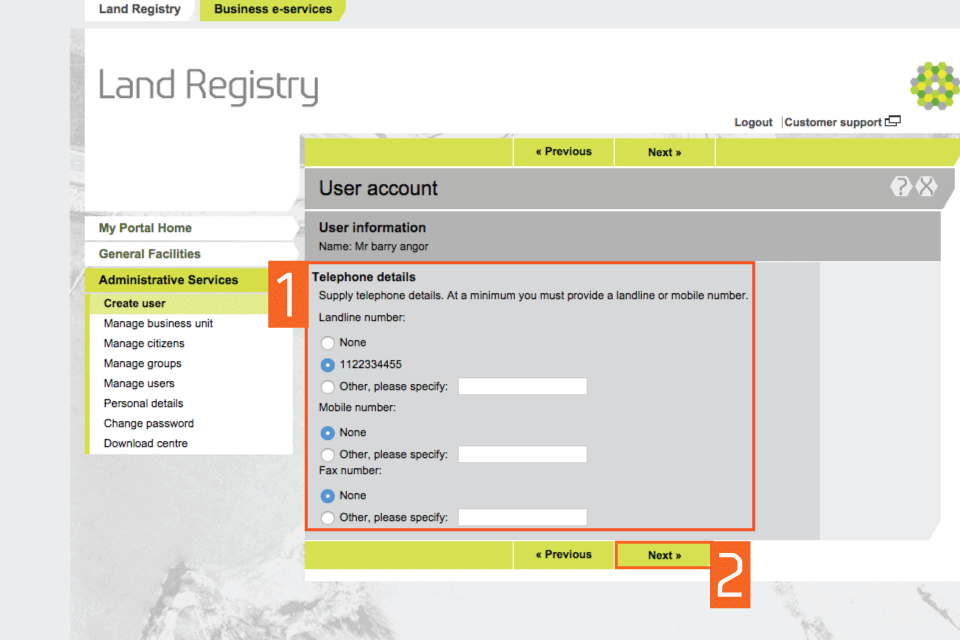
TELEPHONE DETAILS
Email and contact preference
- The business unit email address is shown. If a user wants to use their own email address, select the ‘Other’ field and enter their email. Select the user’s preferred method of contact.
- Select ‘Next’.

contact method
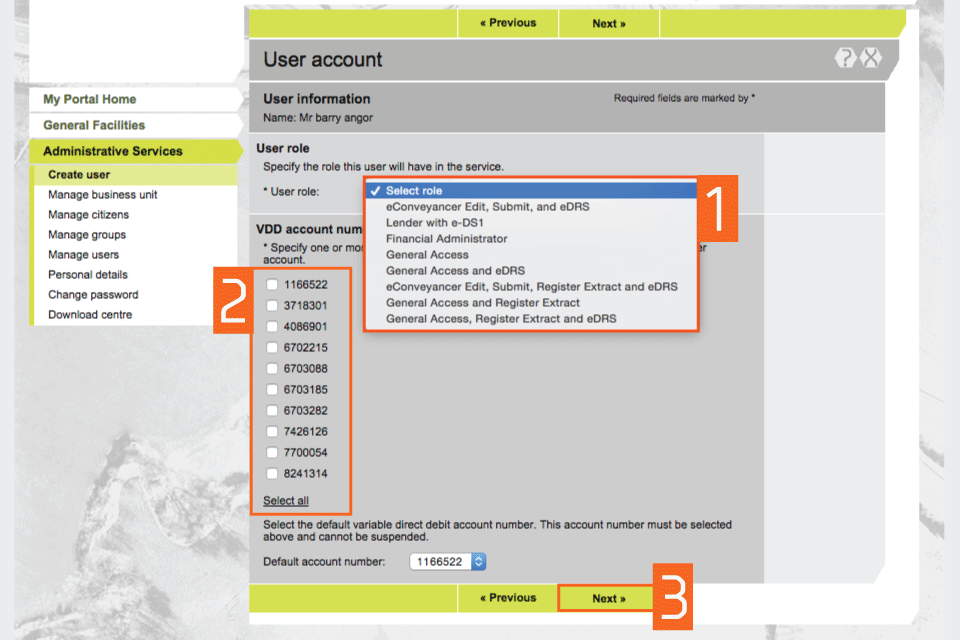
User role and VDD accounts
- Select a user role from the dropdown menu, to determine which services they can use. A user can only have one role for each user account.
- Allocate a variable direct debit (VDD) account to pay HM Land Registry fees. Each VDD account has a despatch address associated with it, for completed applications needing to be sent by post. This is not connected to the address details of a business unit, group or individual. All VDD accounts associated to your business unit are listed. Select the box next to at least one of the account numbers. Each user needs to have a ‘Default account number’. The business unit account number will be displayed. If the user needs a different default account number, select it from the dropdown menu. The ‘Default account number’ must also be one of the accounts you allocated to the user.
- Select ‘Next’.
VDD
Notify the user
- Select how to give the user their account name and temporary password (case sensitive). Please note that:
- the default setting is ‘Email to user’ and will use the email address you entered earlier
- if you select ‘Show me on screen’, you’ll need to note the details to give to the new user
- Select ‘Save’ to get confirmation.

notify user
Logout
When you have completed your tasks, exit the system securely by selecting ‘Logout’ at the top of the screen.
Updates to this page
Published 30 July 2013