Individual Vehicle Approval (IVA) for light trailers: help to get a pass
Published 24 September 2015

© Crown copyright 2015
This publication is licensed under the terms of the Open Government Licence v3.0 except where otherwise stated. To view this licence, visit nationalarchives.gov.uk/doc/open-government-licence/version/3 or write to the Information Policy Team, The National Archives, Kew, London TW9 4DU, or email: psi@nationalarchives.gov.uk.
Where we have identified any third party copyright information you will need to obtain permission from the copyright holders concerned.
This publication is available at https://www.gov.uk/government/publications/individual-vehicle-approval-iva-for-light-trailers-help-to-get-a-pass/individual-vehicle-approval-iva-for-light-trailers-help-to-get-a-pass
Introduction
This guide tells you how to avoid the top 10 reasons that light trailers and other vehicles in the O1/2 inspection category fail the IVA inspection:
- End outline, side, stop & side marker lamps
- General construction
- Retro reflectors
- Installation of lights
- Brakes
- Reverse lamps
- Rear fog lamps
- Couplings 50A
- Direction indicators
- Rear registration plate space
This guide tells you:
- how each item is inspected
- what to check before each item is inspected
- the required standard
Full compliance with this guide doesn’t guarantee a pass. You’ll need to view the IVA Inspection manual for the full requirements and testing procedures needed to get your trailer passed.
You must apply for vehicle approval if you’ve:
- built a trailer
- imported a trailer
You’ll be required to:
- provide suitable documentary evidence where required
- a suitable towing vehicle
DVSA will examine the trailer in all modes of operation, so you’ll need to make sure that everything operates correctly.
This guide doesn’t replace the manual. Access the IVA inspection manual for full inspection details.
1. End outline, side, stop & side marker lamps
1.1 How end outline, side, stop & side marker lamps are inspected
This section applies to all trailers in the O1 and O2 categories.
Each of the lamps in this section have specific requirements.

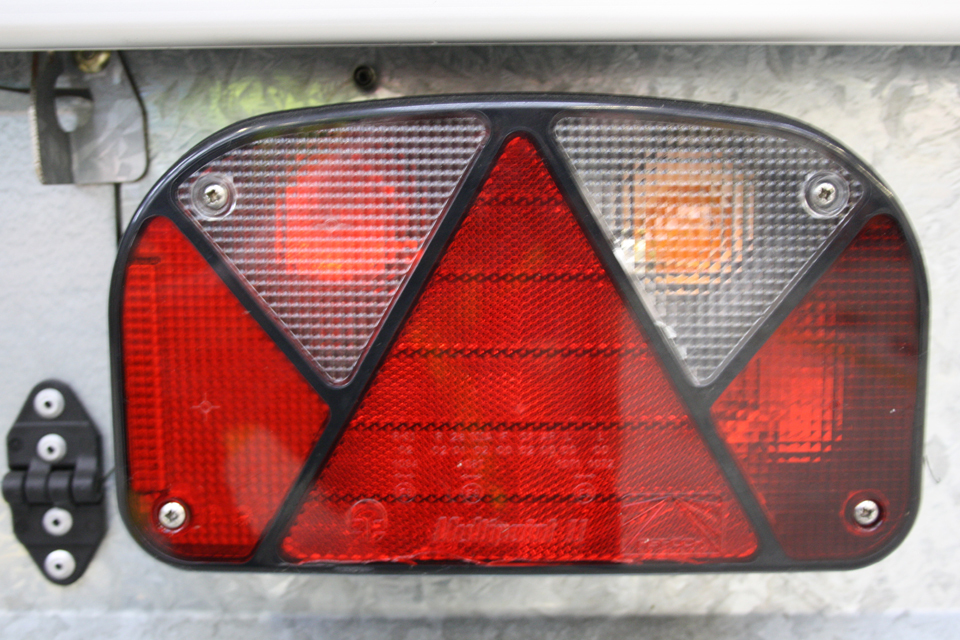
An example of an approved lamp.
The above image shows an approved lamp that has:
- an “e” number
- the symbols identifying what lamps are in the cluster
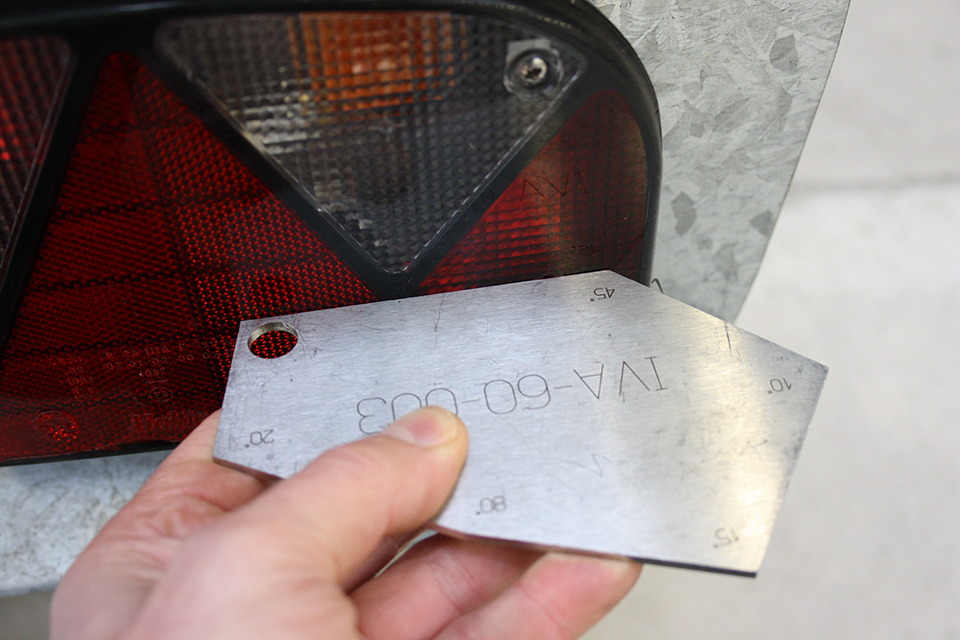
DVSA will use a light angle gauge to check the angles of visibility.
DVSA will use a light angle gauge to check for obstructions to the angles of visibility. This is shown in the image above.

DVSA will check the lamp for the distance from the side of the trailer.
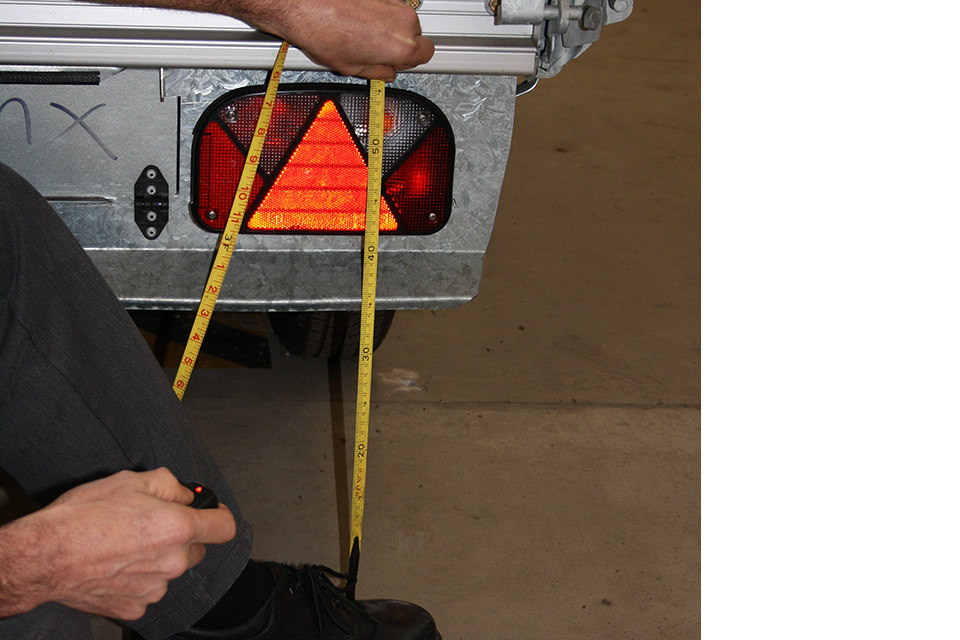
DVSA will check the lamp height from the floor.
DVSA will check the position of the lamps, for both:
- height
- distance from the side of the trailer
Refer to the IVA inspection manual for all the dimensions.

The number plate must be illuminated to sufficiently light the registration plate.
Whether your trailer requires side marker lamps is dependent on the length of the trailer.

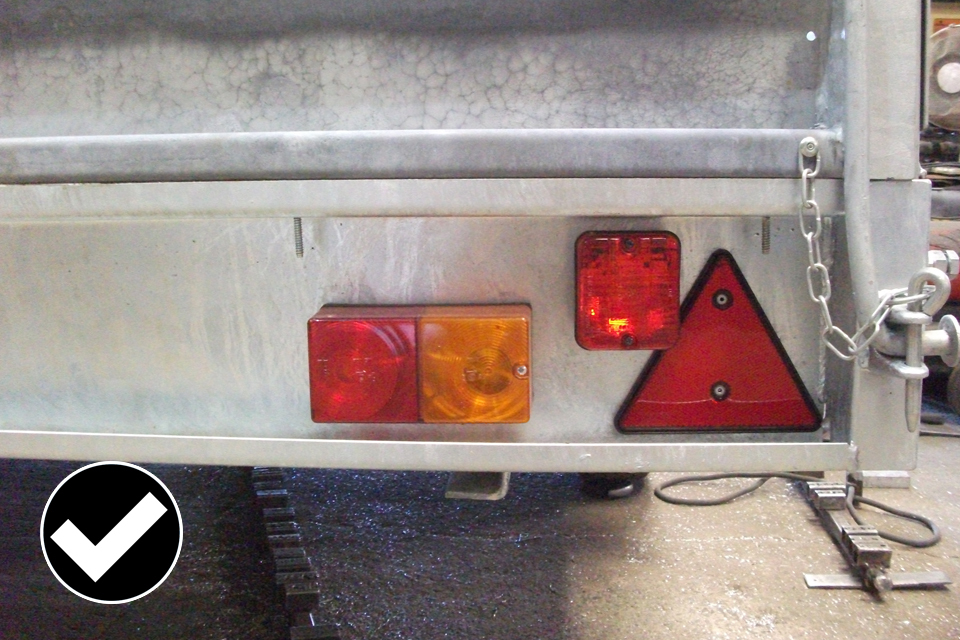
Allowed: lamp fitted in its correct orientation.
The image above shows an approved lamp fitted in its correct orientation.
The lamps may have a mark to help you make sure they are fitted correctly, they may be marked with either:
- an arrow
- the word ‘TOP’
1.2 What to check before end outline, side, stop & side marker lamps are inspected
DVSA will check the lamps fitted to your trailer for:
- number
- operation
- position
- colour
- required symbols (if required)
- required angles of visibility of lamps
- approval mark (if required)
Wider or longer trailers may need end outline and/or side marker lamps.
Check that all these lamps are marked either:
- “e”
- “E”
1.3 The standard End outline, side, stop & side marker lamps must meet
See section 22 (end outline, position(side), stop and side marker lamps) of the IVA inspection manual for the full inspection standard.
2. General construction
2.1 How general construction is inspected
All aspects of design and construction are inspected to make sure that your trailer is of no danger to the driver or other road users.
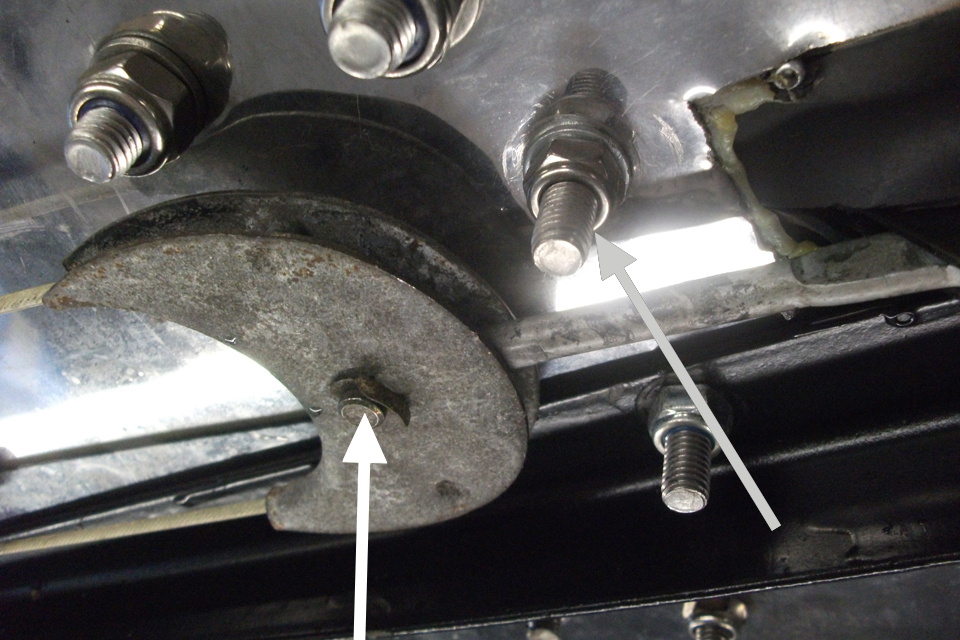
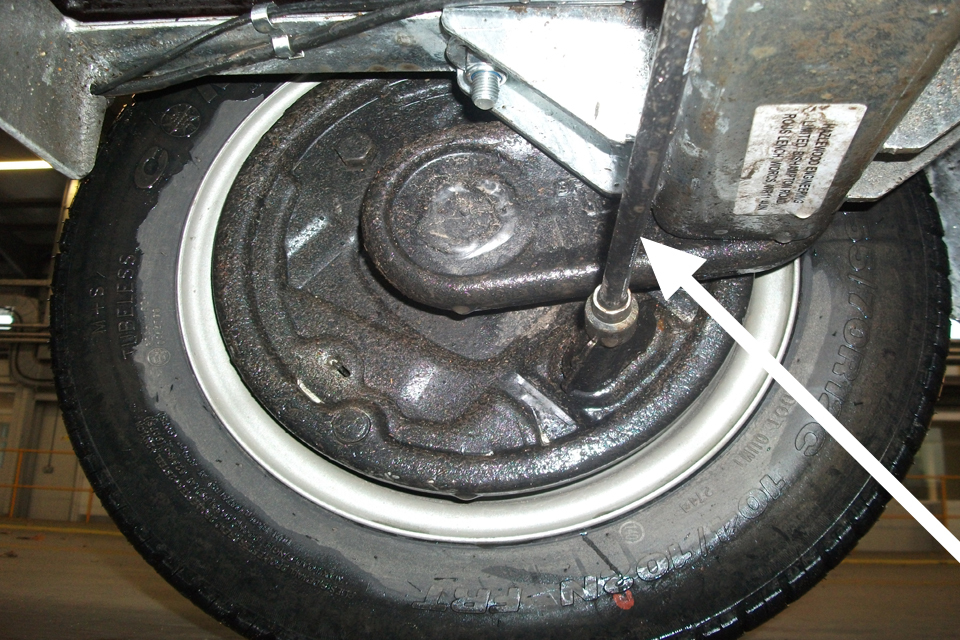
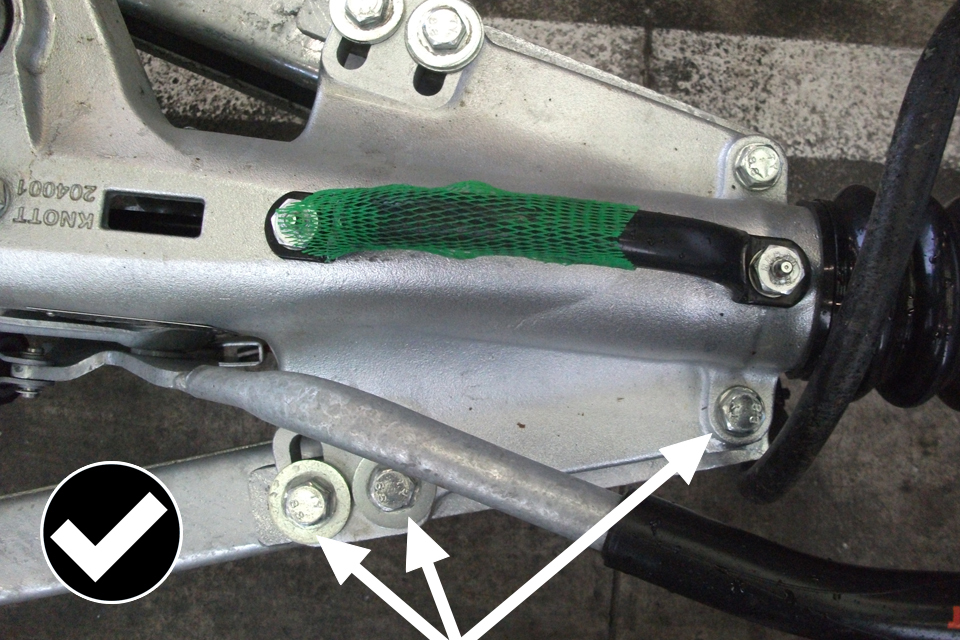
An example of use of a locking device.
The image above shows use of a locking device for:
- the brake cable,
- the retaining nuts and bolts
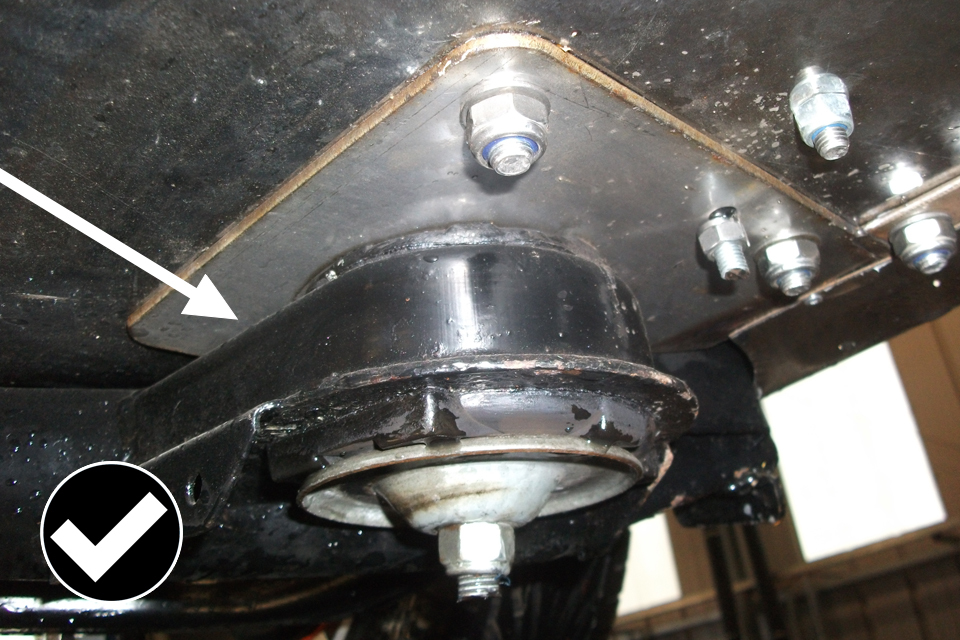
Allowed: the correct use of a reinforcement plate.
The image shows the correct use of a reinforcement plate.
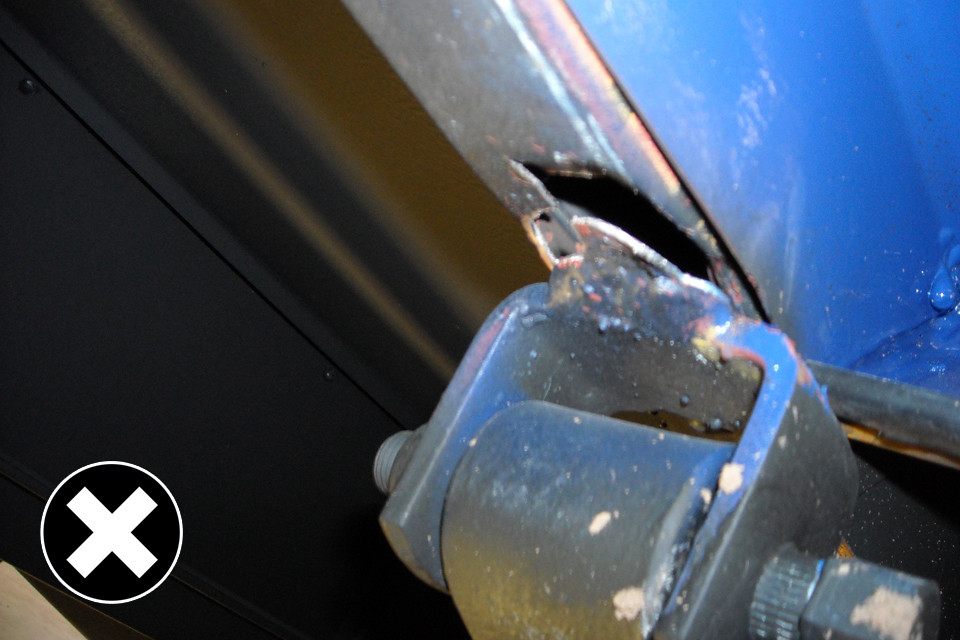
Not allowed: inadequate strength steel used in construction of the trailer frame.
The image above shows the result of inadequate strength steel used in construction of the trailer frame.
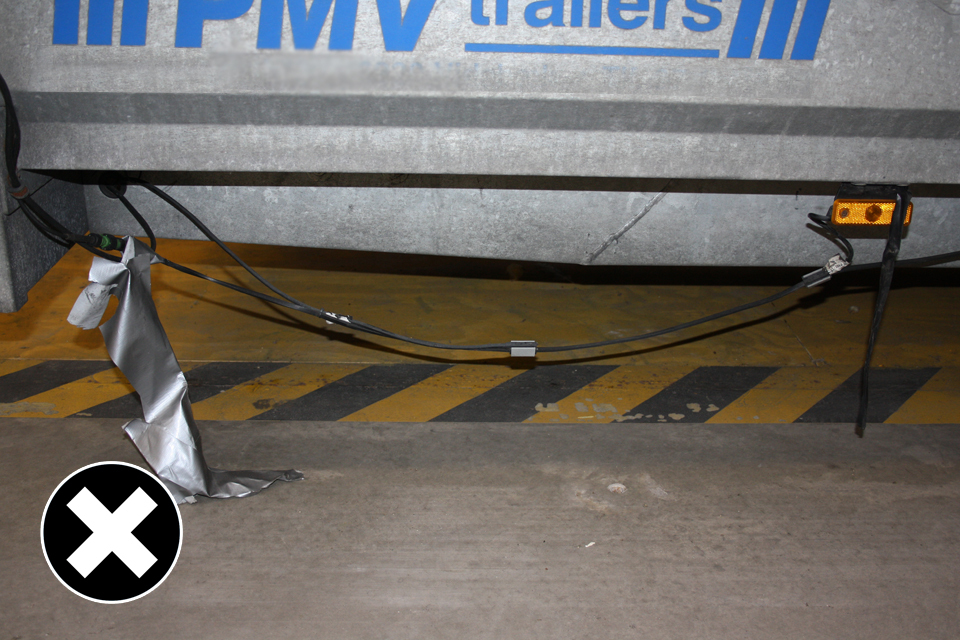
Not allowed: insecure and uninsulated wiring.
The image is an example of:
- insecure wiring
- uninsulated wiring
This isn’t allowed.
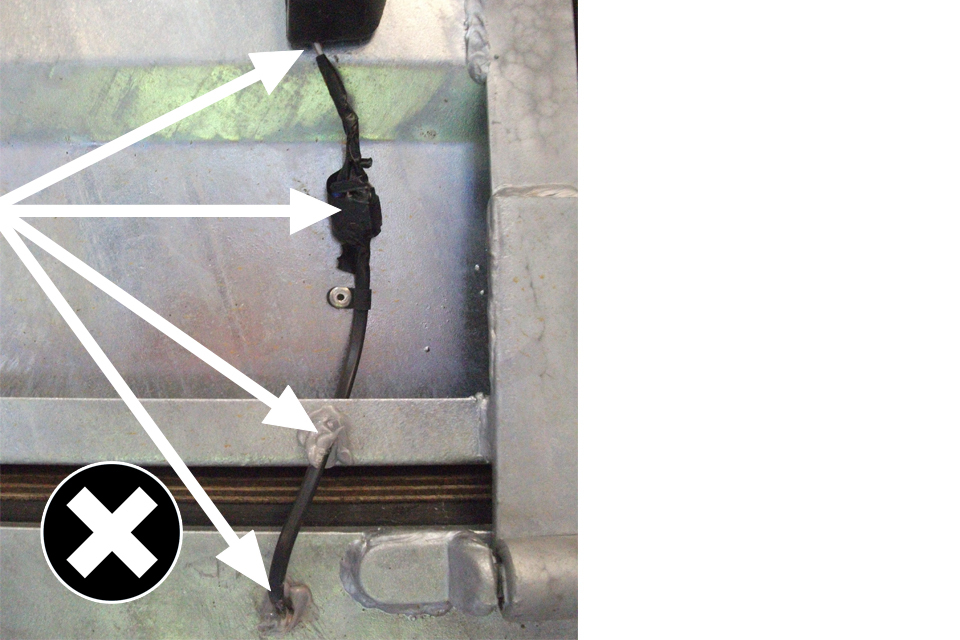
Not allowed: example of poor standard of build.
The image above shows a poor standard of build, this includes:
- sealant used as protection where wires pass through a metal panel
- insulation tape wrapped around a wiring joint
- non insulated wiring where the wires enter the lamp
This isn’t allowed.
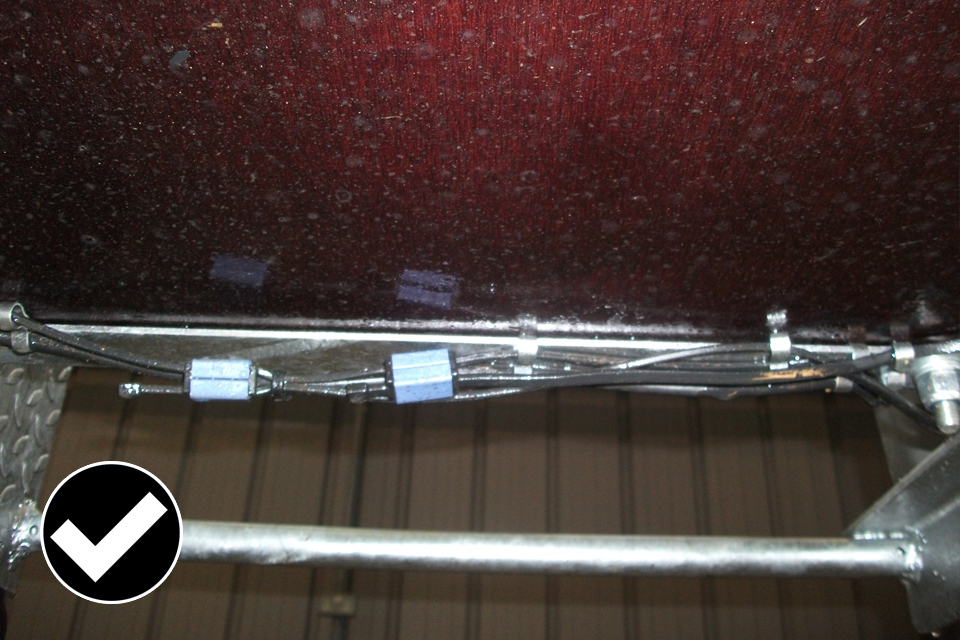
Allowed: wiring clipped and secured into place.
The image above shows a much better standard of construction with:
- wiring clipped into place
- secure and unlikely to chafe
2.2 What to check before general construction is inspected
DVSA will look at how the trailer is designed and constructed and consider all aspects of the vehicle in all the conditions it will be operated under:
- speed
- load
- vibrations
- acceleration
- cornering
- braking forces
DVSA will inspect trailers for:
- correct size and use of nuts and bolts
- locking devices used where appropriate
- adequate materials used
- use of reinforcing plates where necessary
- any adverse effect it may have on the towing vehicle
2.3 The standard general construction must meet
See the IVA inspection manual for the full inspection standard.
3. Retro reflectors
3.1 How retro reflectors are inspected
This section has different requirements for light and heavy trailers - only apply those that are relevant to the trailer presented.
Conspicuity isn’t required on O1 and O2 trailers.
Conspicuity is the method used to make the outline of a trailer visible.
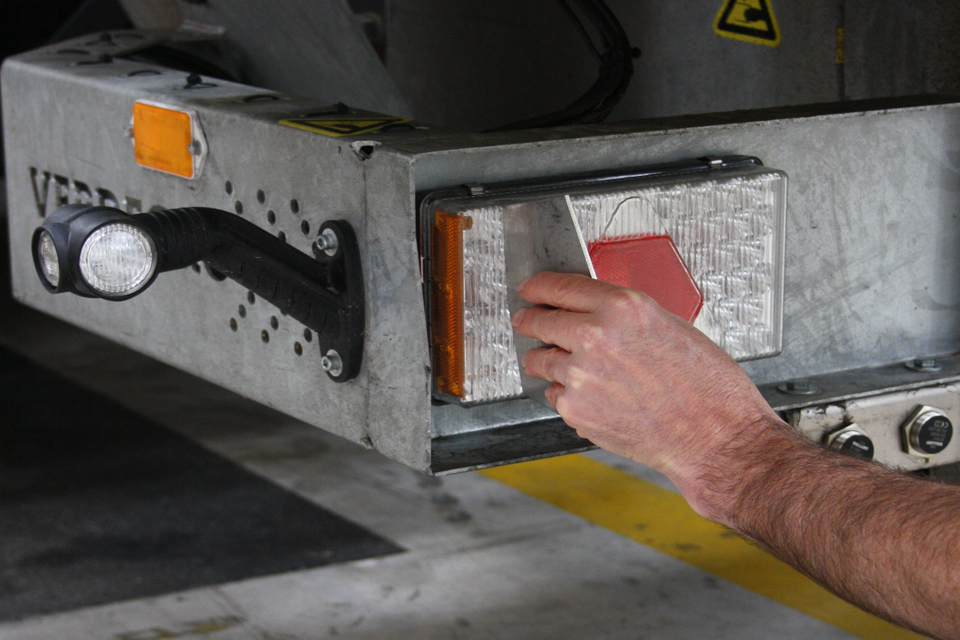
Need to check that a lamp cluster contains a reflector.

Need to check that a lamp cluster contains a reflector.
Check that the lamp cluster you’re fitting contains a reflector.
In the images above they appear to contain a reflector, but it could just be a pattern in the lamp.
You need to check that the lamp cluster carries an ‘Identity Symbol’ of either:
- IIIA
- IIIB
The above figures signify the lamp contains a reflector that is suitable for a trailer.

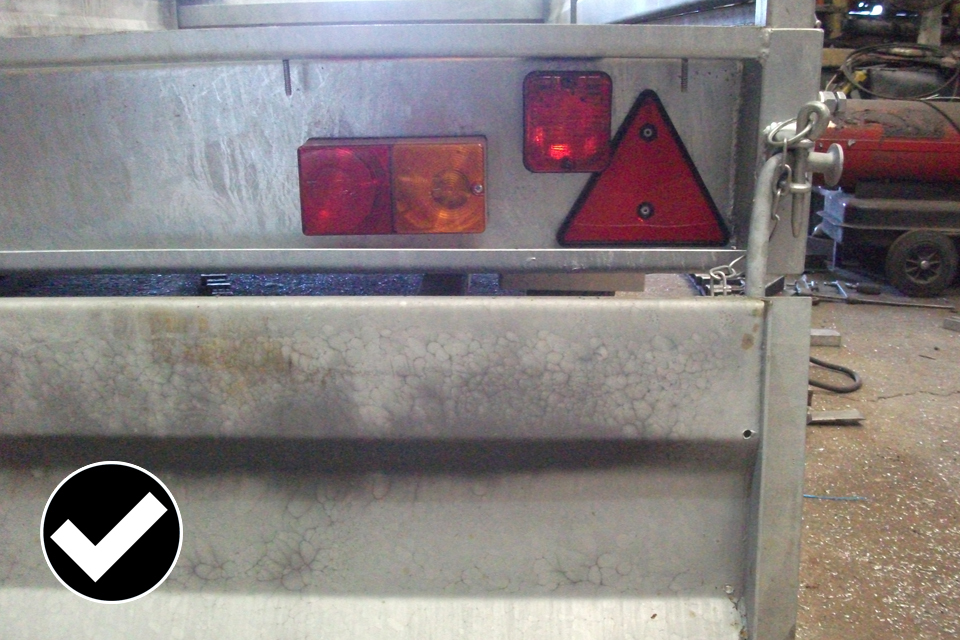
Not allowed: lamps are there but no reflector fitted.
Allowed: lamp cluster doesn't contain a reflector so a separate one has been fitted.
When your fitting individual lamps, don’t forget to fit a reflector.
The first image above shows that all the lamps are there, but no reflector fitted. This isn’t allowed.
The second image above shows that the lamp cluster doesn’t contain a reflector, so a separate one has been fitted. This is correct.

Side and front reflectors are mandatory.
Side and front reflectors are mandatory.
Side and front reflectors are mandatory. The number of reflectors depends on the length of your trailer.
Section 21 of the inspection manual gives positions and angles.
3.2 What to check before retro reflectors are inspected
DVSA check retro reflectors for:
- number fitted
- colour
- position
- shape
- approval marking (if required)
- identity symbol (if required)
Only triangular rear reflectors are allowed on trailers as obligatory reflectors.
When fitting a lamp cluster from another vehicle, make sure a reflector is incorporated in it. Not all contain one.
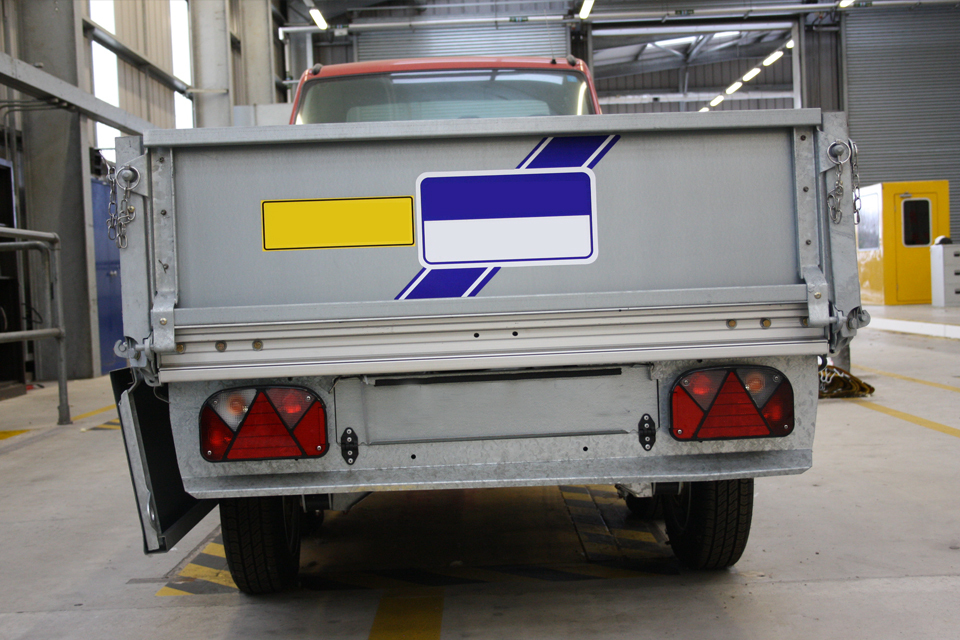
Conspicuity doesn’t apply to light trailers in the O1 and O2 category as they’re under the required weight. Rear marker boards are required if the trailer is over 8 meters in length.
3.3 The standard retro reflectors must meet
See section 21 (retro reflectors) of the IVA inspection manual for the full inspection standard.
4. Installation of lights
4.1 How installation of lights is inspected
Section 20 (installation of lights) of the IVA inspection manual covers the fitting of all lights and reflectors fitted, and should be read in conjunction with sections 21-29.
The most common problem with this section is obstruction of lamps by movable components.
With tailboard up the lamps are fully visible and meet the required angle of visibility.
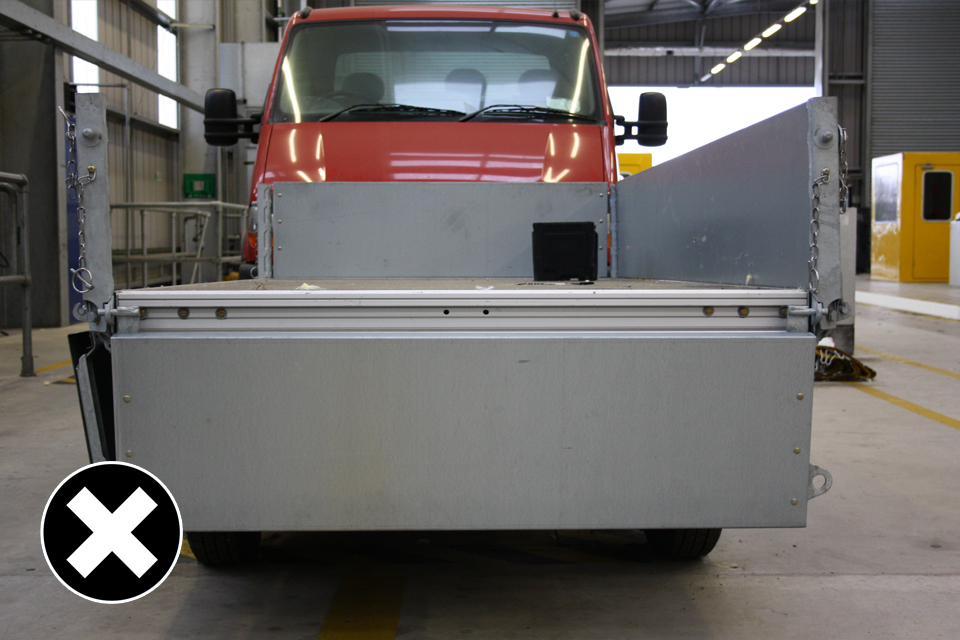
Not allowed: with tailboard dropped all lights and reflectors are hidden.
In the first image above the lamps are fully visible and meet the required angles of visibility. But, as shown in the second image, with the tailboard dropped all lights and reflectors are hidden. This isn’t allowed.
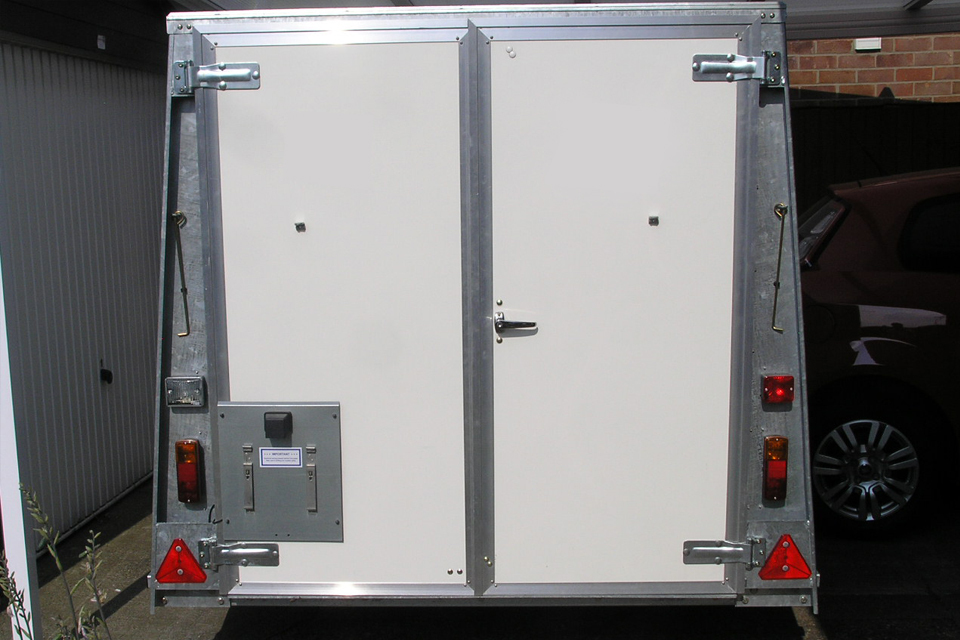
With doors closed the lamps are fully visible and meet the required angle of visibility.
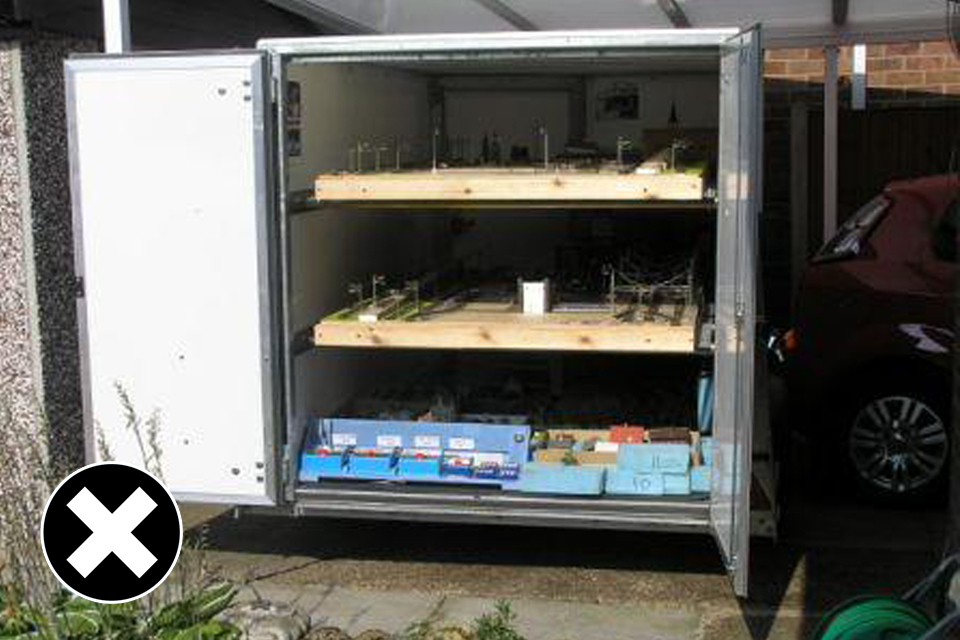
Not allowed: all lights and reflectors are hidden when doors are opened.
The above images show another example with the same problem. The first image shows that with the loading doors closed, all lamps are visible and meet the angles of visibility. But, as shown in the second image, when the doors are opened none of the lamps or reflectors are visible.
In the event of a breakdown on an unlit road, the trailer isn’t visible.
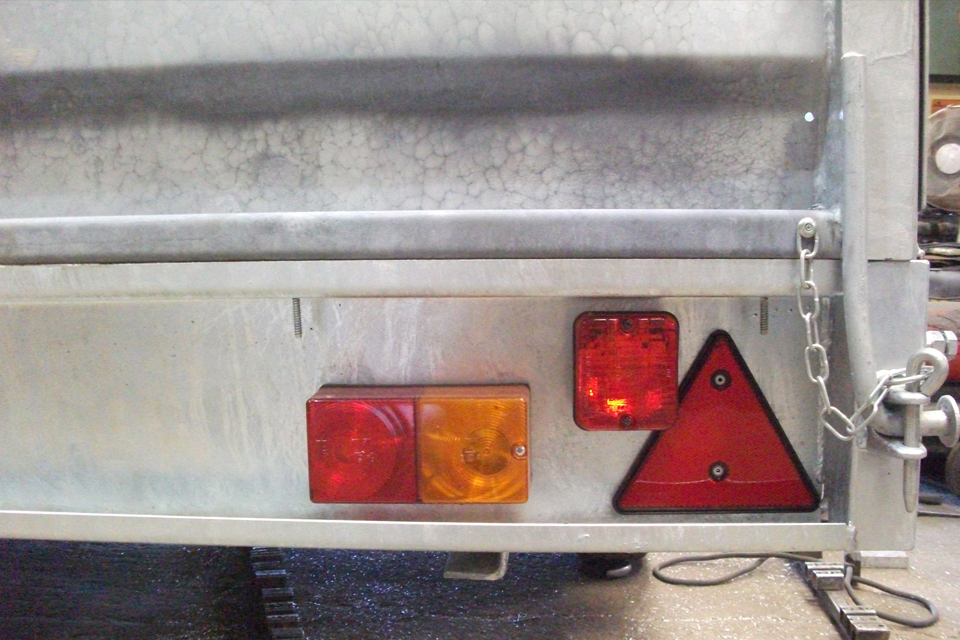
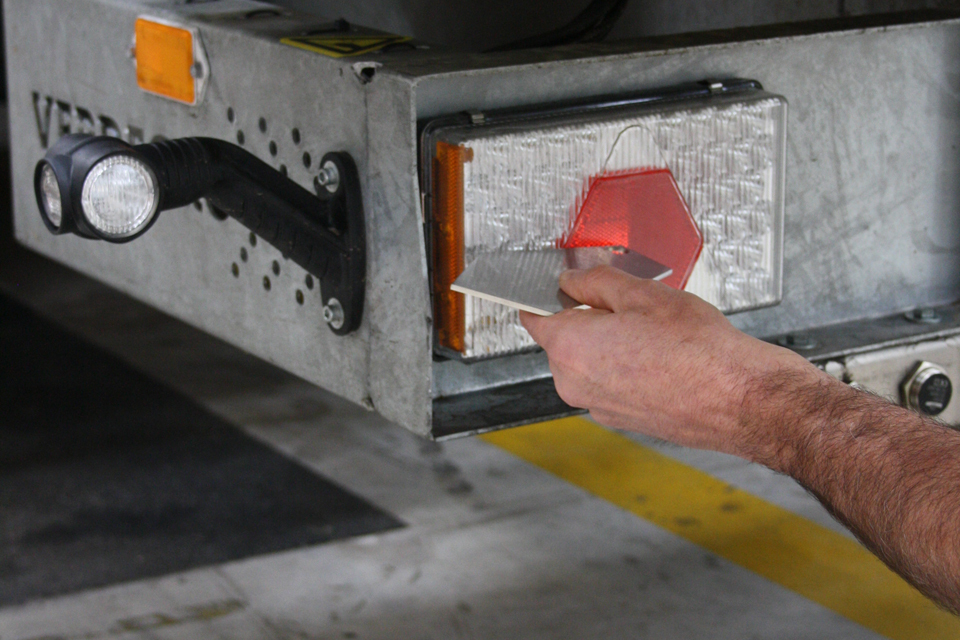
Lamps are fully visible and meet the required angle of visibility.
Allowed: the tailboard is dropped and the lamps are still fully visible and meet the required angle of visibility.
The two images above show a possible solution. When the tailboard is dropped on this trailer all lamps and reflectors remain fully visible.
4.2 What to check before installation of lamps are inspected
DVSA will check all lamps and reflectors for:
- colour
- security
- operation
- orientation
- visibility
Figures in the manual show semi-trailers, the figures apply equally to O1 and O2 trailers.
DVSA will check that all lamps and reflectors are visible when the following are fixed in an open position:
- doors
- loading ramps
- lockers
- other items
Check that when your trailer is being loaded/unloaded, on the side of the road, that the lamps and reflectors are still visible.
Lamp visibility may be increased by additional lamps or a warning triangle, but the reflectors must be 50% visible at all times.
4.3 The standard installation of lights must meet
See section 20 (installation of lights) of the IVA inspection manual for the full inspection standard.
5. Brakes
5.1 How brakes are inspected
This section applies to O2 trailers and O1 trailers if fitted with brakes. See the IVA inspection guide for trailer category definitions.
DVSA will check the parking brake lever for unobstructed movement.
DVSA will check for unobstructed movement of the parking brake lever throughout its travel.
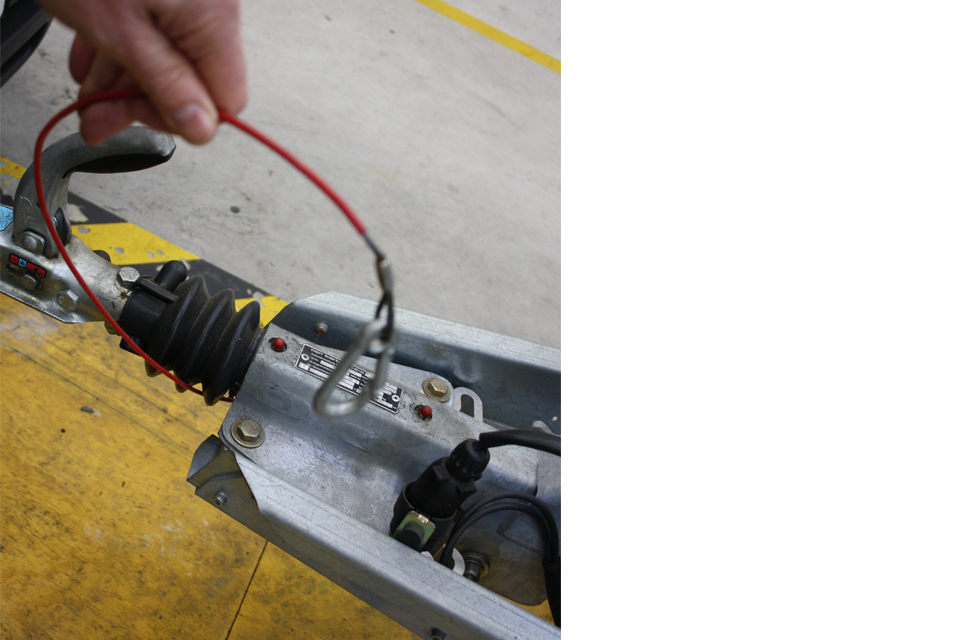
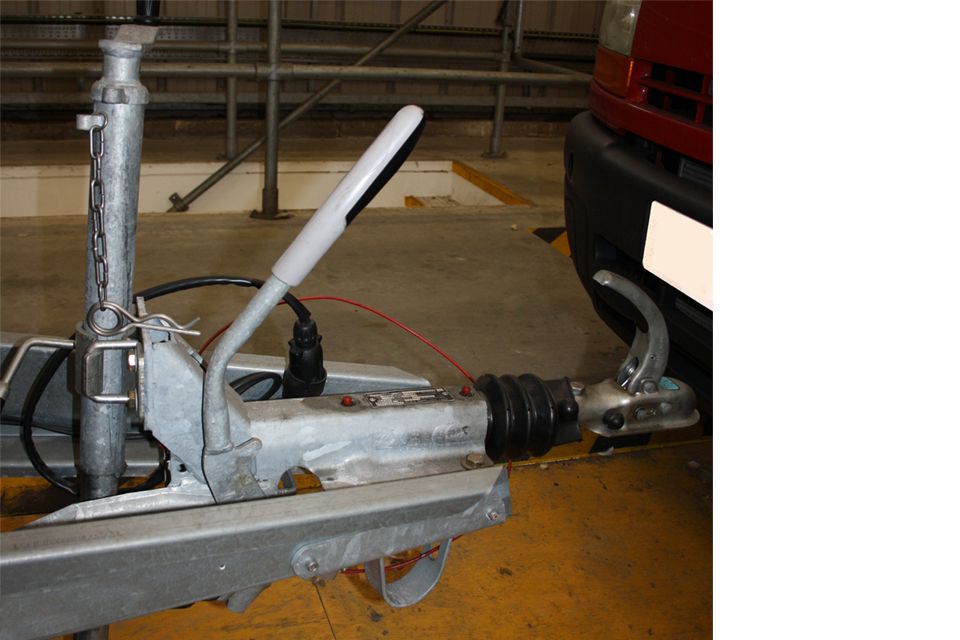
Trailers over 1500kg must be fitted with a breakaway cable.
All O2 trailers, over 1500kg maximum authorised mass (MAM), must be fitted with a breakaway cable.
A breakaway cable must be fitted with an attachment device that can be fitted to any towing vehicle.
The above image shows that a breakaway cable must be fitted with an attachment device that can be fitted to any towing vehicle. In the event of detachment trailer brakes must be able to be applied.
A cable used for brake transmission must be sheathed.
Any cable used for brake transmission must be sheathed.
5.2 What to check before brakes are inspected
O1 trailers don’t need to be fitted with a braking system. If one is fitted, the required standards must be met.
Documentary evidence that the specific trailer presented meets the required standard for braking must be supplied at time of test. This needs to be a test report that covers:
- the foundation brake,
- the coupling
- its compatibility
A breakaway cable, that meets the required standards, must be fitted if the trailer is over 1500kg.
No physical brake test will be carried out on your trailer
5.3 The standard brakes must meet
See section 9 (braking) of the IVA inspection manual for the full inspection standard.
6. Reverse lamps
6.1 How reverse lamps are inspected
Reverse lamps are:
- mandatory on O2 trailers
- optional on O1 trailers

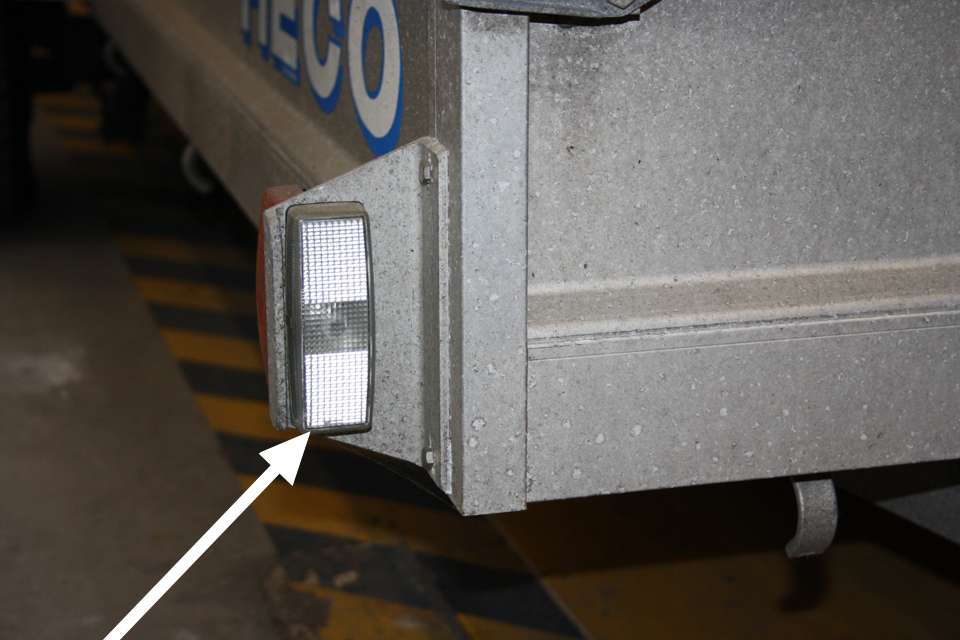
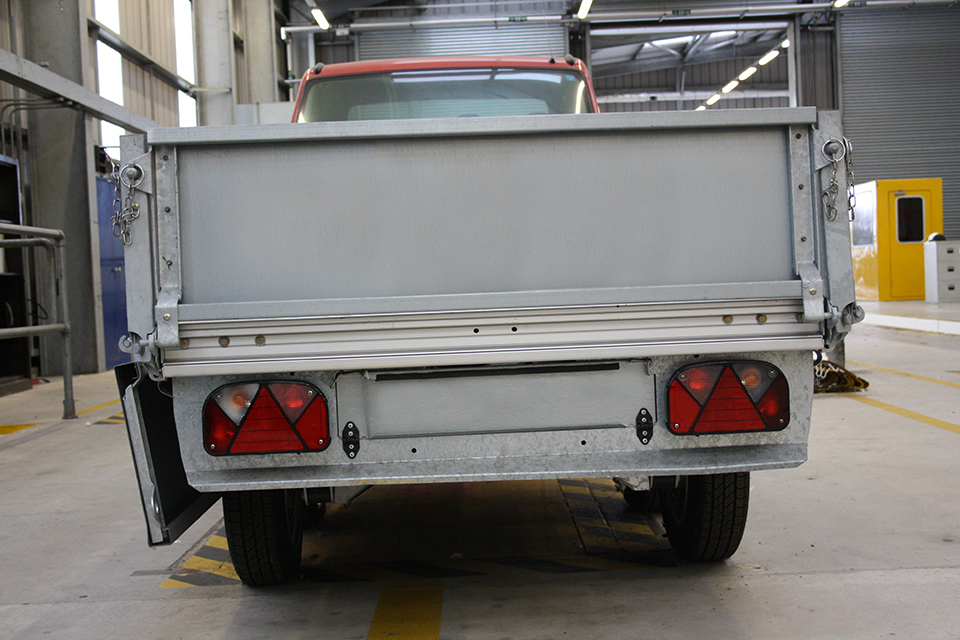
Reversing lamps are optional for O1 trailers, but if fitted must meet the required standard.
The image above shows an O1 trailer, reversing lamps are optional, but if fitted must meet the required standard.
Reverse lamps are mandatory for O2 trailers.
For O2 trailers reverse lamps are mandatory.
6.2 What to check before reverse lamps are inspected
Fit either one or two lamps on an O2 trailer. They must be:
- “e” or “E” marked (if required)
- white in colour
- operational
- marked with “A” or “R” identity symbol (if required)
- positioned correctly
- the correct number fitted
6.3 The standard reverse lamps must meet
See section 29 (reversing lamps) of the IVA Inspection manual for full inspection standard.
7. Rear fog lamps
7.1 How rear fog lamps are inspected

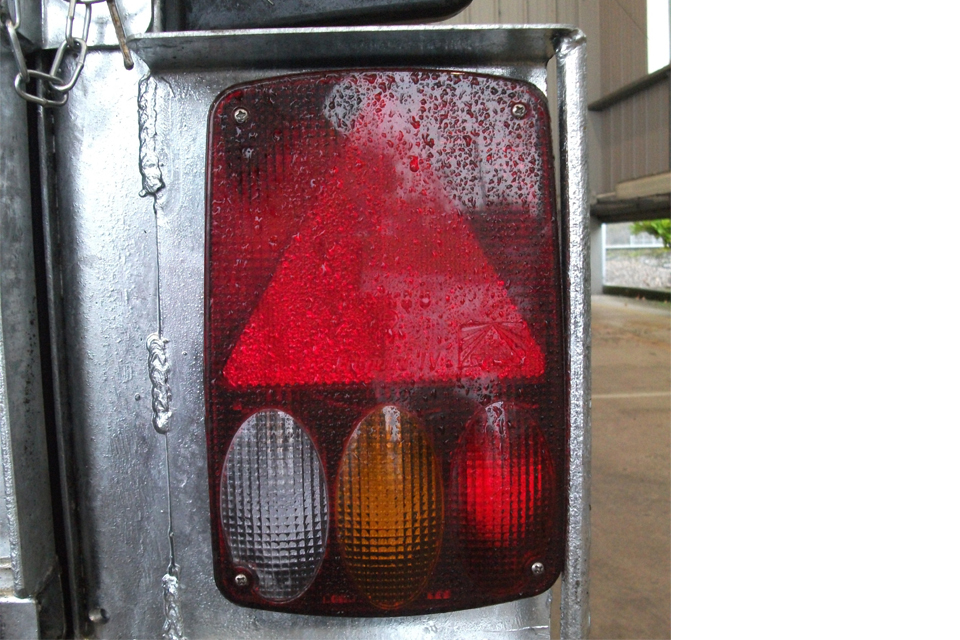
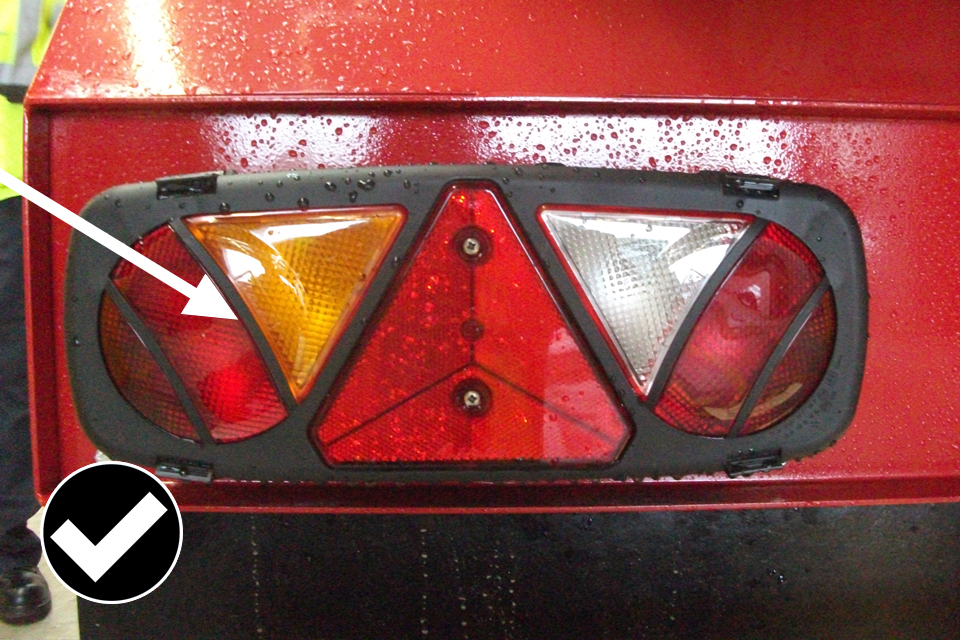
An example of a correctly fitted rear fog lamp.
The image above shows that the fog lamp must:
- be fitted in its correct orientation
- have an “E” or “e” mark
- be marked “B” or “F”

DVSA will check the angles of visibility.
DVSA will check for angles of visibility to make sure that nothing obstructs the lamp.

Allowed: one rear fog lamp fitted, but it must be to the centre or offside of the trailer.
The image above shows that if one lamp is fitted it must be to the centre or offside.

Allowed: the two lamps fitted are a matched pair.
Where two lamps are fitted they must be a matched pair.
7.2 What to check before rear fog lamps are inspected
If you’ve imported a trailer from:
- outside the EU it is likely that it won’t have a rear fog lamp fitted so you’ll need to fit a rear fog lamp or lamps
- within the EU the light will probably be just on the nearside so you’ll need to fit an additional one to the offside
If you’ve:
- one rear fog lamp fitted it must be fitted to the centre off side
- two rear fog lamps fitted they must be a matched pair and mounted symmetrically
A rear fog lamp must:
- have insulated wiring, that is secure and fitted through a grommet (where applicable)
- display an ‘e’ or ‘E’ mark with a ‘B’ or ‘F’ (see IVA inspection manual for exemptions)
- be fitted squarely to the rear
- be separated from the brake lamp by at least 100mm
An ‘e’ or ‘E’ mark means that the lamp is approved and is acceptable in the United Kingdom.
An ‘B’ or ‘F’ mark signifies it is a fog lamp.
7.3 The standard rear fog lamps must meet
See section 28 (rear fog lamps) of the IVA inspection manual for full inspection standard.
8. Couplings 50A
8.1 How couplings 50A are inspected
There are two sections in the IVA inspection manual, 50A and 50B. These refer to:
- 50A applies to light trailers (O1/2)
- 50B applies to heavy trailers (O3/4)
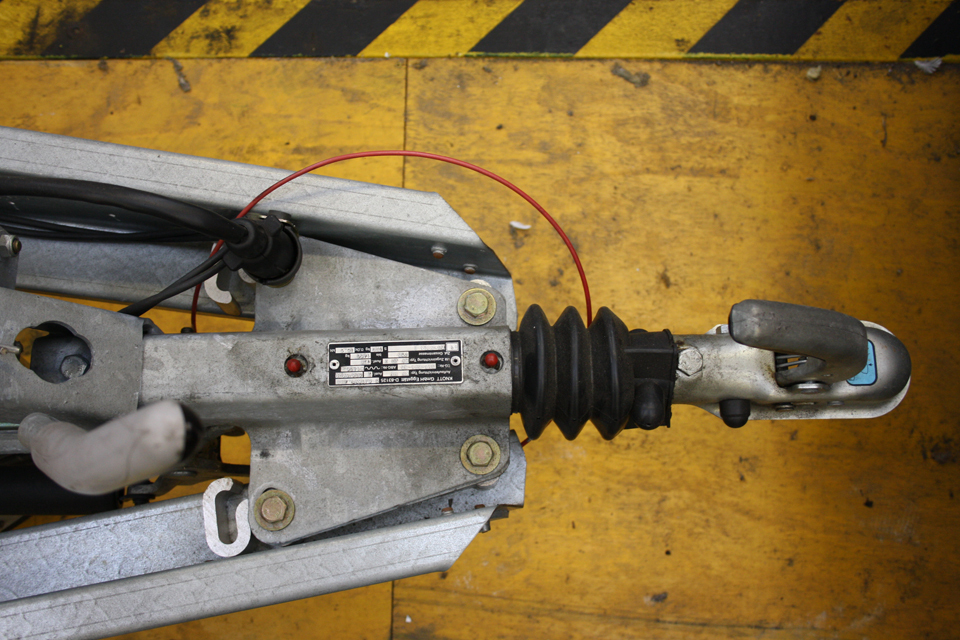
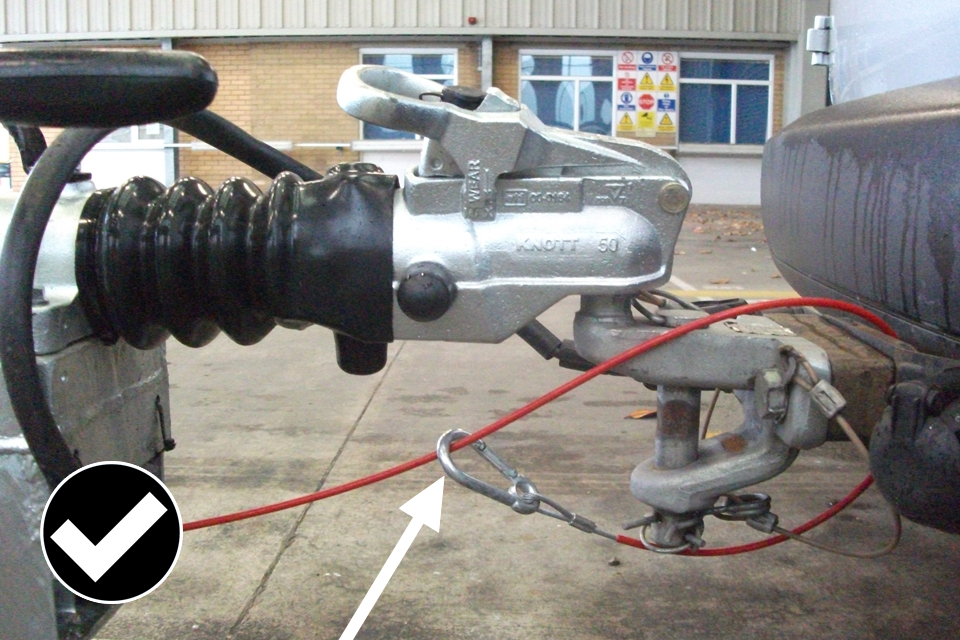
Only an approved coupling device is allowed to be fitted.

Only an approved coupling device is allowed to be fitted.
The images above show that only an approved coupling device is allowed to fitted. They must be fitted to the manufacturer’s instructions.
DVSA will check that the coupling is:
- fitted correctly
- able to be operated safely
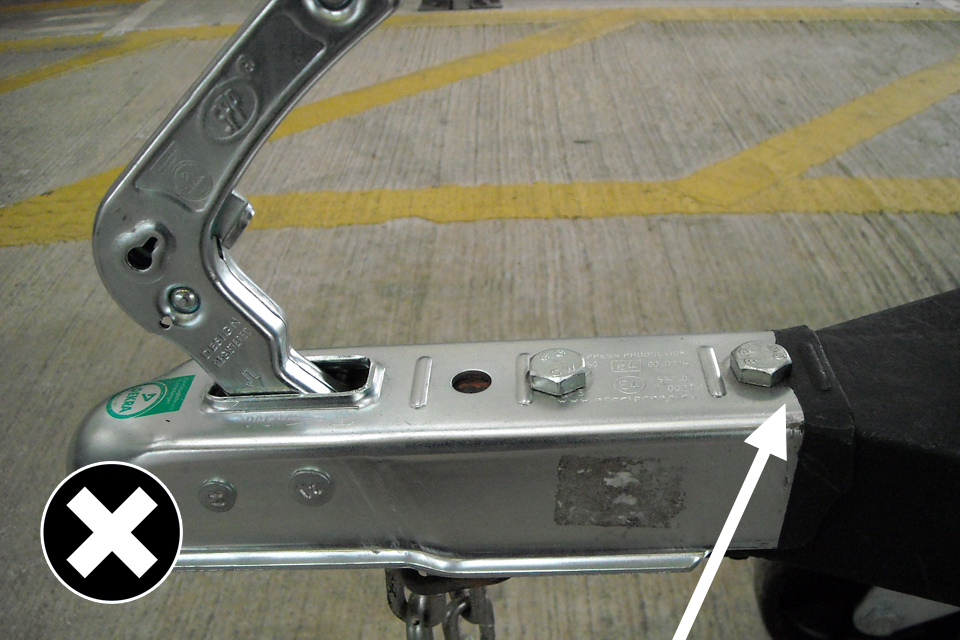
Now allowed: the coupling has been cut and shortened.
In the image above the coupling has been cut and shortened. Modifying coupling isn’t allowed.
Allowed: coupling has the correct size fixings.
The images above show correct size fixings, as the manufacturer’s instructions.
8.2 What to check before couplings 50A are inspected
The trailer coupling must:
- be of an approved class and type suitable for the trailer
- “e” or “E” marked
- be accompanied by installation and operating instructions
- be fitted to the correct height
- must have a secondary coupling if unbraked
- be fitted with a secondary retaining device
An O1/2 Semi-trailer has specific requirements in section 50A (couplings) of the IVA inspection manual.
8.3 The standard couplings 50A must meet
See section 50A (coupling) of the IVA inspection manual for the full inspection standard.
9. Direction indicators
9.1 How direction indicators are inspected
All trailers need to be fitted with:
- indicator lamps
- hazard warning lamps
Allowed: indicators can be part of a cluster.
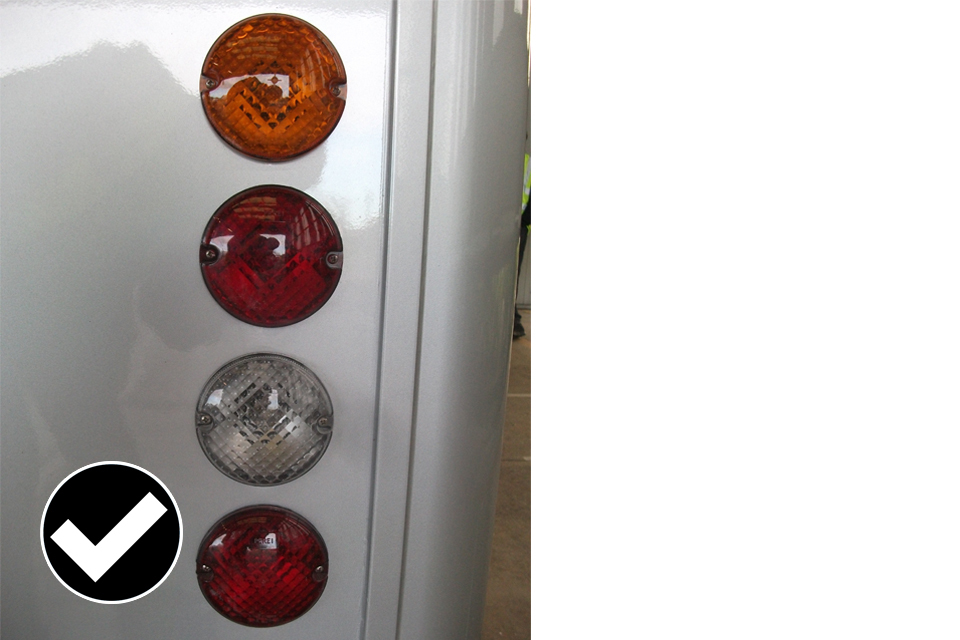
Allowed: indicators can be a separate unit.
As shown in the images above indicators can be:
- part of a cluster
- a separate unit
DVSA will check the angles of visibility for obstructions.
DVSA will check the angles of visibility for obstructions.
DVSA will check angles of visibility for obstructions, both:
- vertically
- horizontally
The angle is always taken from the edge of the illuminated surface.
The required angles are in section 20 of the IVA inspection manual.
9.2 What to check before indicators are inspected
DVSA will check direction indicators and hazard warning lamps for:
- “e” or “E” marking (if required)
- operation
- colour
- flash rate
- position
- identity symbol 2a, 2b or 12 (if required)
- angles of visibility
You must provide a suitable towing vehicle to check the:
- hazard lights
- indicator lights
- light circuits
A lighting simulator can be used, by prior arrangement, at a privately owned testing facility (POTF).
9.3 The standard direction indicators must meet
See section 23 (direction indicators) of the IVA inspection manual for the full inspection standard.
10. Rear registration plate space
10.1 How rear registration plate space is tested
Read this in conjunction with section 24 (rear registration lamps) of the IVA inspection manual.
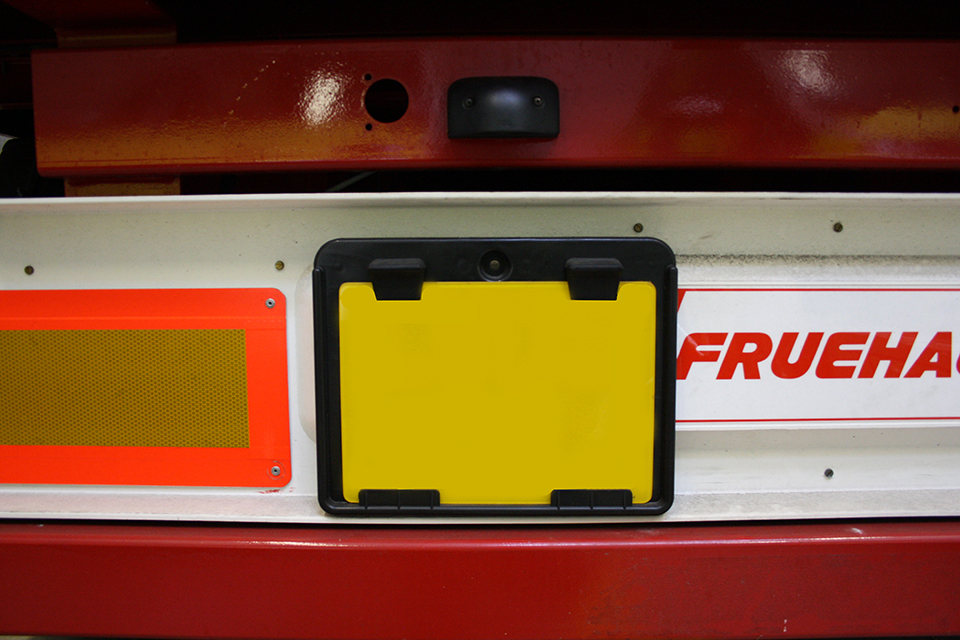
DVSA will use a template to check the rear registration plate space.
DVSA will use a template to check the rear registration plate space.
There are two trailer size registration plate space options. These are either:
- 520 X 120mm
- 340 X 240mm
DVSA will use a template to check there is sufficient space available.
In the images above a trailer has been fitted with a plate. When DVSA uses the template to check, it’s found that the space is too small and doesn’t meet the required standard.
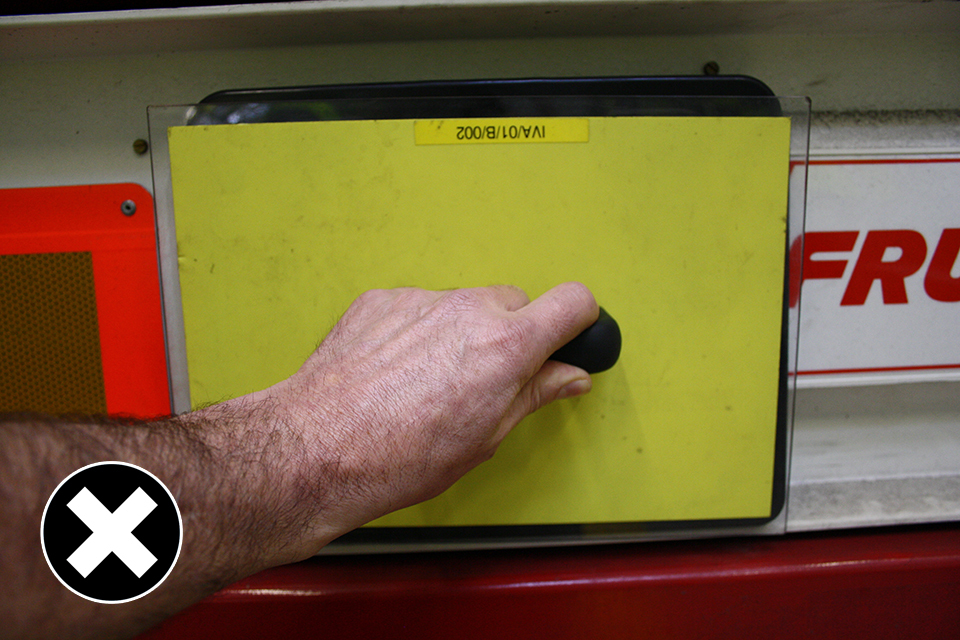
DVSA will use a template to check the rear registration plate space.
The image above shows that the space may be 520 X 120mm.
DVSA will still use a template to check there is sufficient space available.
The number plate must be illuminated to sufficiently light the registration plate.
The number plate space must be illuminated to sufficiently light the registration plate.
The number plate lamp must be marked either:
- “E”
- “e”
Trailers from outside EU don’t need to have an approval marking on the number plate lamp.
10.2 What to check before registration plate space is inspected
DVSA will check the registration plate space for:
- correct size
- it to be close to vertical as possible
- a suitable mounting system, when the space isn’t a part of the body of the trailer
The rear registration lamp must be:
- “e” or “E” marked
- operational
- switched on and off with the side lamps
- white in colour
- positioned to illuminate the rear registration plate space
10.3 The standard registration plate space must meet
See section 4 (rear registration plate space) of the IVA inspection manual for the full inspection standard.