Adding contacts: guidance for professional users of the get flood warnings service
Updated 25 June 2026
Applies to England

© Crown copyright 2026
This publication is licensed under the terms of the Open Government Licence v3.0 except where otherwise stated. To view this licence, visit nationalarchives.gov.uk/doc/open-government-licence/version/3 or write to the Information Policy Team, The National Archives, Kew, London TW9 4DU, or email: psi@nationalarchives.gov.uk.
Where we have identified any third party copyright information you will need to obtain permission from the copyright holders concerned.
This publication is available at https://www.gov.uk/government/publications/get-flood-warnings/adding-contacts-guidance-for-professional-users-of-the-get-flood-warnings-service
1. Overview
You should read this guide if you have a professional (organisation) login for the Get flood warnings service. You are likely to be an administrator for your organisation’s Get flood warnings account.
Administrators for an organisation can add locations of interest and then link contacts to these. This allows organisations to tailor which flood alerts and flood warnings each of their contacts receive.
This document explains how you use your professional (organisation) Get flood warnings account to view, add and remove contacts.
You can also read separate guides explaining how to add locations and how to link contacts to locations.
2. Contacts overview
The Live flood warnings page will display any flood alerts or flood warnings currently in force for locations that you have added to your organisation.
To view your organisations contacts, select ‘Users’ from the navigation tabs.
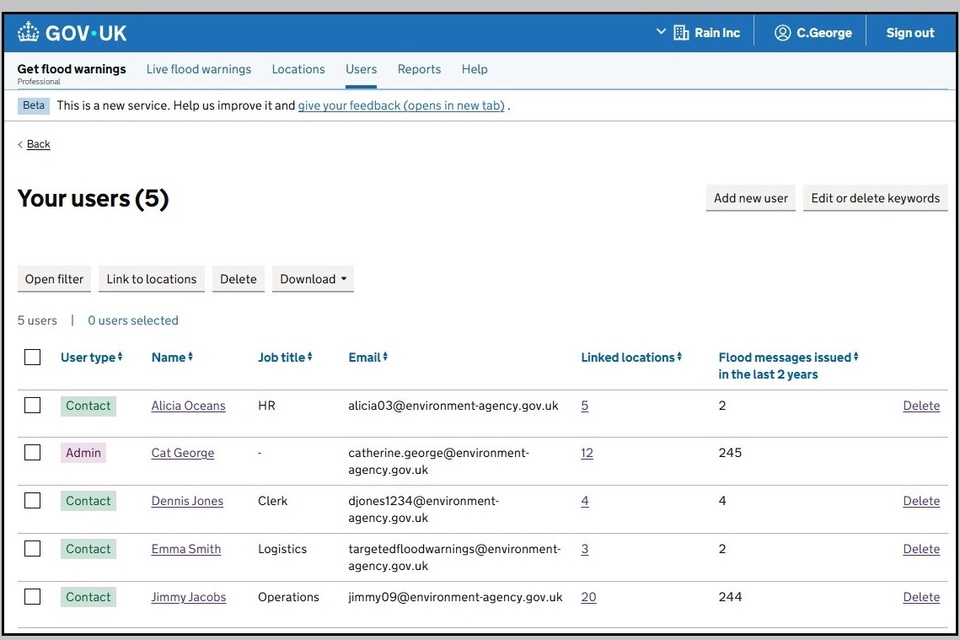
Image 1: Your organisation’s users page. Image courtesy of the Environment Agency.
Your organisation’s users will be listed in this table. The table includes information on:
- user type – admin or contact, admin can edit the locations and contacts for your organisation’s account, contacts will only receive flood alerts and flood warnings
- name – the name of the contact
- job title – the job title of the contact, if provided
- email – email address of the contact
- linked locations – the number of locations this contact is to receive flood alerts and flood warnings for
- messages issued – the number of flood alert or flood warnings this contact has received
3. Adding contacts
To add a contact, make sure you are viewing the ‘Users’ tab, and then select ‘Add new user’.
Note: It is not possible to bulk add contacts to your account.
Step 1: Select the Type of user then select ‘Continue’.
Contacts will only be able to receive messages via their chosen methods, that is phone, text and / or email. They cannot log in to Get flood warnings or make changes to the account.
Admins can receive messages via their chosen methods, that is phone, text and / or email. They can log in and manage locations and add or edit contacts on behalf of the organisation.
Step 2: Enter the first and last name for the user. You can also add a job title. You can then use this to search and filter contacts on the ‘Users’ tab. Select ‘Continue’.
If you are adding an admin user, the next stage will ask for an email for the admin contact. This is the email they will use to log in and access the account. Once entered, you can either continue to step 3 and continue with adding contacts for this user. Or they can login and complete the set up once they join as an admin.
Step 3: Add the contacts for this user. A minimum of one contact method must be added. A contact can have a maximum of:
- 2 email addresses
- 2 mobile numbers for text messages
- 2 telephone numbers for voice messages
If you need to add more contacts, you will need to add these as part of a new contact.
When a flood warning or alert is issued, message notifications will be sent via every phone number, text message number and email address added. This will be done for every contact linked to that location where messages are turned on. You should only add the methods you wish to receive messages via (email, text, phone call) for each contact.
Step 4: Add any keywords associated with the user. Keywords will make it easier to search for contacts and link them to locations. For example, any regions that they cover, or the team they work in.
Step 5: Add any notes associated with the user. Notes are visible to all admins for your organisation. You can use them to help identify which locations a user needs flood warnings and flood alerts for.
Step 6: The contact needs to be linked to locations in order to receive flood alerts and flood warnings. You can find out more about how to link contacts to locations.
4. Searching for contacts
You can search for contacts in your organisation and filter by:
- name
- user type
- job title
- keywords
- linked locations
You can add these details later if they were not provided when the contact was added.
Select the ‘Users’ tab and view the contact table. Select ‘Open filter’ and a filter menu will open to the left of the contact table. Select the drop downs for each section and select the attributes you would like to filter by.
Use this menu to filter by:
- user name
- user type
- job title
- keywords
- linked locations

Image 2: Filters on your organisation’s users page. Image courtesy of the Environment Agency
You can apply multiple filters at a time. Once the attributes have been chosen, select ‘Apply filters’. The contact table will be updated to only show contacts that meet the criteria set in the filter menu. Select ‘Clear filters’ and ‘Close filters’ to return to the full table.
5. Removing contacts
You can remove contacts that are no longer needed by your organisation from the ‘Users’ tab.
Individual contacts can be removed by selecting ‘delete’ in the last column of the contact table. Alternatively, you can delete multiple contacts at the same time by using the tick boxes and then selecting the ‘Delete’box.
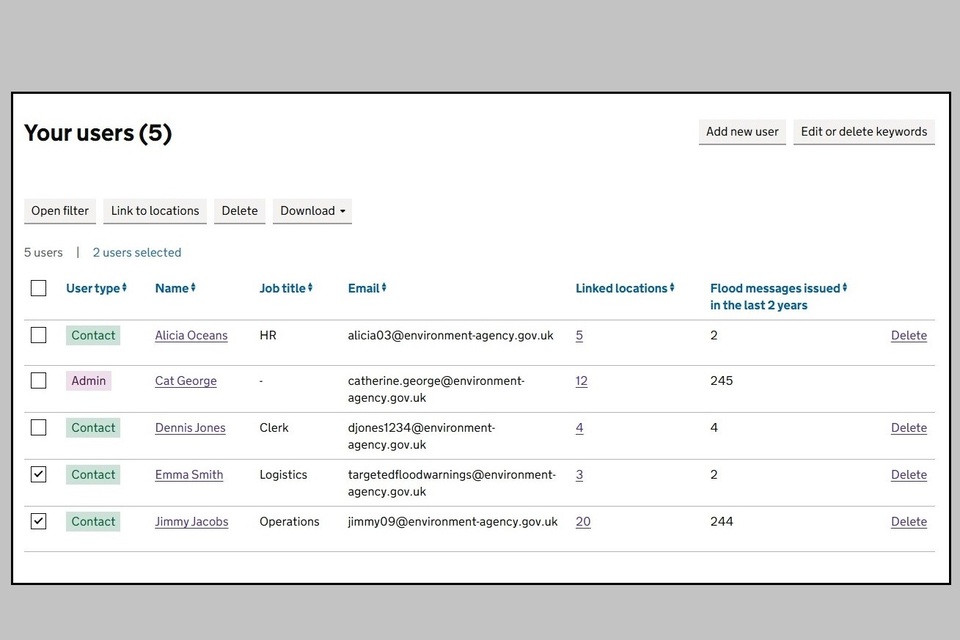
Image 3: Deleting users on your organisation’s users page. Image courtesy of the Environment Agency.
Deleting contacts will remove them from your account. They will no longer receive flood alerts or flood warnings.
6. Changing user type
To view your organisation’s users, select ‘Users’ from the navigation tabs.
Your organisation’s users will be listed in the table. The ‘User type’ column shows if a user is an admin or a contact.

Image 4: Your organisation’s users page with user type shown. Image courtesy of the Environment Agency.
Contacts will only be able to receive messages via their chosen methods, that is phone, text and / or email. They cannot login to Get flood warnings or make changes to the account.
Admins can receive messages via their chosen methods, that is phone, text and / or email. They can login and manage locations and add or edit contacts on behalf of the organisation.
6.1 To promote a contact user to an admin.
Step 1: Select the user by selecting their name, this will open their user profile page. Select the option to ‘Promote to admin’.
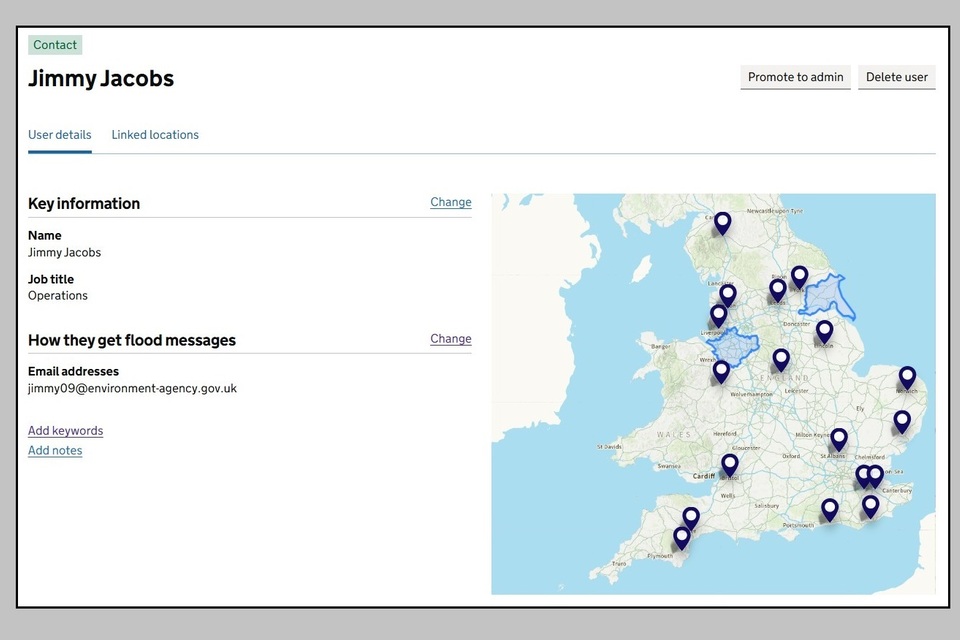
Image 5: User profile page for contact user with ‘Promote to admin’ option. Image courtesy of the Environment Agency.
Step 2: Confirm the email address is correct on the following page and select ‘Invite as admin’.
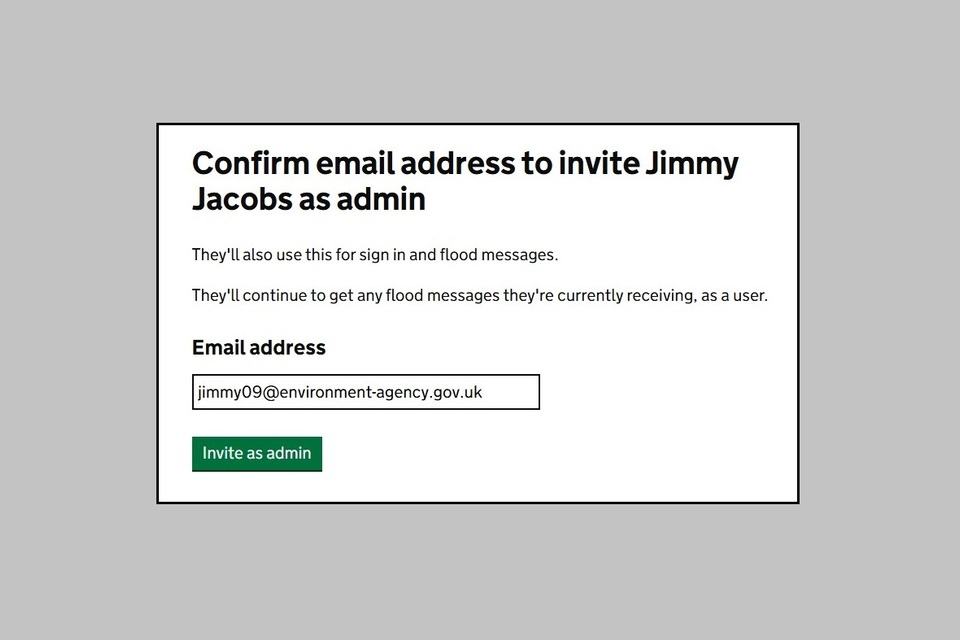
Image 6: Invite as admin page. Image courtesy of the Environment Agency.
A success message will be displayed and the user will now be shown as user type ‘pending admin’.
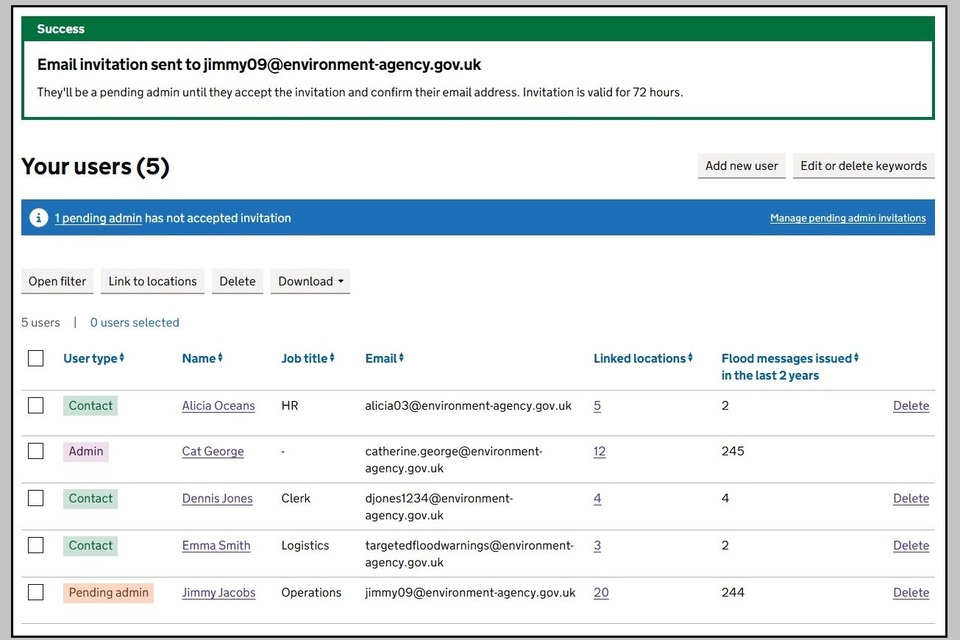
Image 7: Success message showing email invitation sent and user type as ‘pending admin’. Image courtesy of the Environment Agency.
An email is sent to the user inviting them to join your organisation’s account as an admin. They have 72 hours to click on the link to accept. Once they have clicked on the link and accepted the invitation they will be able to login to the service. At this stage, their user type will change from ‘pending admin’ to ‘admin’.
Until the invitation has been accepted, there is the option to select ‘Manage pending admin invitations’ on the ‘Users’ page with options to resend and withdraw the invitation.
6.2 To change an admin user to a contact
To view your organisation’s users, select ‘Users’ from the navigation tabs.
Step 1: Select the user by selecting their name, this will open their user profile page. Select the option to ‘Remove as admin’.
Note: if you can not see the ‘Remove as admin’ option then it is possible that the user is logged into the system. It will also not be possible to remove the only admin on the account, there must be at least one admin user.

Image 8: User profile page for admin user with ‘Remove as admin’ option. Image courtesy of the Environment Agency.
Step 2: Remove as admin page displayed. Select the option to ‘Remove as admin’.
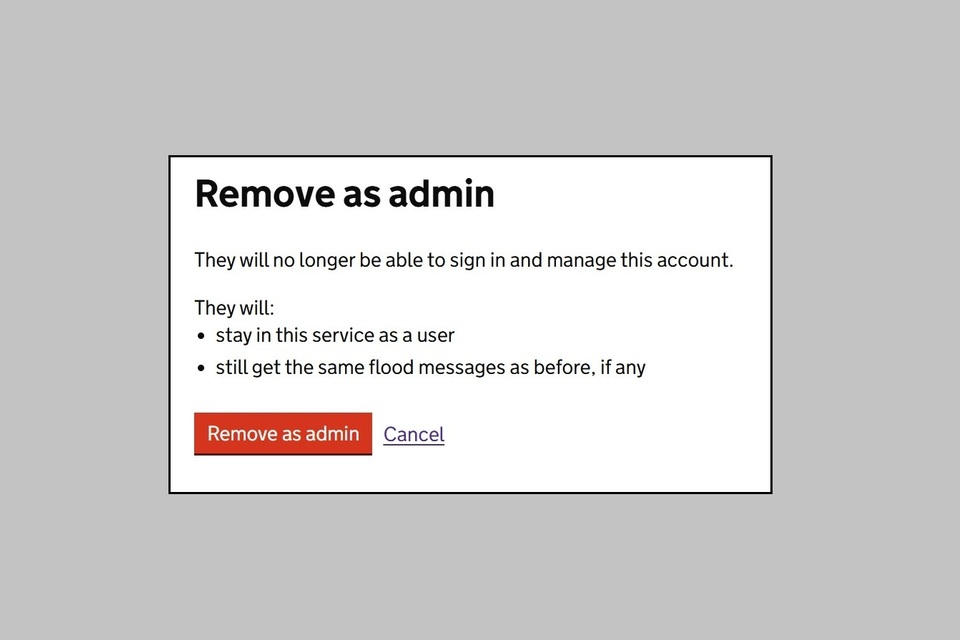
Image 9: Remove as admin page. Image courtesy of the Environment Agency.
A success message will be displayed and the user will now be shown as user type ‘contact’. They will still get the same flood messages as before but will no longer be able to log in.
7. Find out more
You can also watch this YouTube tutorial to find out how to:
- create new users
- add additional user details
- link locations to users