
Requirements for creating compartment maps
Updated 15 January 2026
Applies to England

© Crown copyright 2026
This publication is licensed under the terms of the Open Government Licence v3.0 except where otherwise stated. To view this licence, visit nationalarchives.gov.uk/doc/open-government-licence/version/3 or write to the Information Policy Team, The National Archives, Kew, London TW9 4DU, or email: psi@nationalarchives.gov.uk.
Where we have identified any third party copyright information you will need to obtain permission from the copyright holders concerned.
This publication is available at https://www.gov.uk/government/publications/create-and-submit-compartment-maps-and-spatial-data/requirements-for-creating-compartment-maps
Use this guide when creating compartment maps for felling licence applications or a woodland management plan for the Forestry Commission.
These 6 mapping requirements will help us process your proposal faster and keep your compartment maps focused and clear.
This guide is not for:
- mapping other types of forestry proposal, such as woodland creation
- digitally mapping within Felling Licence Online
For a felling licence application, you can create your maps within the ‘Felling Licence Online’ system.
For a woodland management plan, you must create your maps before you submit your plan. You can create a map by using:
- myForest service
- your own Geographic Information Systems (GIS)
1. Use a scale and basemap
Set the map scale to include multiple compartments on one map. Then zoom out to capture surrounding features, such as roads, rivers, landmarks for context. This creates a ‘basemap’, which provides us with context of your compartments in the landscape.
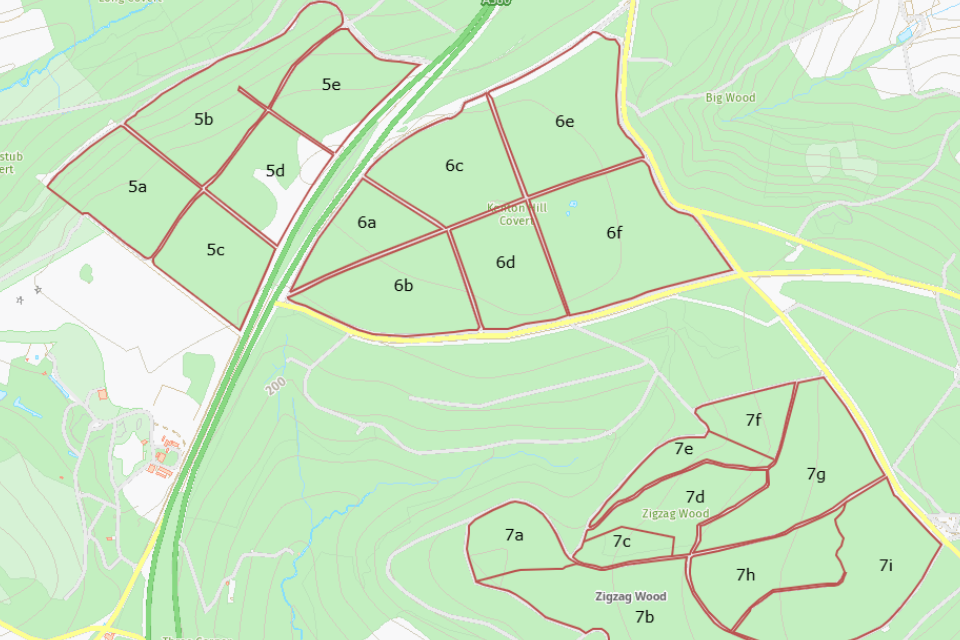
✅ Good map example: this map shows the surrounding area to give context to the labelled compartments.
Avoid exporting multiple separate maps of individual compartments without a basemap.
⚠️ Bad map example: there are no details, such as roads, rivers or landmarks in the surrounding area around the compartments.
Always use a vector basemap for example, OpenStreetMap with a light, simple style that allows compartment boundaries to be easily identified.
Avoid using aerial or satellite imagery or photography where possible. If necessary, ensure enough surrounding area is included to provide multiple reference points (for example, roads, buildings etc.)
We can supply Ordnance Survey (OS) or Rural Land Registry data on request, provided you hold a valid contract licence with us. Contact your operations team.
2. Include the OS grid reference
Include additional OS grid references for compartments whenever they extend beyond a single OS grid square and are located further apart.
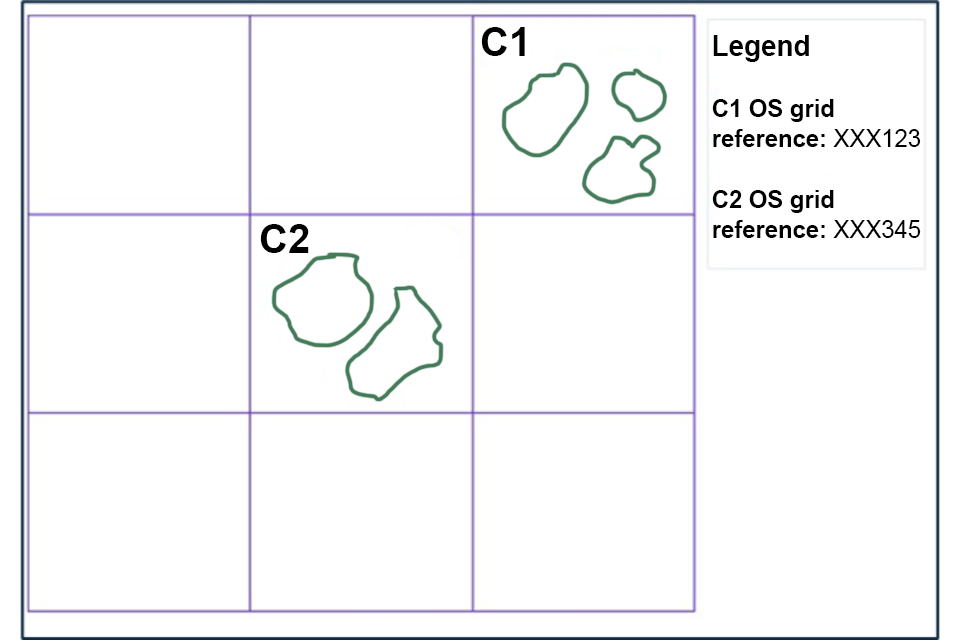
✅ Good map example: the OS grid reference for each compartment is listed in the legend.
Mention the corresponding grid reference on the legend of the map for every new grid.
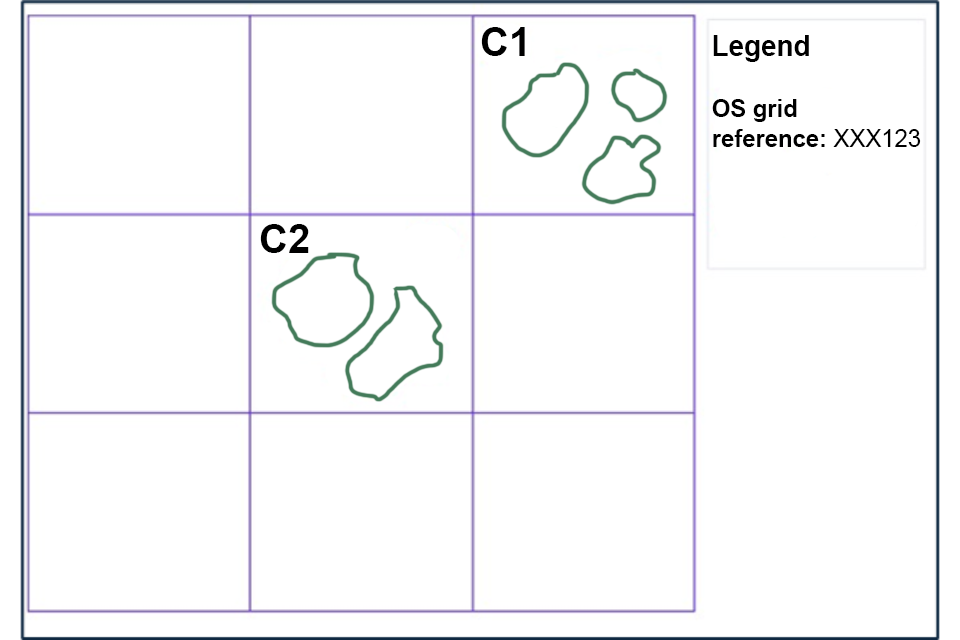
⚠️ Bad map example: the OS grid reference is missing for the second compartment. All compartment OS grid references should be listed.
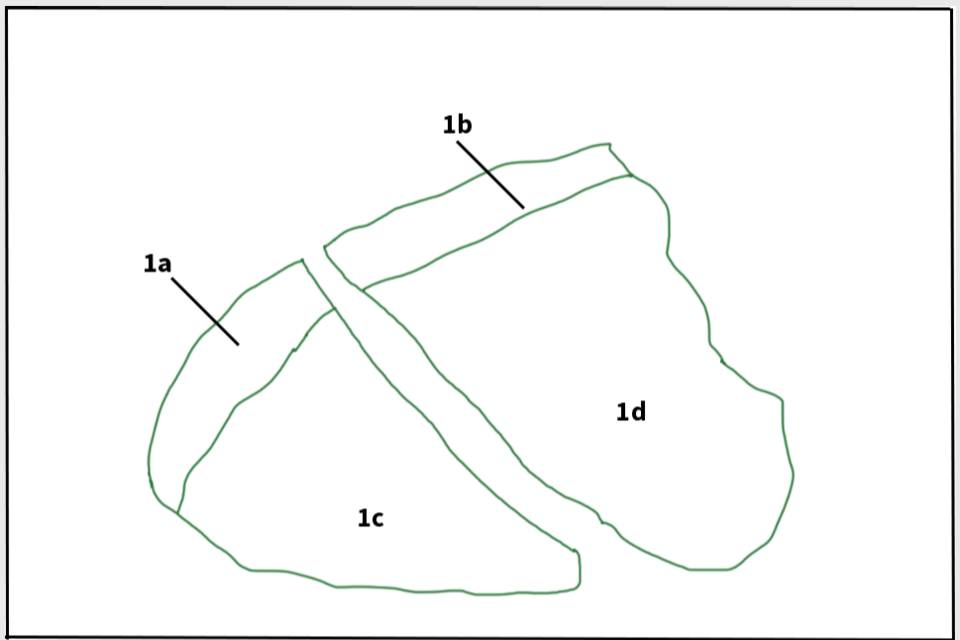
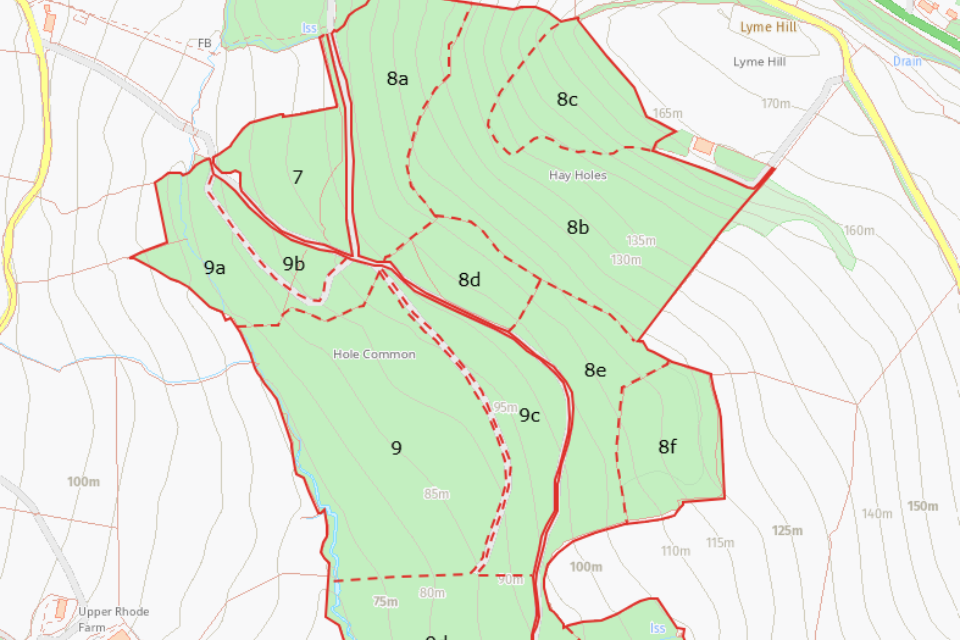
3. Only map compartments and sub-compartments
Create a dedicated map highlighting only compartments and sub-compartments with clear labels. Make sure this is distinct from the basemap.
Make sure compartment and sub-compartment boundaries are clear.

✅ Good map example: the compartment boundaries are clearly marked with red lines. The sub-compartment boundaries are marked with red dotted lines.
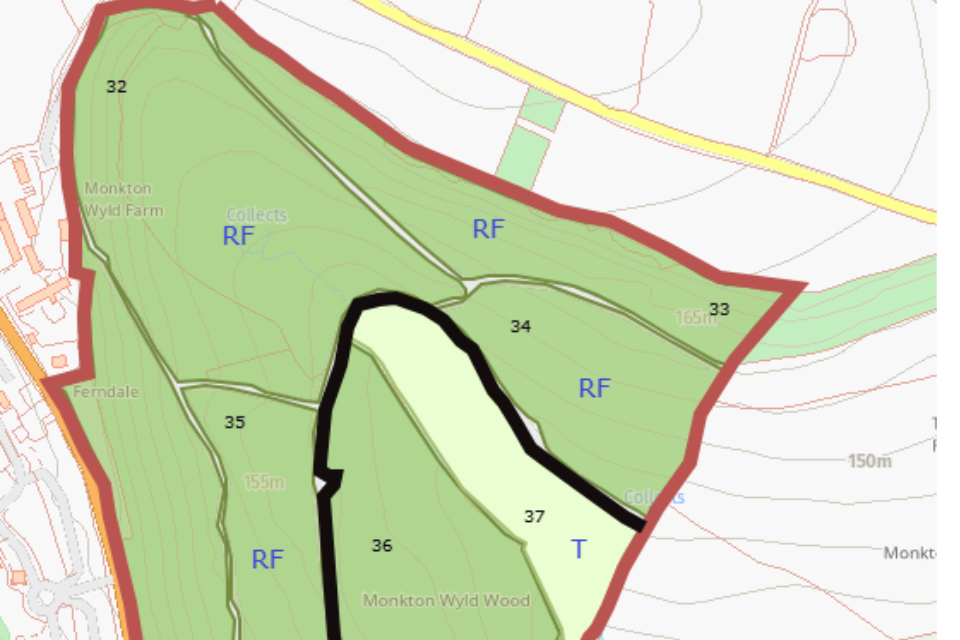
Do not include other felling operations or constraints on the same map because it makes boundaries hard to read. Instead, highlight these on separate operations and constraints maps respectively.

⚠️ Bad map example: avoid adding extra information, such as species type, to compartment labels.
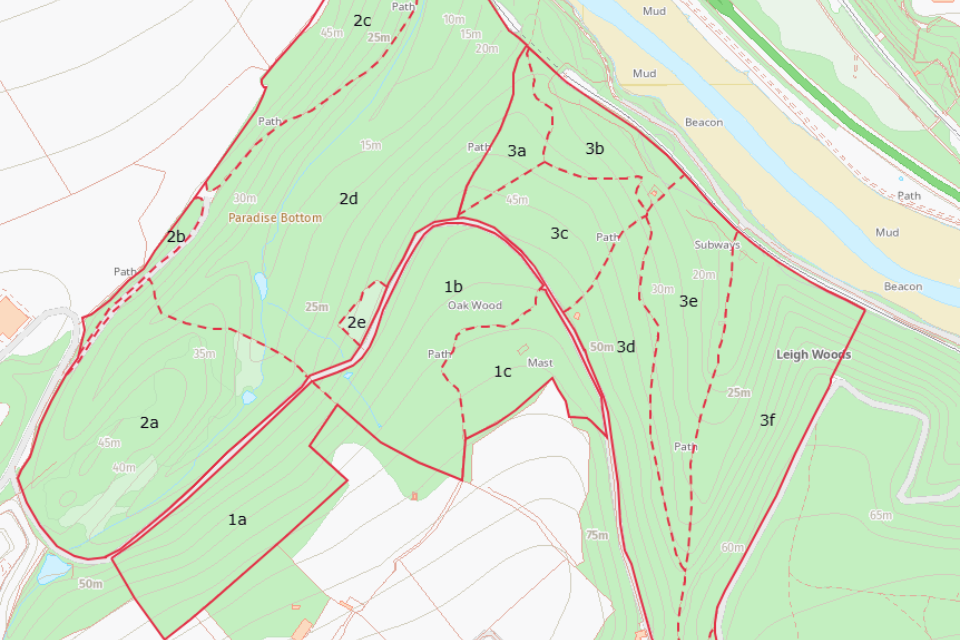
4. Make compartments and sub-compartments stand out
Compartments and sub-compartments need to stand out from other features.
Use a strong, contrasting colour to show compartment boundaries. You can then show sub-compartments with a dotted line in the same colour.
✅ Good map example: compartment boundaries are clear. Sub-compartment boundaries are marked with dotted lines.
Use boundary lines of appropriate thickness. Avoid overly thick lines, they can misrepresent compartment shapes.
⚠️ Bad map example: boundary lines are too thick. Avoid adding extra information to compartment labels.
If needed, fill compartments with a light, distinct shade, such as green or light yellow, that stands out from other features.
Avoid colours and shading that blend into other features or the background.
5. Label compartments clearly
Place labels inside their respective compartments, where possible.
Labels should only show compartment numbers and sub-compartment letters.
If you have multiple sub-compartments, use clear and simple labelling, such as 1a, 1b, 2a, 2b and 2c.
✅ Good map example: labels are within boundaries and only show compartment numbers and letters.
Use a medium-sized, clean font, such as Ariel or Verdana.
Ensure labels do not overlap boundaries or other labels. You can do this by adjusting how labels show up at different zoom levels before exporting the map.
Avoid using background shapes, icons, or extra symbols and other info such as species, areas, planting years or felling details.
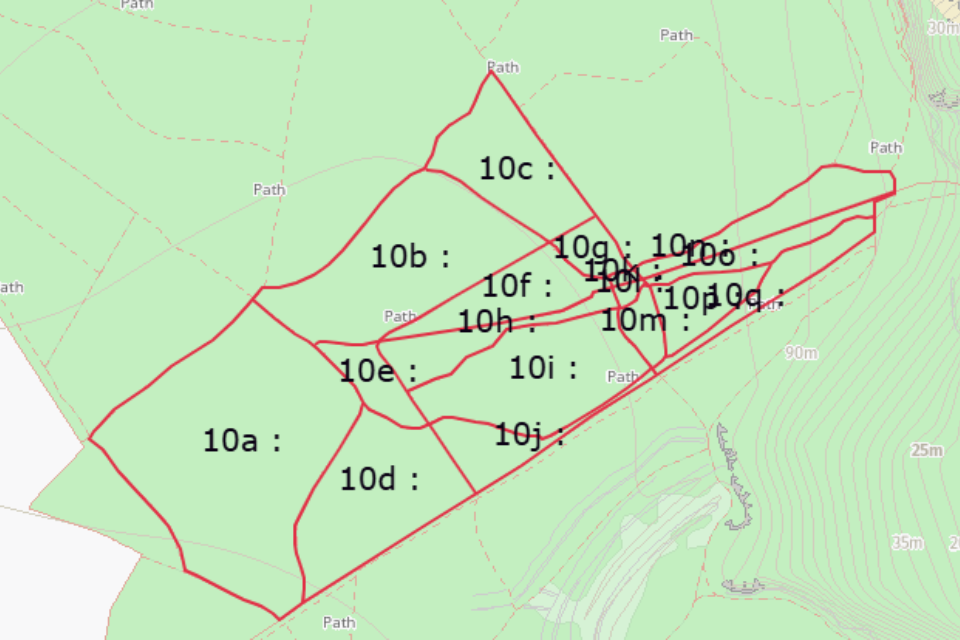
⚠️ Bad map example: compartment labels are overlapped.
If the area is congested because you have lots of sub-compartments, use an anchor, arrow or leader line to position the label clearly without overlapping boundaries.
6. Export compartment maps as a georeferenced PDF
Georeferenced PDFs look like standard PDFs but contain co-ordinate information. They are helpful for site visits.
You can select a georeferenced PDF during the exporting process on most mapping software. Here are guides on how to do this using 3 of the most commonly used software:
If your mapping software doesn’t support georeferenced PDFs, you can use a regular PDF instead.
Exporting a georeferenced PDF in myForest
- In Mapping Live View open the Maps menu in myForest.
- Click or tap the hamburger menu (3 dots) and select Download Geospatial Map.
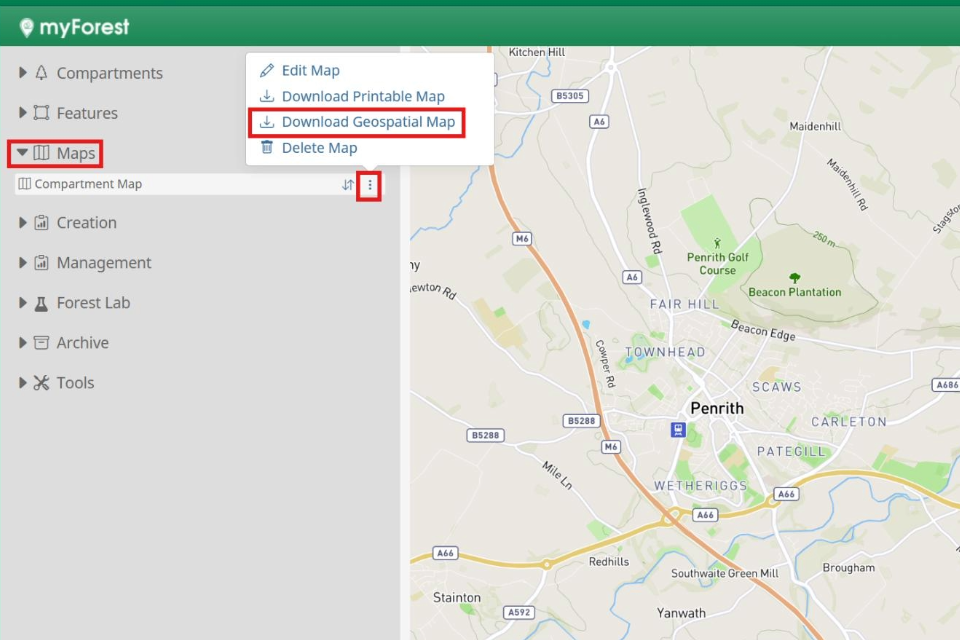
Screenshot from myForest (Mapping Live View).
When the map has finished generating, click or tap Download your map.
Exporting a georeferenced PDF in ArcGIS Pro
- Open your Layout View in ArcGIS Pro.
- Go to the Share tab on the ribbon.
- Click or tap Export Layout and select Georeferenced PDF.
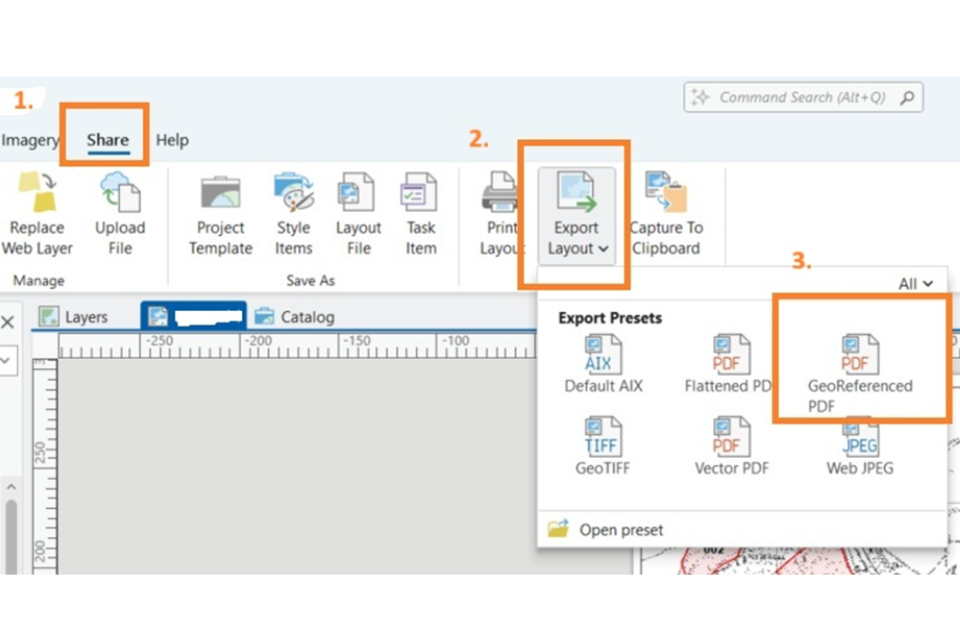
Screenshot from ArcGIS Pro (Layout View).
The Export Layout window will open:
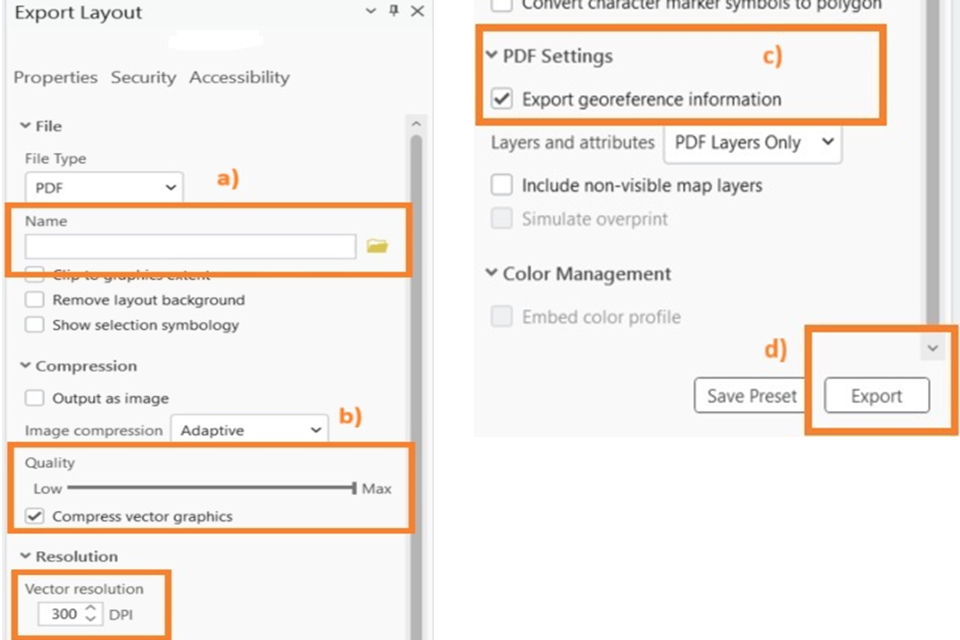
Screenshot from ArcGIS Pro showing what to select to export a georeferenced PDF.
a. In Name choose where you want to save the document.
b. In Quality increase to the maximum and set the Vector resolution to 300 DPI.
c. In PDF Settings check/tick the box Export georeferenced information.
d. Click or tap Export to save your file.
Exporting a Georeferenced PDF in QGIS
Follow the guide on the QGIS website to export a georeferenced PDF using QGIS software.
Further information
Read more about how to create and send spatial data to the Forestry Commission.
Read more about what you need to create a woodland management plan.