HM Land Registry portal: standard restrictions (e-RX1)
How Business e-services customers can register standard restrictions on e-RX1 through the portal.
Applies to England and Wales
Start an application
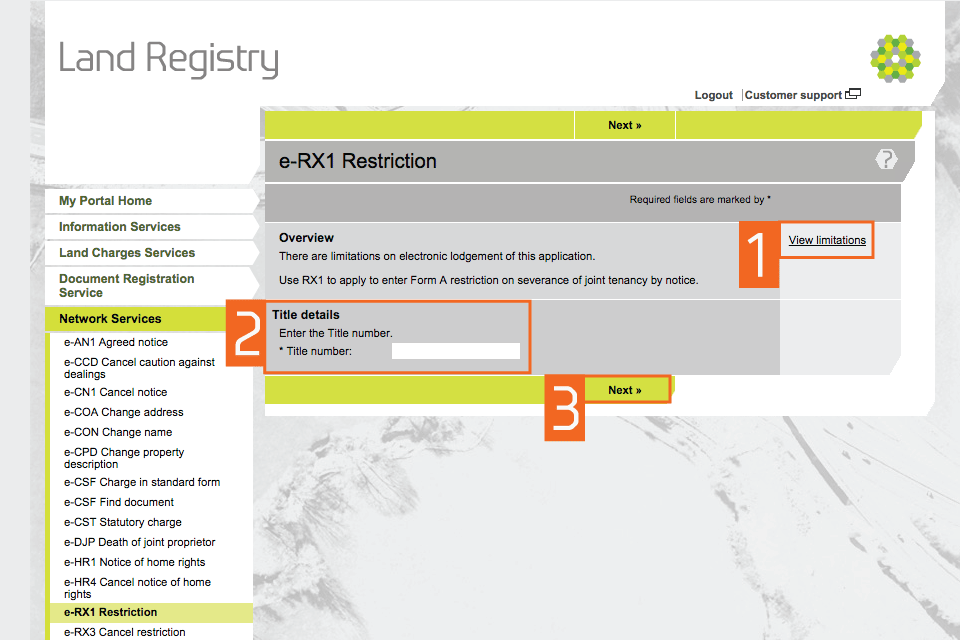
Select ‘Network Services’, then select the ‘e-RX1 Restriction’.
- Some applications for a restriction cannot be lodged as an e-RX1. Select ‘View limitations’ to check details.
If the limitation applies, you will not be able to lodge the application as an e-RX1. Instead you will need to apply using the Document Registration Service or by post or DX. Select ‘Previous’ to return to the process. - Enter the title number.
- Select ‘Next’.
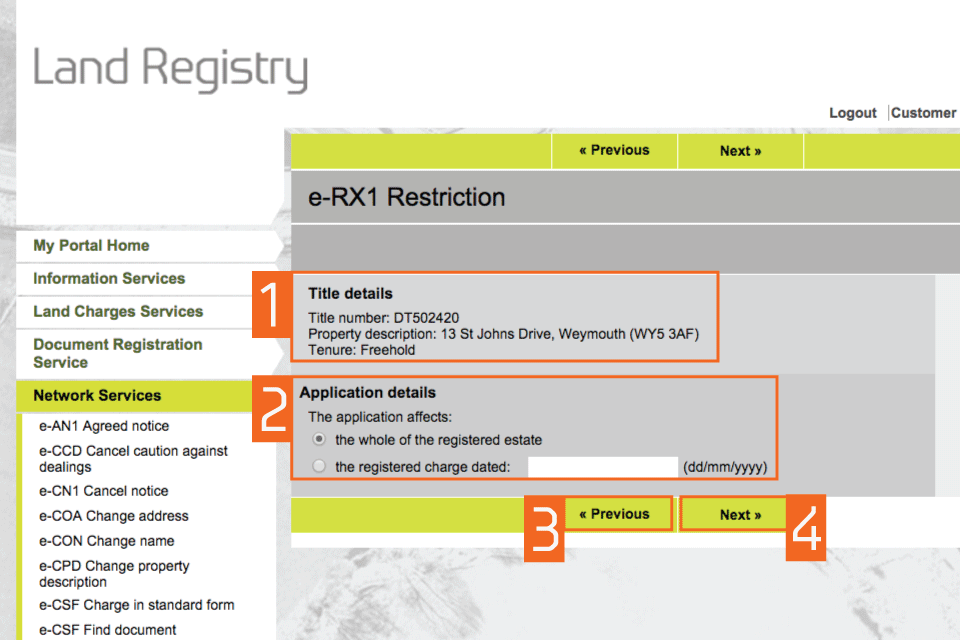
Check title details
- Check that the property details for the title number you entered are correct.
- If they are correct, select one of the options in ‘Application details’. These decide whether the application is against the whole of the registered estate or a registered charge. If the application affects only part of the registered estate you will not be able to register the restriction electronically. You will have to apply using the Document Registration Service or by post or DX.
- If they are not correct, select ‘Previous’ to go back and amend the title number if required.
- Select ‘Next’.
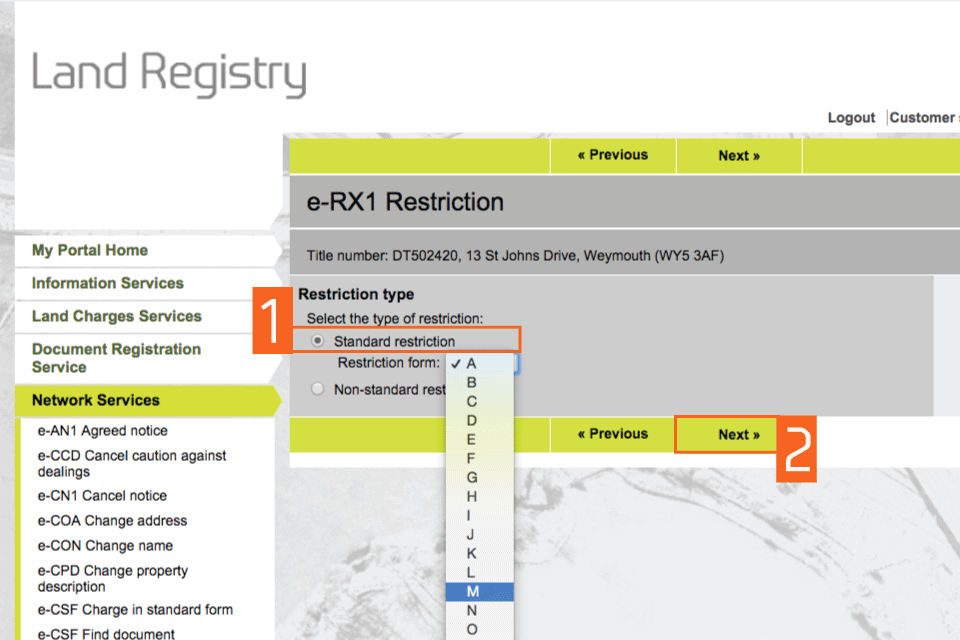
Select the restriction type
-
Notices, restrictions and protection of third party interests (Practice guide 19) explains the difference between the two types of restrictions. In this guide we will look at standard restrictions. Select ‘Standard restriction’.
If you wish to register a non-standard restriction, see our guide: HM Land Registry portal: non-standard restrictions (e-RX1).
From the drop-down menu, select the required form of restriction. In this example, we will look at a form M standard restriction. - Select ‘Next’.
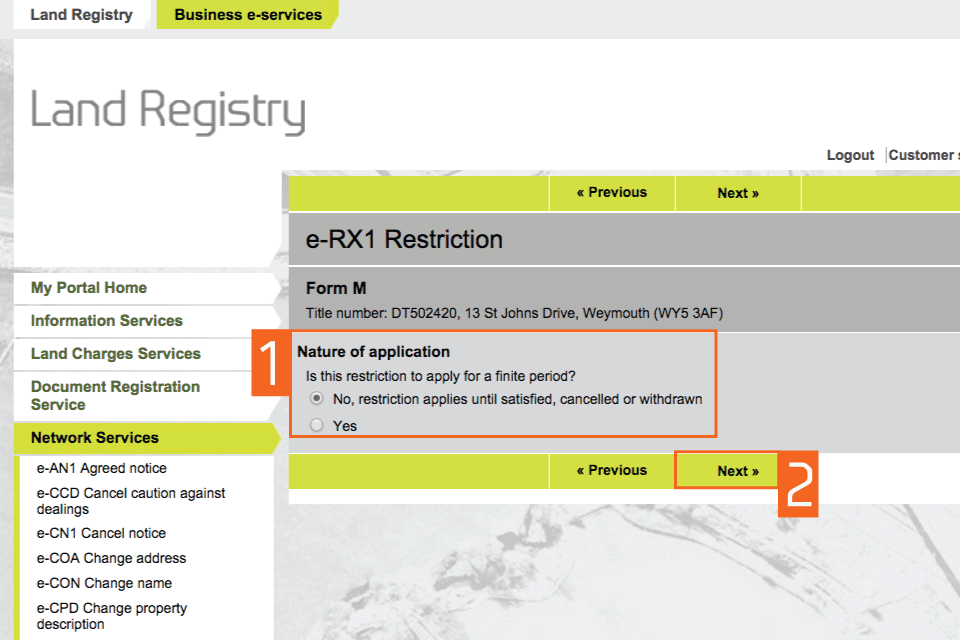
Nature of application: (M)
Other forms of standard restriction may have alternative options. You should select the relevant option appropriate to your application.
- If the restriction is to apply:
- until a specific event occurs, choose ‘No, restriction applies until satisfied, cancelled or withdrawn ‘
- if the restriction is to apply until a certain date, choose ‘yes’.
- Select ‘Next’.
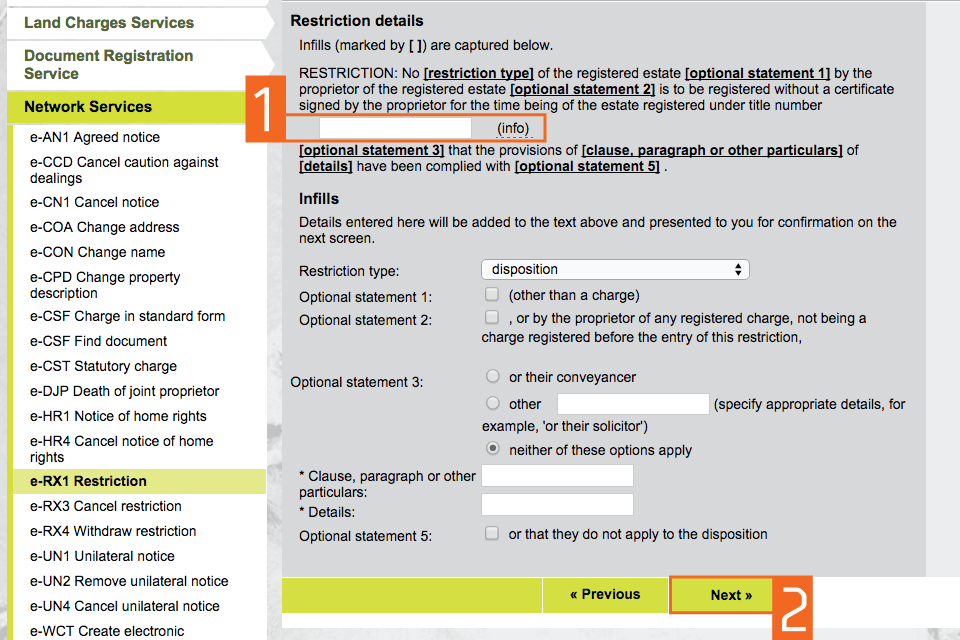
Record restriction details (M)
- Hover the mouse pointer over ‘info’ to show further information on completing the corresponding text box. Complete all text fields, also called infills. See guidance on completing this application: Notices, restrictions and protection of third party interests, Practice guide 19.
- Select ‘Next’.
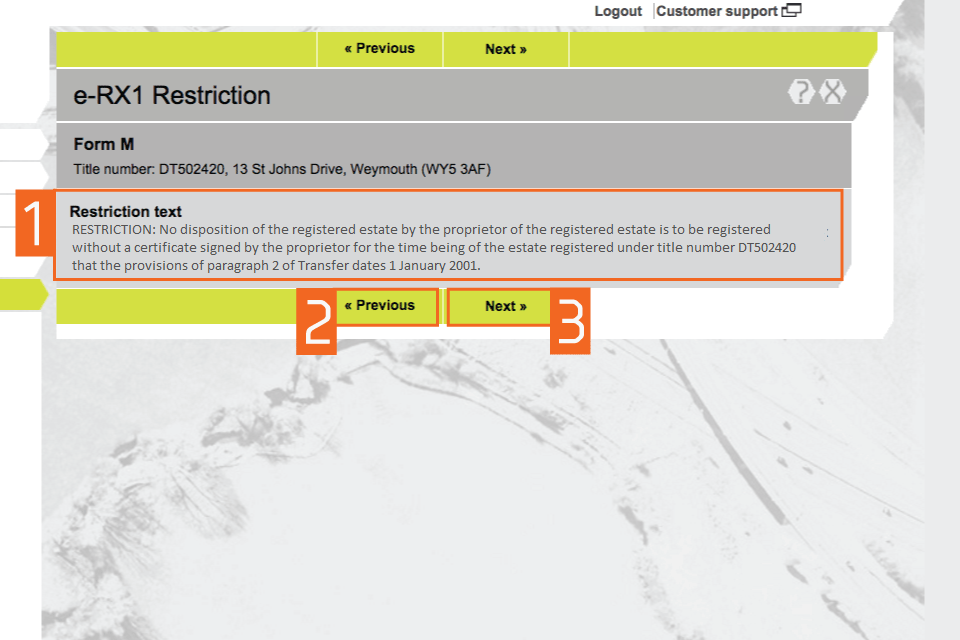
Check the restriction text (M)
- At that stage you can view the Form M restriction text. Check the text and that you have selected the correct restriction type.
- You can amend the various options by selecting ‘Previous’.
- Select ‘Next’.
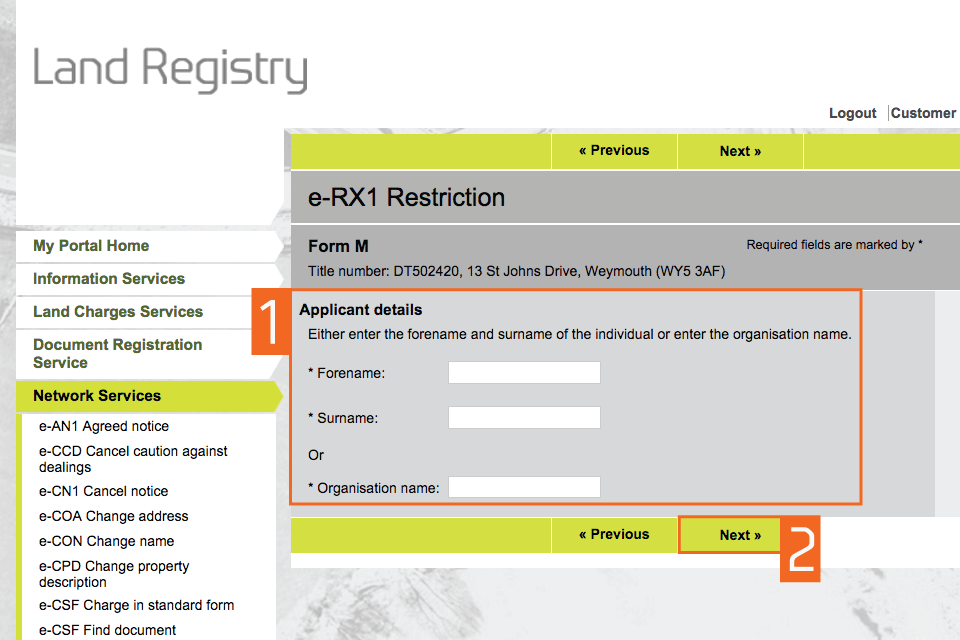
Enter applicant details (M)
- Enter the forename and surname of the applicant (individual or organisation). This means the client not the conveyancer. These fields are not case sensitive, but the format you use will appear in the PDF acknowledgement.
- Select ‘Next’.
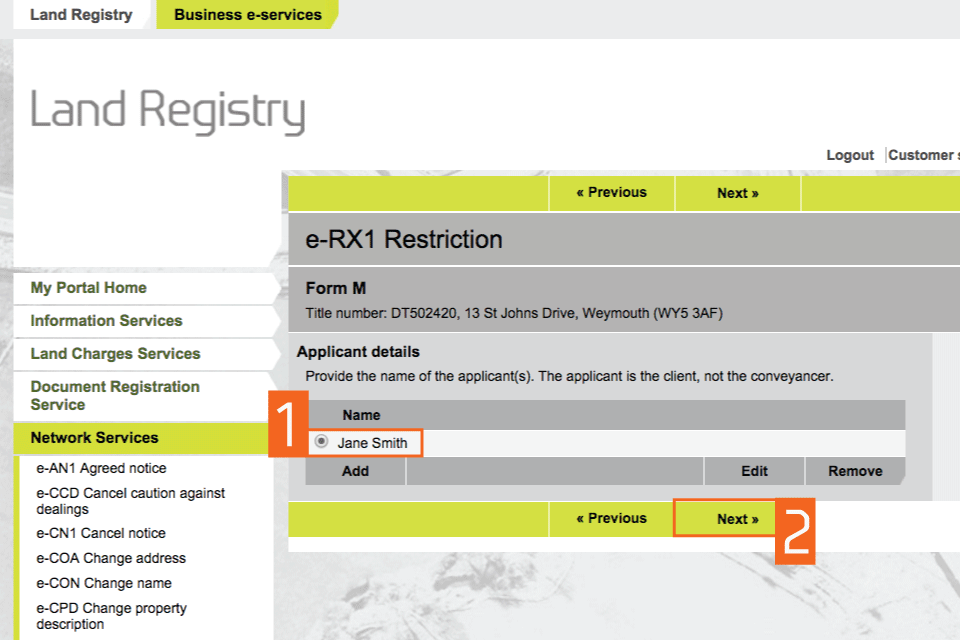
Check and amend applicant details (M)
- Check that the name of the applicant you entered earlier is correct. If it is incorrect, ‘Edit’ to amend it or ‘Remove’ to start again. If there is more than one applicant you can now add the other names using ‘Add’.
- Select ‘Next’
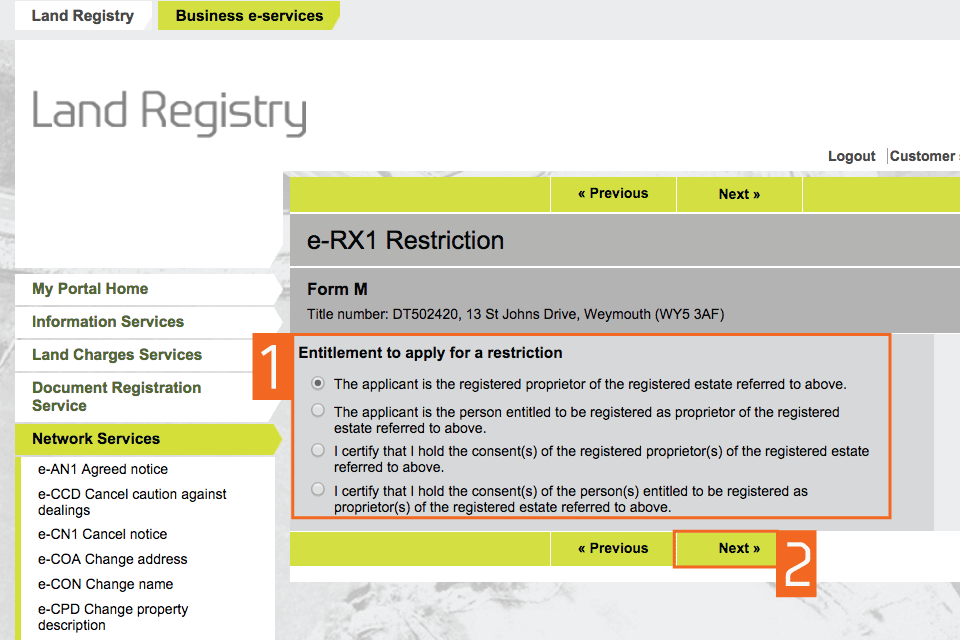
Entitlement to apply (M)
Other forms of restriction may have alternative criteria for entitlement to apply. If appropriate, you should certify or select the relevant option.
- Certify your entitlement to apply for the restriction by selecting one of the options. Depending on the option selected you may then be requested to attach evidence of entitlement.
- Select ‘Next’.
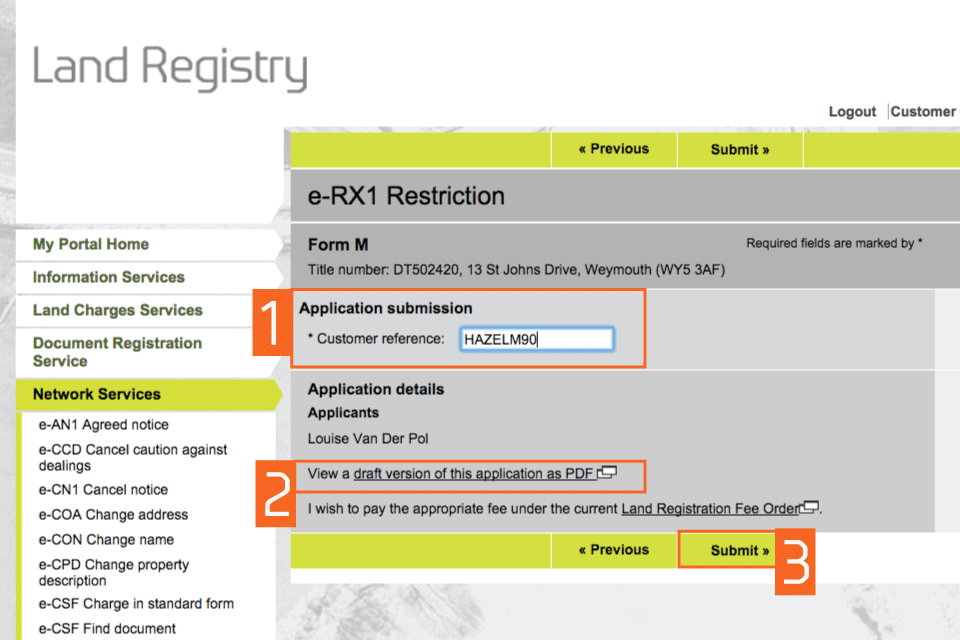
Preview and submit application
- Enter your ‘Customer reference’. This can be any reference that helps you to relate the application to your client or file.
- Preview the application details in PDF format, print or save the document as required.
- Now you are ready to submit the application. By selecting ‘Submit’ you are agreeing to pay the appropriate HM Land Registry fee. You can check the fee payable by selecting ‘Land Registration Fee Order’. Select ‘Submit’.
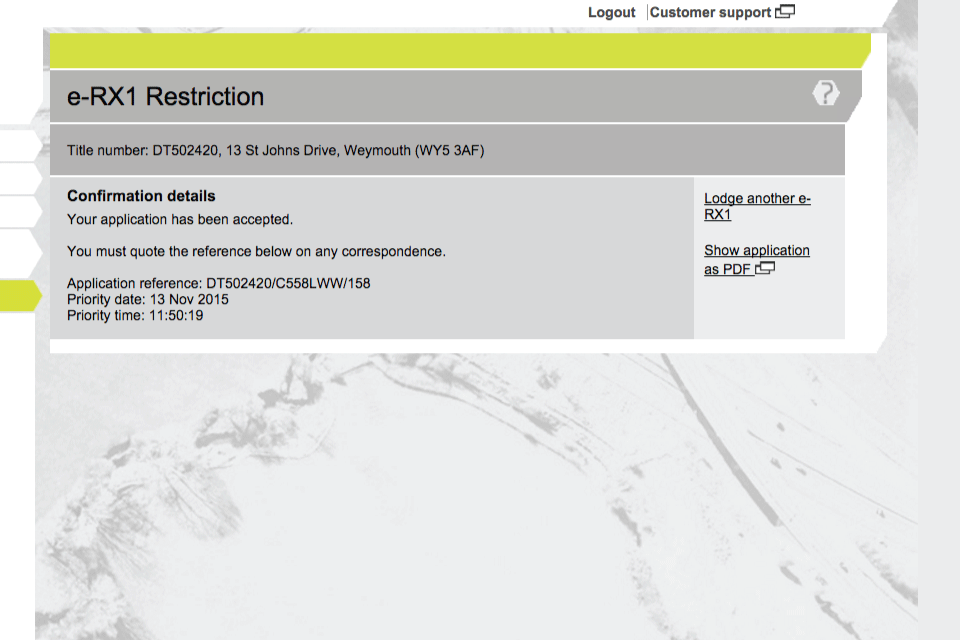
Confirmation
This confirms that the application has been submitted successfully. An application reference (and if the day list is open a priority date and time) will be displayed should you wish to make an enquiry.
Availability of applications
Your application will require further action by HM Land Registry and will not be completed automatically. The title documents will be delivered via portal. You will be notified on the portal home page when a new PDF is available to view.
If we cannot deliver your title documents via portal they will be issued by post to the address associated with your Variable Direct Debit account, or to your designated alternative.
Logout
When you have completed your tasks, select ‘Logout’ at the top of the screen to exit the system securely.