Data extraction protocol for secure settings
Updated 30 November 2018

© Crown copyright 2018
This publication is licensed under the terms of the Open Government Licence v3.0 except where otherwise stated. To view this licence, visit nationalarchives.gov.uk/doc/open-government-licence/version/3 or write to the Information Policy Team, The National Archives, Kew, London TW9 4DU, or email: psi@nationalarchives.gov.uk.
Where we have identified any third party copyright information you will need to obtain permission from the copyright holders concerned.
This publication is available at https://www.gov.uk/government/publications/continuity-of-care-for-prisoners-who-need-substance-misuse-treatment/data-extraction-protocol-for-secure-settings
The prison National Drug Treatment Monitoring System (NDTMS) data items to be extracted for a local audit of continuity of care should include the following:
- first name
- surname
- date of birth
- sex
- client reference (PNOMS ID)
- initial reception date
- drug 1
- drug 2
- drug 3
- discharge reason
- prison exit date
- prison exit reason
- prison exit destination (DAT code)
- referral on release status
These fields should be populated for each client released from the establishment and recorded on NDTMS as transferred to community treatment services. The criteria for the extract includes:
- discharge reason = transferred – not in custody
- prison exit date = [between the dates agreed to be covered by the audit]
- prison exit reason = released
- prison exit destination (DAT code) = [DAT code of receiving partnership who will be undertaking the audit]
To produce the NDTMS extract for populating the audit template spreadsheet, the provider in the participating prisons should follow these instructions:
1. Take a local extract from the data entry tool
Take a local extract from the data entry tool (DET) or local case management system on which NDTMS data is recorded. This will include clients’ full names to share with the community treatment service. Ensure the extract is in ‘values’ not ‘code’ for ease of interpretation.
To filter the extract to give only the relevant clients, follow these steps:
Step 1: Turn on filters, by highlighting the top row of the extract (spreadsheet) and then in the ‘Home’ tab, click on ‘Sort & Filter’ and then select ‘Filter’ from the dropdown list.
Step 2: Highlight column EPISODID, select ‘Data menu’ and click on ‘remove duplicates’.
Step 3: When the box below appears, ensure ‘expand the selection’ is ticked and click ‘remove duplicates’.

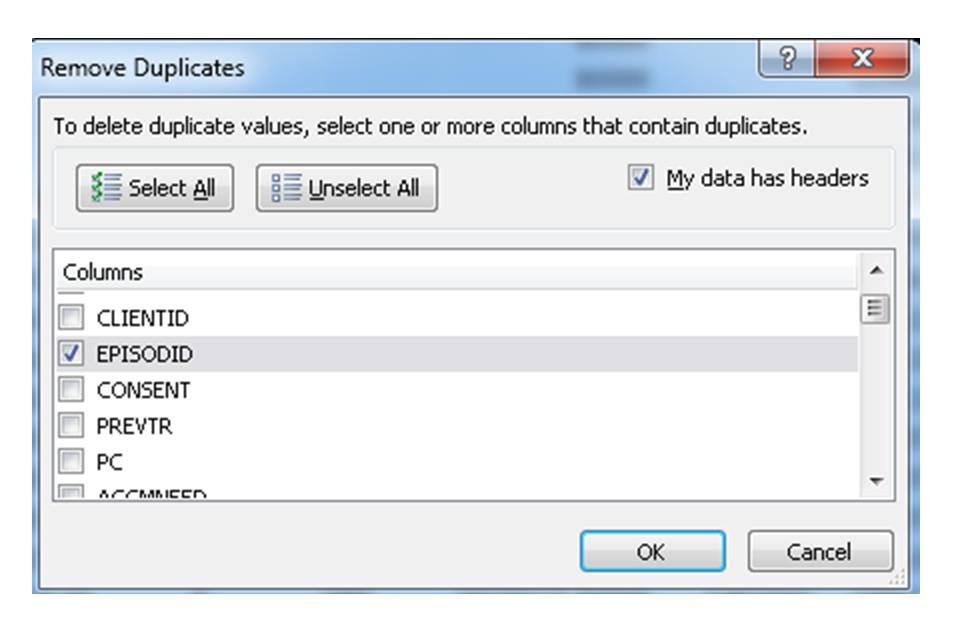
Step 4: When the box below appears, click ‘unselect all’, scroll down and click EPISODID and click ‘OK’ – this will ensure that only one row per episode is extracted.
Step 5: Find header EXITD – click on the arrow to the right of the header and then in the drop-down box untick ‘select all’ and select only those clients who exited the prison in the time frame agreed for the audit (for example, the last quarter).
Step 6: Ensure ‘blanks’ is not ticked.
Step 7: Find header DISRSN – click on the arrow to the right of the header and then in the drop-down box untick ‘select all’ and tick only those client with a discharge reason of ‘transferred – not in custody’ (code 83).
Step 8: Find header EXITRSN – click on the arrow to the right of the header and then in the drop-down box untick ‘select all’ and tick ‘released’ (code R).
Step 9: Select the whole worksheet by clicking the box in the top left hand corner between ‘A’ and ‘1’.
Step 10: Right click and then copy and paste the data into a new spreadsheet, selecting ‘values’ under paste options.
Step 11: Delete all columns from the extract other than: FIRSTNAME (the header may be something other than FIRSTNAME depending on the local software system but it will be the column that contains the clients’ full first name – not their initial), LASTNAME (the header may be something other than LASTNAME depending on the local software system but it will be the column that contains the clients’ full last name – not their initial), DOB, SEX, CLIENT, INTRCPTD, DRUG1, DRUG2, DRUG3, DISRSN, EXITD, EXITRSN, EXITDEST, RTOAGNCY – this should result in a spreadsheet with just these headers.
Step 12: Save this as ‘Clients transferred from HMP XXXX between DDMMYY and DDMMYY’.
2. Ensure each local authority only receives details of clients transferred to them
To do this:
Step 1: Turn on filters, by highlighting the top row and then in the ‘Home’ tab, click on ‘Sort & Filter’ and then select ‘Filter’ from the dropdown list.
Step 2: Find header EXITDEST and click on the arrow to the right of the header.
Step 3: Untick ‘select all’ and select the code for the first DAT of interest.
Step 4: Select the worksheet by clicking the box in the top left hand corner between ‘A’ and ‘1’.
Step 5: Right click and then copy and paste the data into a new spreadsheet, selecting ‘values’ under paste options.
Step 6: Save this as ‘Clients transferred from HMP XXXXX to XXXX (DAT) between DDMMYY and DDMMYY’.
Step 7: Return to the spreadsheet saved as ‘Clients transferred from HMP XXXX between DDMMYY and DDMMYY’, untick the previously selected DAT code and select the next DAT code of interest.
Step 8: Repeat this process to produce a spreadsheet for each partnership of interest.
3. Share the information securely
Once you obtain the relevant authorisation to share this information with the community services, you should establish a secure transmission method (such as the Criminal Justice Secure Mail (CJSM) email with additional 7-zip encryption). Using this secure transmission method, you can send the treatment provider the spreadsheet of clients that were transferred to them.
You should be very careful to ensure that each provider is sent the correct spreadsheet to prevent any accidental data breaches.