Complete your claim
Use this section to help you complete your claim
After you’ve signed in to the Rural Payments service, click ‘View business’. Scroll down the ‘Business overview’ screen and click ‘Countryside Stewardship Claims’.
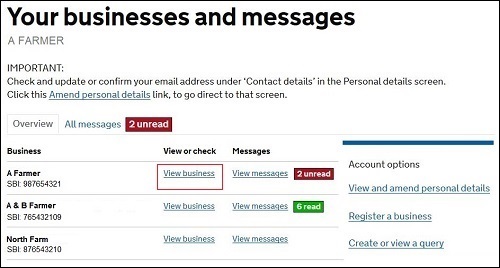
If you cannot see the ‘Countryside Stewardship Claims’ link, you should check that you have the correct permission level to create a claim. For more information read the ‘Check your permission levels’ section. If you still cannot see the link after your permission level has been updated in the Rural Payments service, you should ‘sign out’ then ‘sign in’ again, to refresh your account.
Use these screens to submit your revenue claim online. Before you start your claim you must read the relevant scheme manual, search for Countryside Stewardship on GOV.UK, and choose the relevant link.
There’s a ‘Help’ link on many of the screens that will take you through each process step-by-step.
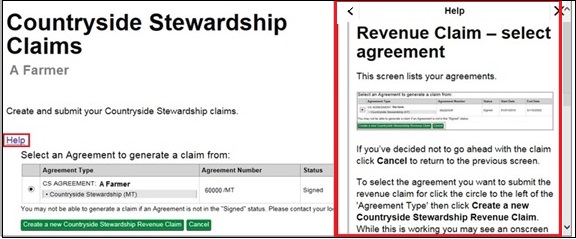
On the ‘Countryside Stewardship Claims’ screen, click the green button to ‘Create a new Countryside Stewardship Revenue Claim’.

The screen shows a list of agreements for your business.
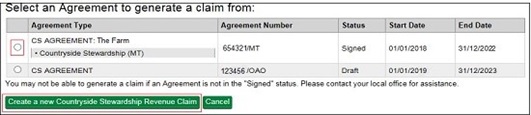
Your agreement must contain at least one revenue option before you can create a revenue claim for that agreement.
Select the agreement you want to submit the claim for.
Then click ‘Create a new Countryside Stewardship Revenue Claim’.
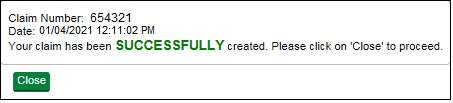
A message will appear when your claim is created ‘Successfully’.
Click ‘Close’ to return to the previous screen where you can open your claim.
The screen shows the claim status as ‘Created’ and the unique ‘Claim Reference’ number.
If the status shows as ‘Claim Held’ call RPA on 03000 200 301.
Click ‘Open’ to continue your claim.

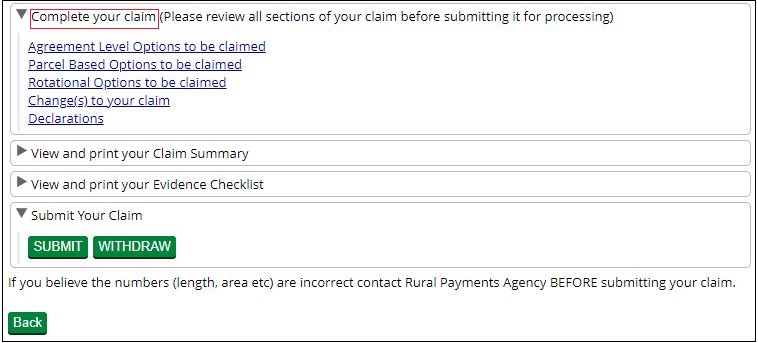
Using the list on your screen, you can add details to your online revenue claim using ‘Complete your claim’, or you can create your ‘Claim Summary’.
Click ‘Complete your claim’.
A list of everything you need to do in your claim appears.
The following applies for each of the options sections:
-
If your agreement does not contain any of these options a message will tell you this – click ‘Close’ to return to the Complete your claim section.
-
You cannot claim for more than the approved amount of the option.
-
If you’re claiming for less than the approved amount, give an explanation in the ‘Changes to your claim’ section.
-
If you think that the approved values of any of the options are incorrect, contact RPA BEFORE you submit your claim. Read the ‘More Information and Contact details’ section.
Add agreement level options
This screen shows a list of options that are in your agreement and that do not relate to specific land parcels. For example, option ED1 – Educational Access. For more information about any of your agreement level options read Countryside Stewardship grants on GOV.UK.
Click ‘Agreement level options to be claimed’.
You must enter a figure for every option on this screen – or you will not be able to submit your claim.
For an option you want to claim click ‘Open’ then enter the amount or number under ‘Claimed (units)’. Click ‘Save’, then click ‘Back’, to return to the list of options.
For an option you do not want to claim, click ‘Open’ then enter ‘0’ under ‘Claimed (units)’. Click ‘Save’, then click ‘Back’, to return to the list of options.

After you’ve entered either the claimed amount or ‘0’ for each option, click ‘Close’ to return to the ‘Complete your claim’ section.
Add parcel based options
This screen shows a list of options that are in your agreement and that relate to specific land parcels. You can claim for any of these options.
Click ‘Parcel Based Options to be claimed’.
You’ll see the ‘Total Approved’ and ‘Claimed’ amount for each option.
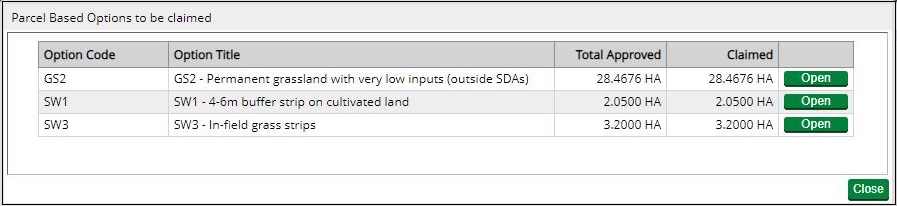
You can change the ‘Claimed’ amount, click ‘Open’ for the option code.
You can delete the figure for each land parcel under ‘Claimed’ and enter the amount you want to claim for.
Click ‘Save’ then ‘Back’ to return to the ‘Parcel Based Options to be claimed’ screen.
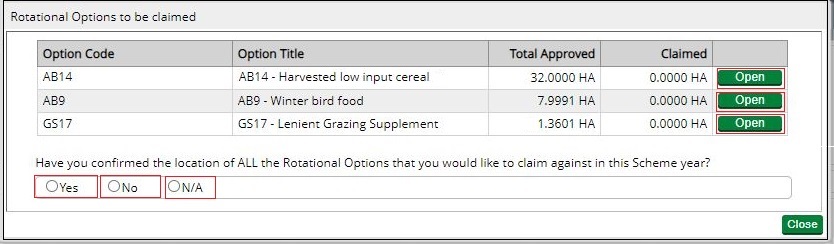
Add rotational options
This screen shows a list of rotational options that are in your agreement. You can claim for any of these options.
Click ‘Rotational Options to be claimed’.
If your agreement does not contain any of these options a message will tell you this. However you must answer ‘N/A’ to the question about the location of options or you cannot submit your claim. Then click ‘Close’ to return to the ‘Complete your claim’ section.

If your agreement contains rotational options you’ll see a list of them.
If you do not want to claim for any of the rotational options you must answer ‘N/A’ to the question about the location of options or you cannot submit your claim. Then click ‘Close’ to save and return to the ‘Complete your claim’ section.

If you want to claim for rotational options listed you’ll see the ‘Total Approved’ and ‘Claimed’ amounts for each option.
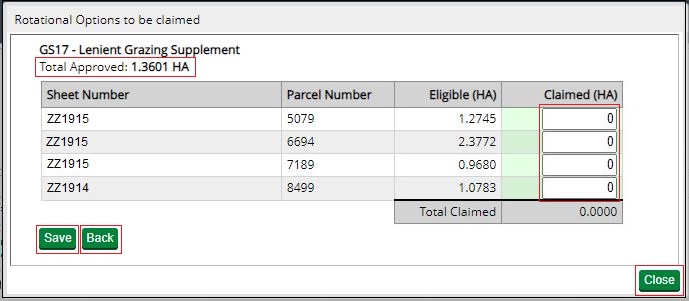
To enter your ‘Claimed’ amount(s), click ‘Open’ for the option code you want to claim for.
The screen will show any land parcels that are eligible for the option. If you know where the rotational option will be located in this scheme year, enter the amount you are claiming for each relevant land parcel under ‘Claimed’.
If you have not yet decided where your rotational options will be located during this scheme year, you must still indicate how much of the option(s) you intend to claim. This can be against any available land parcel.
For example, if you know that you want to claim 1ha of a rotational option, but you have not yet decided where this will be located:
You could submit your claim with 1ha allocated to land parcel ZZ1915 5079 in the example below.
Then confirm at a later date to reach RPA no later than 1 September in the scheme year, that the 1ha is actually located in land parcel ZZ1915 6694 in the scheme year. For more information read the ‘After you’ve claimed’ section.
If you enter a claimed figure that is larger than the area of the land parcel (listed in the Eligible (HA) column), an error message will appear when you click save. You cannot continue until you’ve corrected the claimed figure.
You cannot claim more than the approved value for each rotational option. At the top of the individual option screen, you’ll see the total approved for the option.
The ‘Total Claimed’ at the bottom of the land parcel list automatically updates as you add in the claimed amount for each land parcel. The ‘Total claimed’ turns red if the total claimed is larger than the total approved, and an error message will appear when you click save. You cannot continue until you have reduced the total claimed.
IMPORTANT: Currently the land parcel reference numbers you add the areas to on this screen do not appear in Section 3 of your claim summary. This does not affect the information you have added and ‘saved’ in this screen. This information and the land parcel reference numbers are still contained within this screen and the claim itself in the Rural Payments service.
The ‘Agreement Area’ column in Section 3 of the claim summary does show the area(s) of rotational options you have claimed in this screen.
If you want a record of which land parcels you’re adding the rotational options information for, we suggest you take screenshots of this rotational options screen after you’ve added and ‘saved’ the relevant information and before you submit your claim. You can then save or print the screenshots to keep as a record.
We are looking at this and we intend to update the Rural Payments service to include the land parcel references in the summary as soon as we can.
After you’ve added the claimed amount, click ‘Save’ then ‘Back’ to return to the ‘Rotational options to be claimed’ screen.
IMPORTANT: Now answer the location of rotational options question.
If you know the location of all the rotational options you are claiming, answer ‘Yes’ to the question.
Then click ‘Close’ to save and return to the ‘Complete your claim’ section.
If you do not know the location of all the rotational options you are claiming for, answer ‘No’ to the location of rotational options question.
You must confirm the locations of your rotational options as soon as this information is available, to reach RPA no later than 1 September in the scheme year.
You can do this in the Rural Payments service by completing the Rotational Options Declaration. Or you can write or send an email to RPA confirming the locations. For more information read the ‘After you’ve claimed’ section.
Then click ‘Close’ to save and return to the ‘Complete your claim’ section.

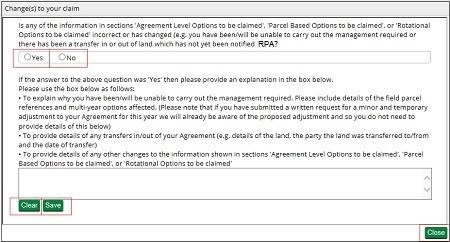
Changes to your claim
This section asks you to answer ‘Yes’ or ‘No’ to confirm whether you have made any changes to your claim. You must answer this question before you can submit your claim.
If you answer ‘Yes’, you must also give details about any changes you have made in the box provided.
Click ‘Clear’ to delete all information if you’ve made a mistake.
Click ‘Save’, then ‘Close’ to return to the ‘Complete your claim’ section.
Declarations
You must complete this declaration or you cannot submit your claim.
Read all of the declarations and undertakings. Use the scroll bar at the side of the declaration to read it all.
Click ‘Yes’ to confirm that you accept the terms and conditions and make the declaration.
Then click ‘Close’ to return to the previous screen.

You should create (generate and download) your claim summary before submitting your claim to RPA.
Using the list on your screen, you can ‘View and Print’ details about your online claim before you submit it:
-
claim summary – shows all the information you’ve added to your claim – create it after you’ve filled in your claim
-
evidence checklist – shows all the evidence needed for your claim – create it after you’ve filled in your claim – if this is not visible on your screen read Countryside Stewardship grants on GOV.UK for more information.
Claim Summary
Before you submit your claim, create (generate and download) your claim summary.
This summary shows the information you’ve entered into your claim. It’s important that you use it to check that you’ve given the correct information before you submit your claim. Then if needed, you can go back into your claim and change it.
(After you’ve submitted your claim to RPA you get another opportunity to create your claim summary. Keep this as a record of the claim you’ve submitted.)
Click ‘View and print your Claim Summary’.
Click ‘Generate’ to create (or update) this summary.
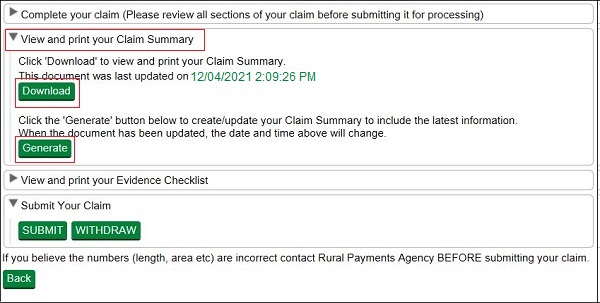
The first time you generate the document the ‘Download’ button will not be clearly visible. When the document is ready the ’Download’ button turns green and the button will now always be visible. The date and time that appears next to the ‘Download’ button tells you when the document was last updated with the information in your claim.
If the date and time beside the download button is green, then the information in the summary is up to date. If you’ve changed any information in your claim, for example, added or changed options, since the last time you generated and downloaded this summary, the date and time will be red, which indicates the summary is not up to date.
After you’ve generated the document, click ‘Download’ to see the document.
If you always click ‘Generate’ before you click ‘Download’, you’ll always see the most up to date information in your claim.
You can read the summary on screen by scrolling down the pages or you can print or save it for your records by using the buttons that appear when you place the cursor near the middle point at the bottom of the screen.
Do not send the document to us as a paper claim – we cannot accept it.
IMPORTANT: If you’re claiming for rotational options you should read about how to keep a record of the land parcel reference numbers you’ve used in the ‘Add rotational options’ section before you submit your claim. Or if you have already submitted your claim read the ‘After you’ve claimed’ section.
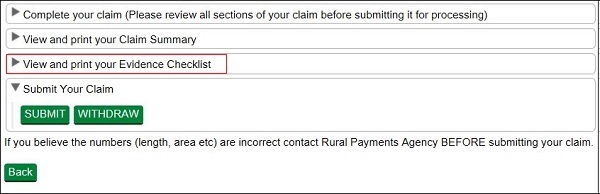
Evidence Checklist
This checklist shows all the evidence needed for your claim. It tells you which evidence you need to submit to RPA by the claim deadline and which evidence you must keep until you’re asked for it.
If it is not visible on your screen read Countryside Stewardship grants on GOV.UK for information about what evidence is needed for your claim.
Click ‘View and print your Evidence Checklist’
To create your checklist follow the instructions in the Claim Summary section.
If you make any updates to your claim after you’ve created your evidence checklist, you should generate and download a new checklist to make sure you have the most up to date information.
You can read the checklist on screen by scrolling down the pages or you can print or save it for your records by using the buttons that appear when you place the cursor near the middle point at the bottom of the screen.